Install and configure backup software
This user guide helps you to install and configure the backup software IBM Storage Protect on your Windows device.
Note
The backup software IBM Storage Protect used by the ZID will be shortend to ISP in this user guide.
Downloading backup software
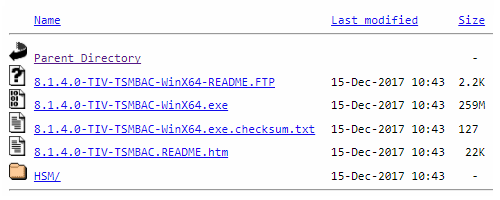
- Download the latest Storage Protect software from the IBM website. To do this, open both of the following links and select the more recent version:
- Base version: https://aix.software.ibm.com/storage/tivoli-storage-management/maintenance/client/
- Patch version: https://aix.software.ibm.com/storage/tivoli-storage-management/patches/client/
- Select the appropriate folder for your system: x32 for 32bit or x64 for 64bit operating systems.
You can find the system requirements of your windows version in the system settings in the menu system (also available via Windows key + pause key) in system type. - Select the latest version of the client, for example v814 and download the file with the naming scheme similar to 8.1.4.0-TIV-TSMBAC-WinX64.exe. This is usually the largest file in the directory.
- Use Powershell to compare the checksum of the file with the one specified on the manufacturer’s website in the download directory:
Get-Filehash .\Downloads\8.1.<xx>.0-TIV-TSMBAC-WinX64.exe -Algorithm SHA256
For older client versions with MD5 hash use MD5 instead of SHA256 as algorithm.
Note
- IBM Storage Protect Clients for 32bit operating systems are only available up to version 7.
- Clients with version 8 do not run under Windows 7 – in this case, install the latest client in version 7.
Installing the backup software
Open the downloaded file with a double-click. The installation files will be unzipped automatically.
Open the created folder TSMClient and run the file spinstall.exe.
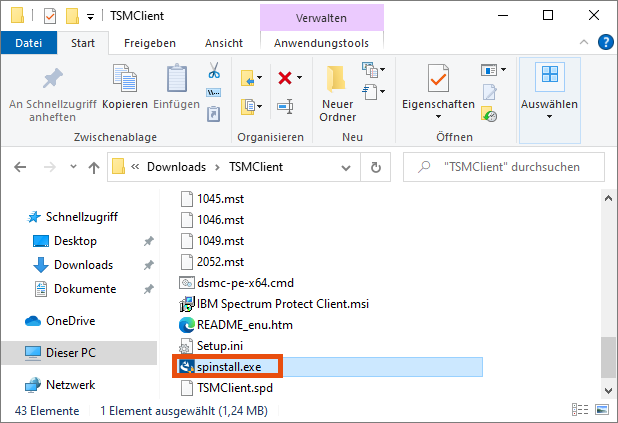
Open the TSMClient directory created during the unpacking process and execute the spinstall.exe file there.
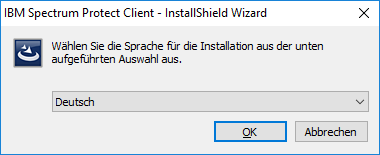
Select the language for the client and click OK. Follow the instructions of the installation wizard and finish the installation.
Basic configuration
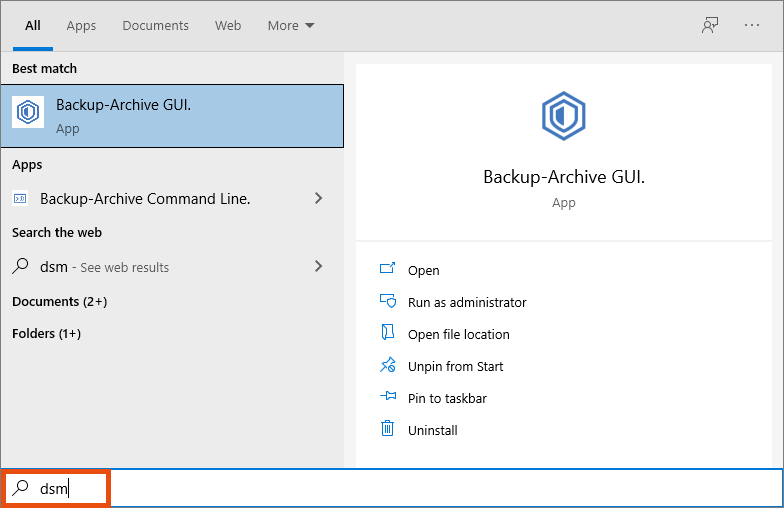
To open the ISP desktop application, search for dsm using the Windows search and then open the program Backup Archive GUI.
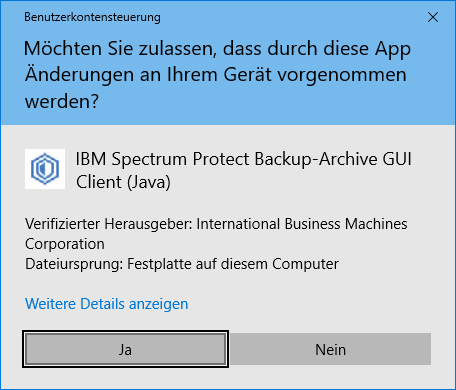
Confirm the note that IBM Storage Protect Archive GUI is allowed to make changes on your device.
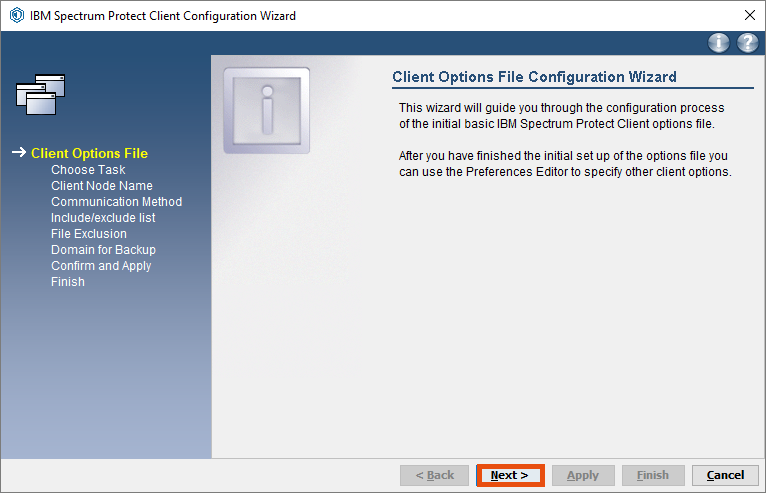
Since there is no configuration file on your computer yet, the configuration wizard starts when the software is run for the first time. Click Next.
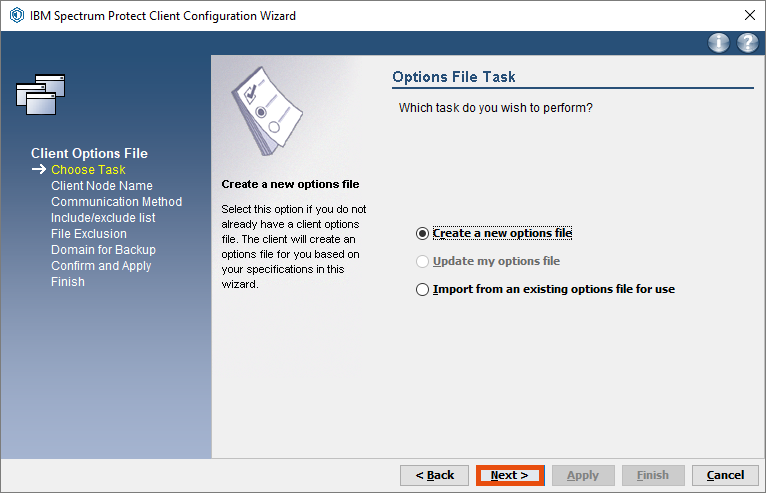
Select Create a new options file and then click Next.
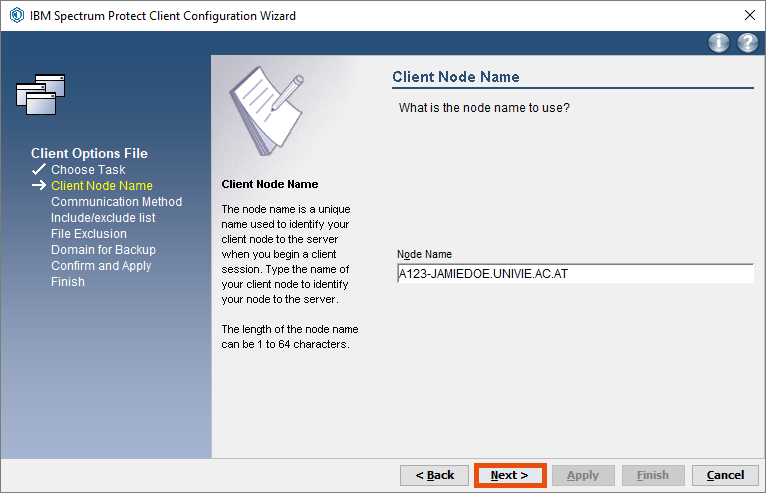
Type in the account name (Node name).
You can find it in the e-mail you have received after registering for the central backup. Then click Next.
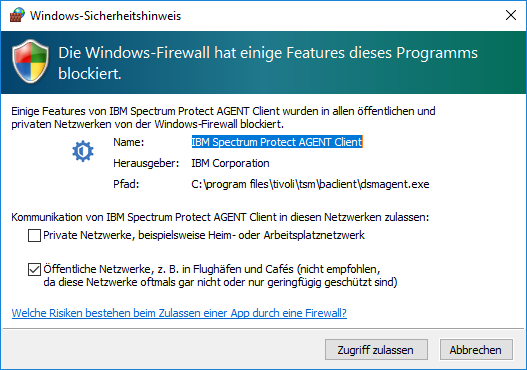
You might have to change the firewall settings so that the backup software can access your device. Click Zugriff zulassen/Grant access.
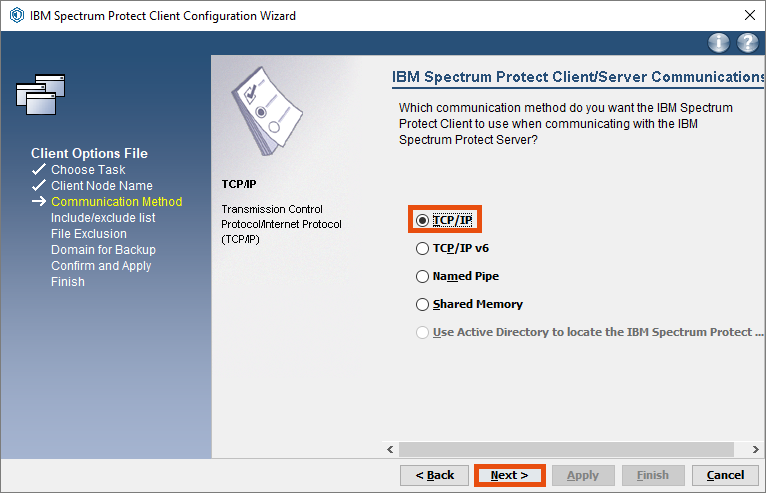
Select TCP/IP and click Next.
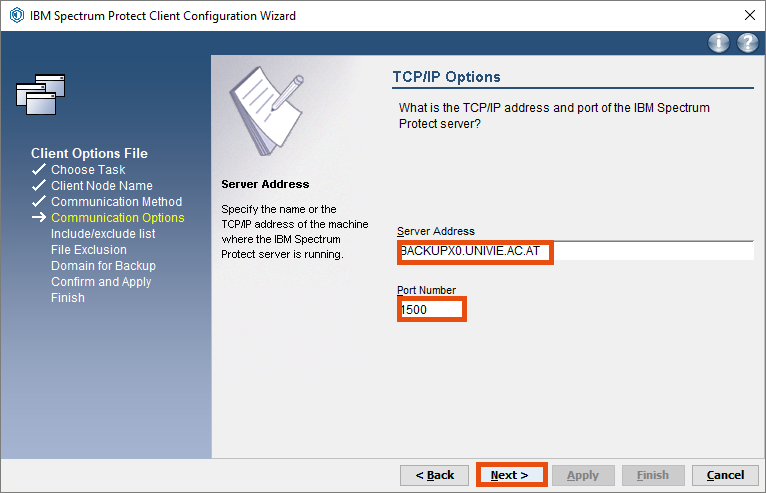
Then enter the following data you received in the e-mail after registering for the central backup:
- Server address: TCPServeraddress (e.g.
BACKUP.UNIVIE.AC.AT) - Port number: TCPPort (e.g.1500)
Then click Next.
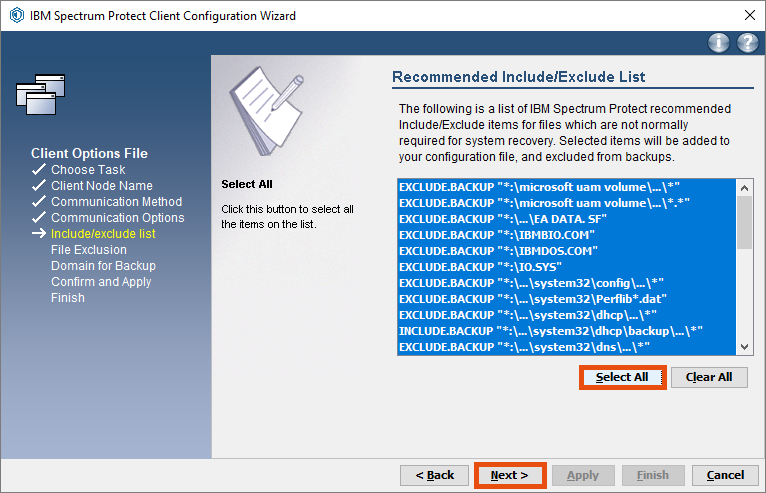
In the include/exclude list, select Select all first, then select Next.
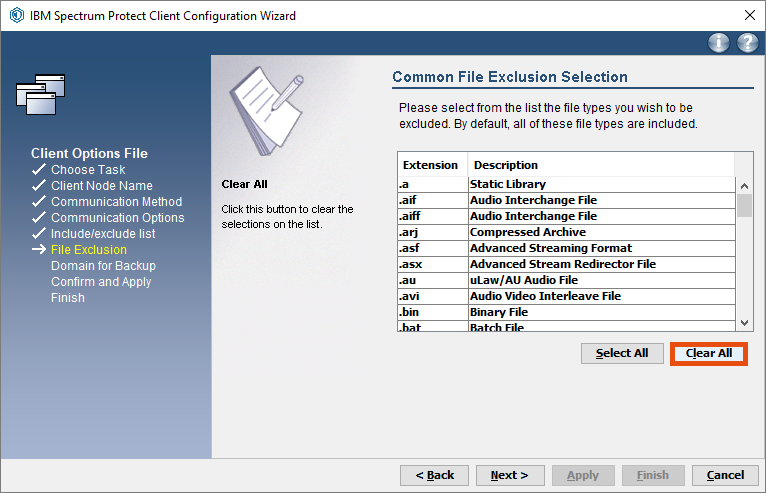
In Common File Exclusion Selection you don't have to select anything. To do so, first click Clear all and then Next.
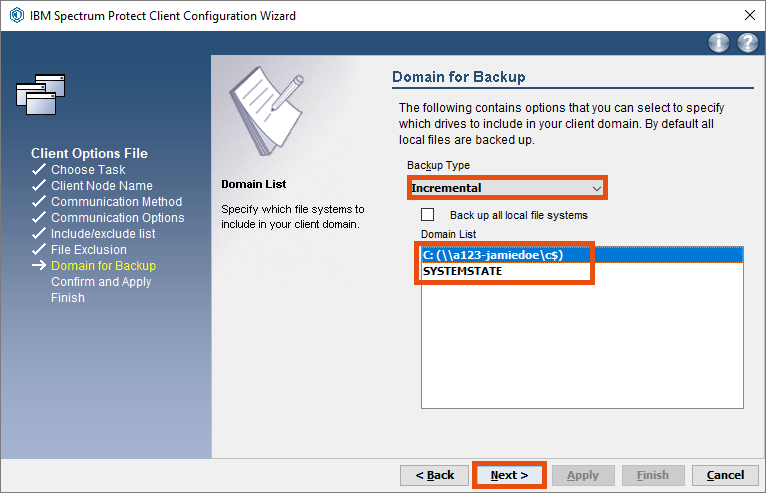
As backup setting it is recommended to use Incremental, so that only changed files will be transferred. As a result, the transferred data size and the backup time will be reduced.
In the domain list select all drives that should be backed up. Click Next.
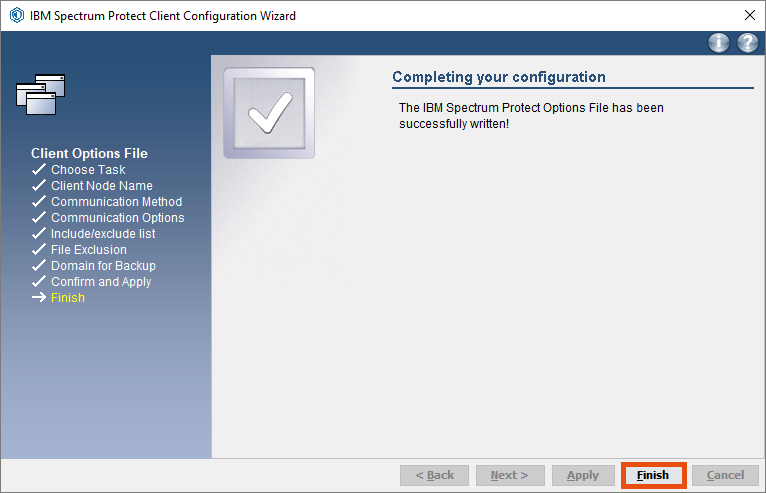
Click Apply to confirm the configuration.

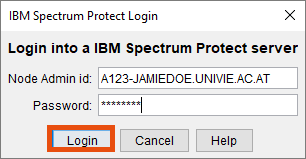
The wizard now asks for the password of your backup account. You can find it in the e-mail you received after registering for the central backup.
After typing in the password, click Login.
Close the configuration with Finish.
More configuration options
Adjust files list
If you want to adapt your backup settings (e.g. exclude certain files or folders from the backup), select Edit - Client Preferences in the menu.
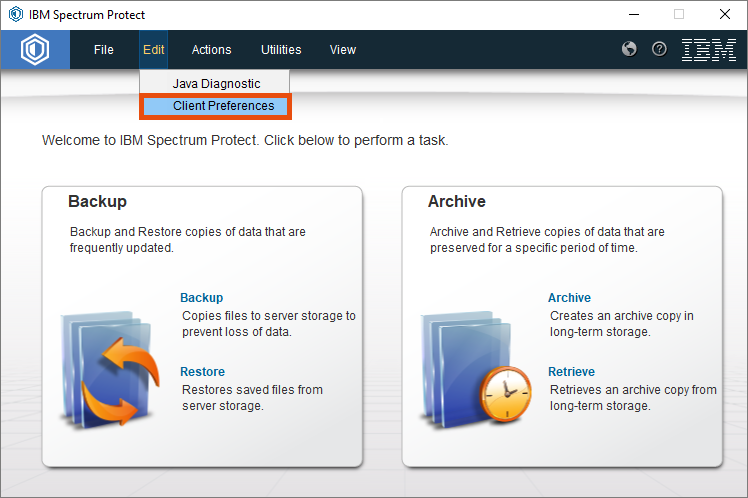
Go to the Include/Exclude section in the left column to change your backup rules.
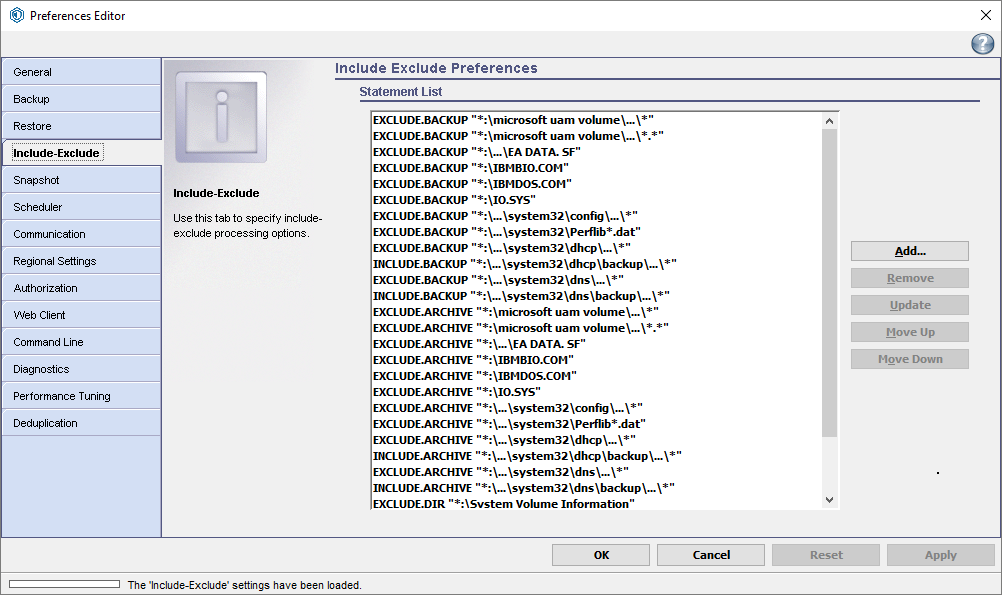
The Include/Exclude rules are read from bottom to top. If you exclude a file or an entire file system from the lower part of the include/exclude list, it will be ignored, even if it is explicitly mentioned above.
For example, the following definition
include C:\Users\user01\test\test.file
exclude C:\Users\user01\...\*
would not save the file test.file since the folder has been excluded before.
However, if you write the lines in reverse order, the test.file file is saved as the only object in the directory:
exclude C:\Users\user01\...\*
include C:\Users\user01\test\test.file
You can find possible Include/Exclude rules on the IBM websites:
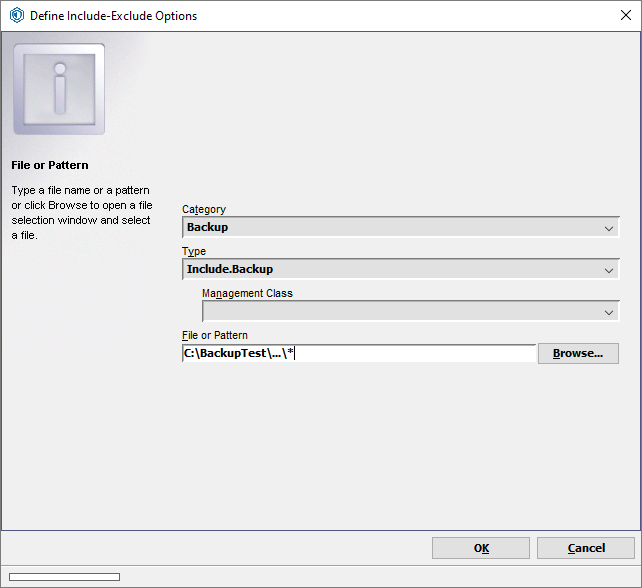
To create a new rule, click on Add on the right-hand side and select the desired items from the drop-down menus according to your specifications.
Exclude all
If all files are to be excluded from the backup (corresponds to the backup category), the rule looks like this:
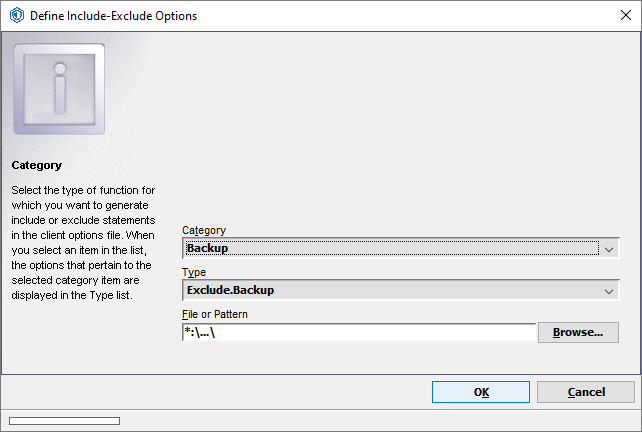
Including folders
If you want to back up a folder including subdirectories, the rule must be created as follows:
Saving password
To avoid entering a password when starting the backup client, the password can be saved.
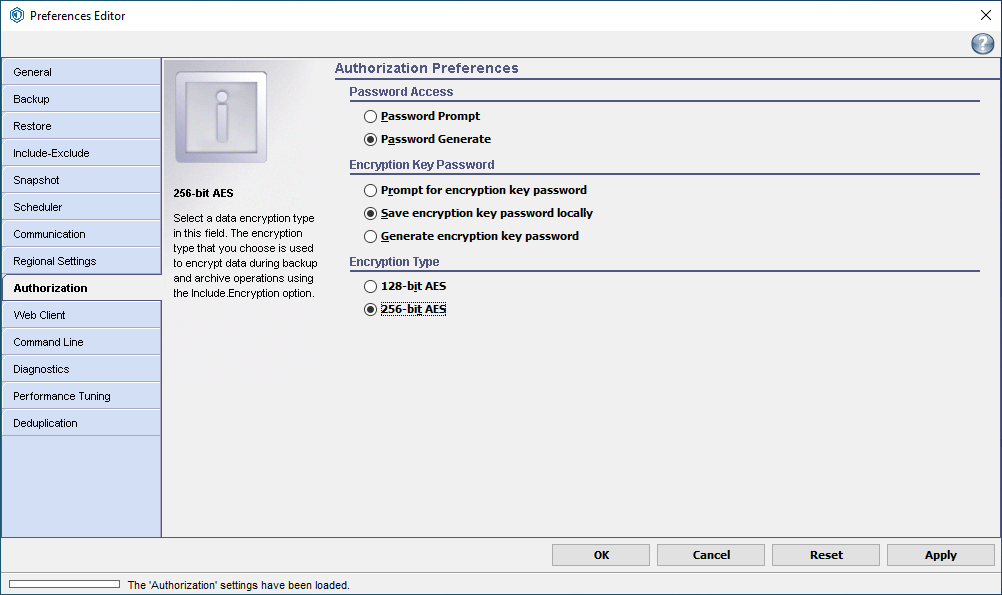
- To do this, open the Client settings under the menu item Edit and select the Authorization area on the left.
- Select the item Generate password and press Apply.
This option must be selected if you want to automate the backup.
If you have defined an automatic scheduler task, make sure that when you log in to the backup client again, the password is saved and does not have to be re-entered.
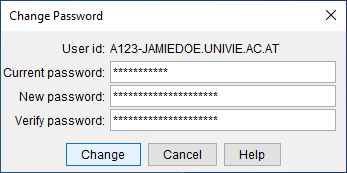
Changing password
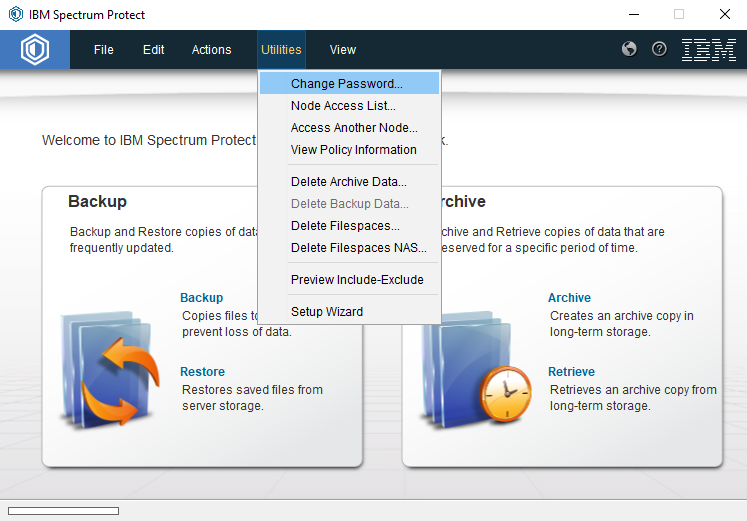
To change the password of your account, select Change password ... in the Utilities menu.
Enter the old password and the new password twice in the corresponding fields and click on Change to renew the password.