Creating or editing a sub-task
This user guide will help you split a large or complex Servicedesk request into multiple sub-tasks or edit a sub-task assigned to you.
A sub-task is created in the same Servicedesk project as the original request. It can therefore only be assigned to those people who can work on that project.
Note
The person who created the sub-task (not the original requester) is entered as the author.
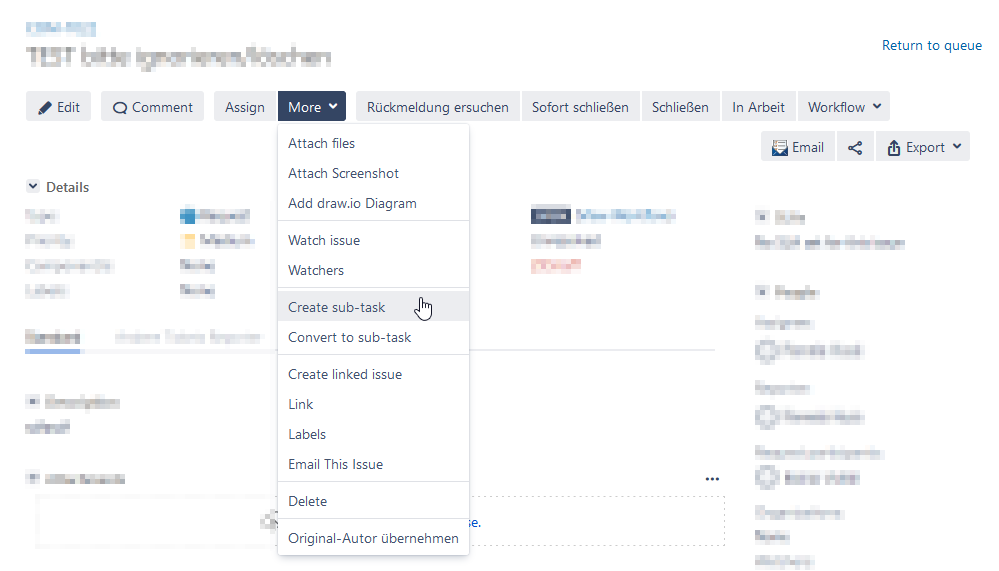
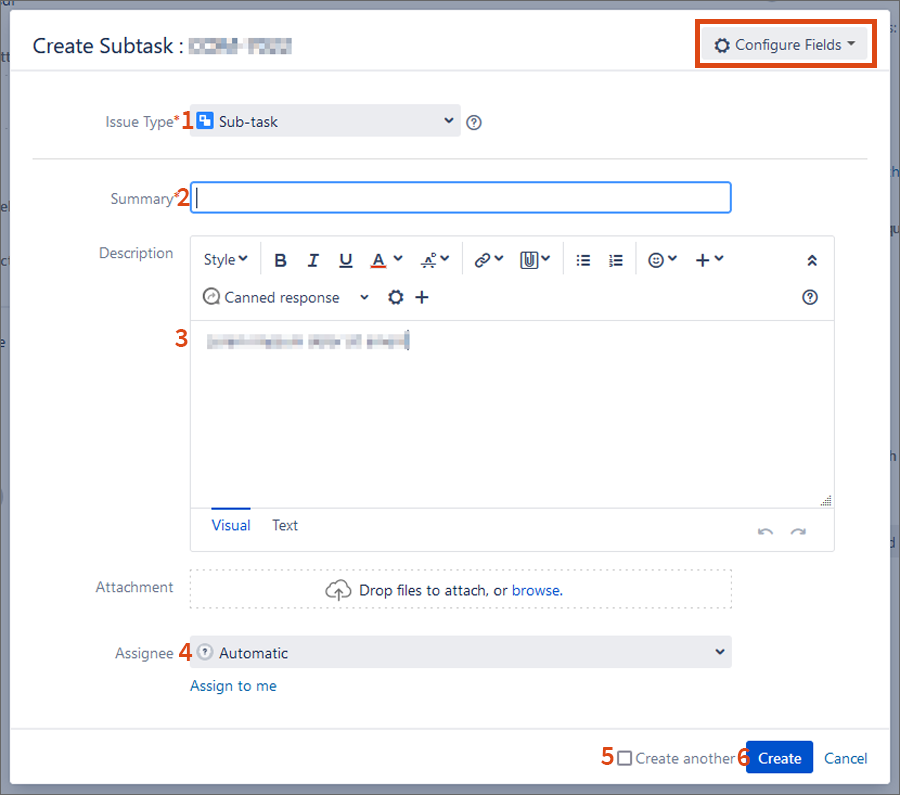
A pop-up window opens with the title Create subtask and the number of the original request. Fill in the required fields. If not all required fields are visible, you can add them with the Configure Fields button in the top right corner.
- The Issue type Sub-task is entered automatically.
- Enter a meaningful summary of the sub-task.
- You can enter further details in the Description field.
- If you wish, you can assign the sub-task to a specific person or to yourself for processing with the help of the field Assignee.
- Activate the checkbox next to Create another if you want to create another sub-task.
- Complete the process by clicking on Create.
Edit sub-task
- When a sub-task is created in your project, you can accept, edit and close it like a regular request.
- You can also ask questions to the requester or to your team members in the project (internal comment) just like any other request.
- Do not forget to close the sub-task when it is completed. Otherwise, the main task cannot be closed.