Linux
This user guide helps you to establish a VPN connection with Linux.
Requirements
- Established and operational internet access
- Valid u:account UserID and password
- Set up multi-factor authentication and authentication app on smartphone or YubiKey
- Fedora users: Note the guides in Manually install Root certificate
Installing software
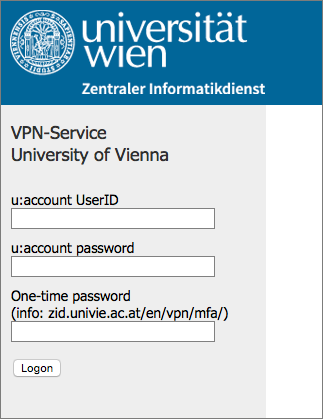
In the browser open the VPN page of the Universiy of Vienna. Log in with your u:account details and the one-time password:
- With an authentication app on your smartphone: Open the app. On the VPN website, enter the currently valid code in the field One-time password, which is displayed in the app in the ZID Universität Wien account. Then, before the code expires, press Logon.
- With YubiKey: Position the cursor in the One-time password field. Plug the YubiKey into a USB port on your device and then press the button on the YubiKey. The one-time password is entered in the text field. The Logon button is activated automatically.
For the download of the software click BIG-IP Edge Client Linux.
If you want to download the Linux client under Windows or MacOS instead, click here.

Open the terminal.
- Go to the Download directory, by entering the following command and then (as well as at the end of all commands mentioned in these user guides) press Enter:
cd Downloads
If the directory has a different name, type in the respective name or path inDownloads. - Unpack the Installation data:
tar -xvf BIGIPLinuxClient.tgz - Change to the directory BIGIPLinuxClient:
cd BIGIPLinuxClient - For Debian based systems (e.g. Ubuntu, Mint) install the required package via dpkg:
sudo dpkg -i linux_f5cli.x86_64.deb
or for ARM architectures (e.g. Raspberry PI):sudo dpkg -i linux_f5cli.armhf.deb
For RPM based systems (e.g. Fedora, CentOS, Redhat) install the required package via rpm:sudo rpm –i linux_f5cli.x86_64.rpm - Type in the local password of your device and press Enter. The software will be installed.
If you neither use a Debian nor a RPM based system, you may try the installation with the old installer insted by typing in the following command:sudo ./old-version/Install.sh
and answer all questions with yes.
Establishing a VPN connection
Two variants are available for establishing a connection:
- Route all traffic through the VPN tunnel by specifying port 8443 when connecting:
f5fpc -s -t vpn.univie.ac.at:8443 -d /etc/ssl/certs/ -u u:account-UserID@ - Only route data traffic to computers in the university’s data network through the VPN tunnel (split tunnel):
f5fpc -s -t vpn.univie.ac.at -d /etc/ssl/certs/ -u u:account-UserID@
In the parameter -u type in your u:account UserID followed by an @ symbol and the one-time password:
- With an authentication app on your smartphone: Open the app and enter the currently valid code immediately after the @ symbol, which is displayed in the app in the ZID Universität Wien account. Then, before the code expires, press Enter.
- With YubiKey: Plug the YubiKey into a USB port on your device and then press the button on the YubiKey. The one-time password is entered automatically at the current position of the cursor (immediately after the @ symbol) and Enter is pressed automatically.
Typing in the directory the certificates are in is not always necessary and can be ignored (Option: -d /etc/ssl/certs/).
Type in your u:account password and click Enter.
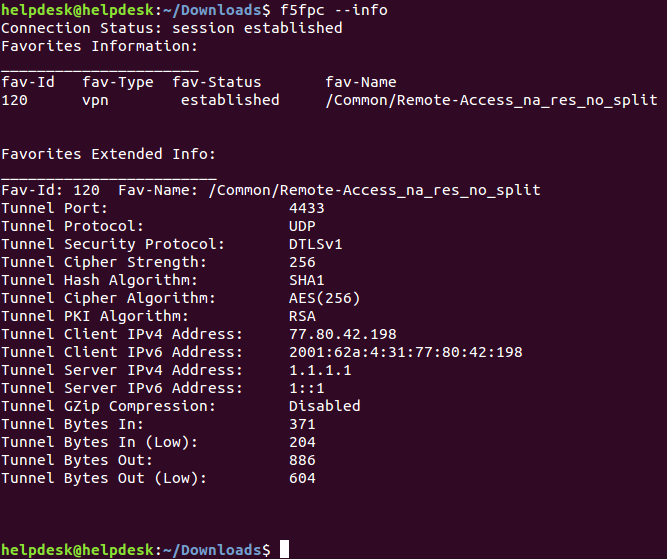
The connection should be up and running.

You can check the connection status after waiting for 5 seconds and by using the command f5fpc --info. IF the connection has been succesfull, it should look like the screenshot.
Manually installing root certificate
If you receive the failure notice Server certificate verfication failed, do the following steps:
- Download the Root-Zertifikat.
Change the name to USERTrust_RSA_Certification_Authority.pem and copy it in the directory /etc/ssl/certs/. Create a shortcut to /etc/ssl/certs/fc5a8f99.0
wget https://zid.univie.ac.at/fileadmin/user_upload/d_zid/zid-open/daten/datennetz/vpn/Linux/SHA-2_Root_USERTrust_RSA_Certification_Authority.crt
sudomv SHA-2_Root_USERTrust_RSA_Certification_Authority.crt /etc/ssl/certs/USERTrust_RSA_Certification_Authority.pem
sudoln -s /etc/ssl/certs/USERTrust_RSA_Certification_Authority.pem /etc/ssl/certs/fc5a8f99.0 - Repeat the connection establishment.
Diconnecting from VPN
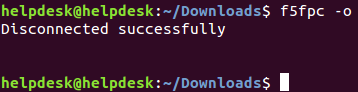
To disconnect, type in the following command:
f5fpc -o