Using ACOnet FileSender
This user guide will help you to send files with ACOnet FileSender, have external people send files, send a file as an external person, and delete all data.
Sending file
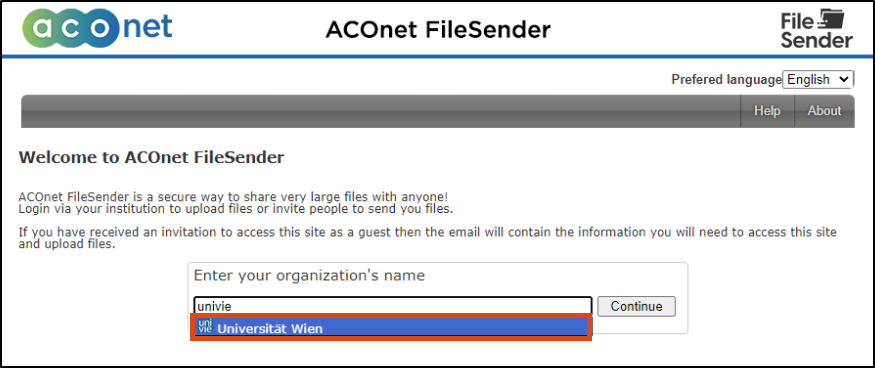
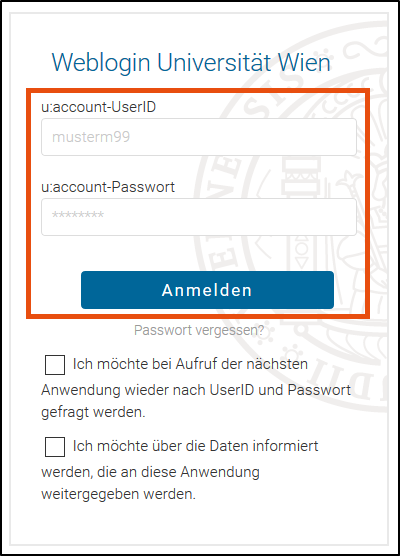
If you are not yet logged in, you will automatically be redirected to the Weblogin of the University of Vienna. Log in there with u:account userID and password. You will then be automatically redirected back to the ACOnet FileSender.
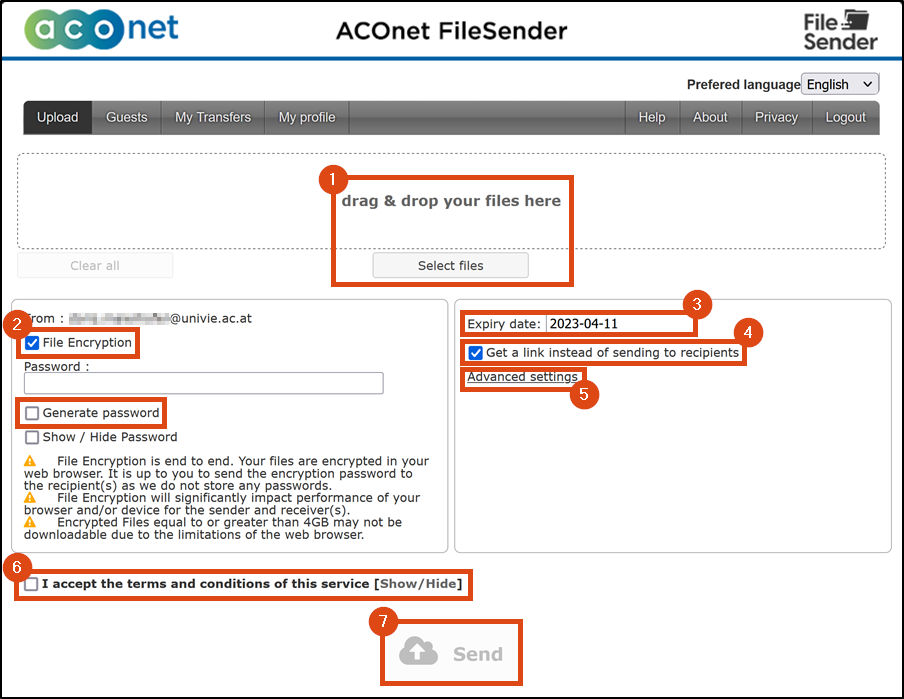
- Select a file by clicking on the Select files button or insert the file by drag-and-drop.
- If you are sending a file with sensitive content, activate File Encryption. In this case you will be asked to enter a password. The ZID recommends using the Generate password option. If you choose a password yourself, follow the ZID‘s password tips. You must later give the password to the person who is to receive the file.
- Choose an expiry date (default 5 days, maximum 15 days).
- The ZID also recommends activating the option Get a link instead of sending to recipients. Otherwise, the recipients of the file will receive a generic e-mail through the ACOnet FileSender with the following disadvantages:
- The e-mail may be sorted out by spam filters.
- You will not be recognised as the sender by the recipient and the e-mail will be ignored due to the sender filesender@aco.net.
- The download link is only available in the e-mail inbox, but not under My Transfers in FileSender.
- Optionally set Advanced settings as required.
- Read and accept the terms and conditions of the service.
- Then click Send.
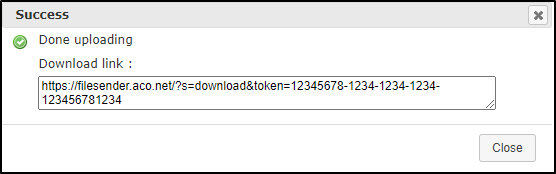
If, as recommended, you have selected the option Get a link instead of sending to recipients: After the file has been successfully uploaded, you will receive a download link. You must pass this on to the person who is to receive the file.
If you have activated encryption: Send the password to the person who is to receive the file. Use a different channel than the one used to send the download link. End-to-end encrypted communication, phone calls or personal delivery are suitable for this. Should either of the two pieces of information fall into the wrong hands, the file is still protected from unauthorised access.
Having file sent by external person
If you are not yet logged in, you will automatically be redirected to the Weblogin of the University of Vienna. Log in there with u:account userID and password. You will then be automatically redirected back to the ACOnet FileSender.
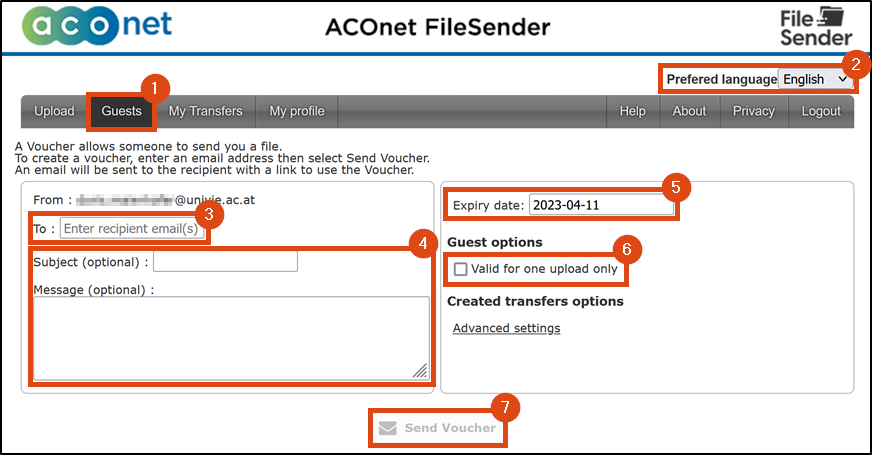
- Select the menu item Guests.
- The e-mail that is later sent to the external person is written in the language in which you fill out the form. If necessary, change the language of the form.
- In the To: field, enter the e-mail address of the person who is to send you the file. Confirm with the Enter key to enter multiple addresses.
- Optionally, you can also enter a subject and a personal message.
- Select an expiry date (default 5 days, maximum 15 days) for the invitation. The invited person can independently choose the expiry date for the file to be sent.
- In addition, you can restrict that the generated link can only be used once (option Valid for one upload only), or make Advanced settings. These cannot be edited later by the invited person.
- Check the information, especially the e-mail address of the external person, and click Send Voucher. If necessary, you can forward the user guide Sending file as external person.
Note
If the file is to be sent encrypted, the password must be assigned by the external person and transmitted to you via another channel (e.g. end-to-end encrypted communication, phone calls or personal delivery).
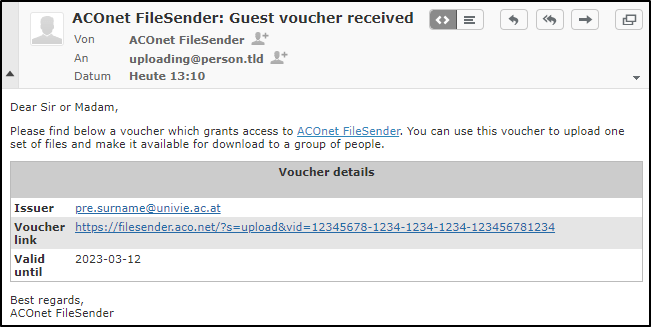
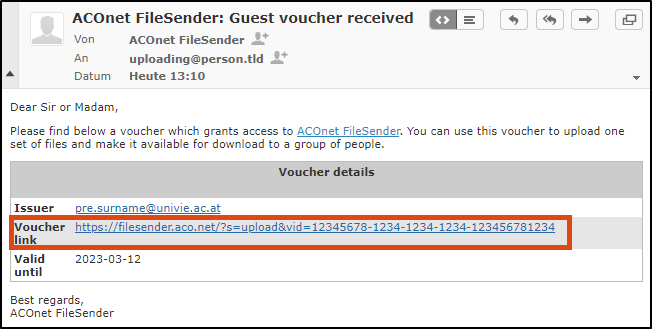
The external person then receives the following message.
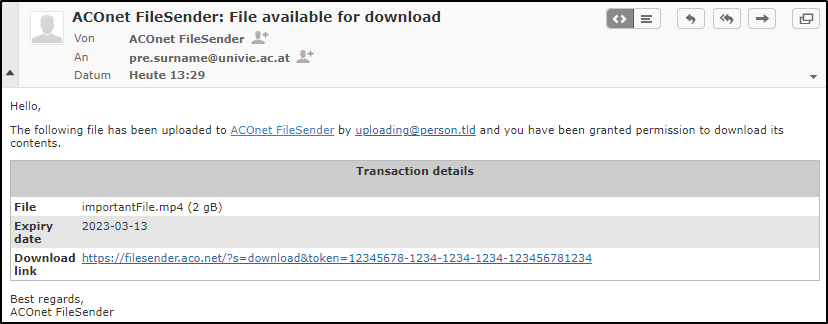
As soon as the external person has uploaded the file, you will receive a notification by e-mail. This contains a download link that you can use to download the file.
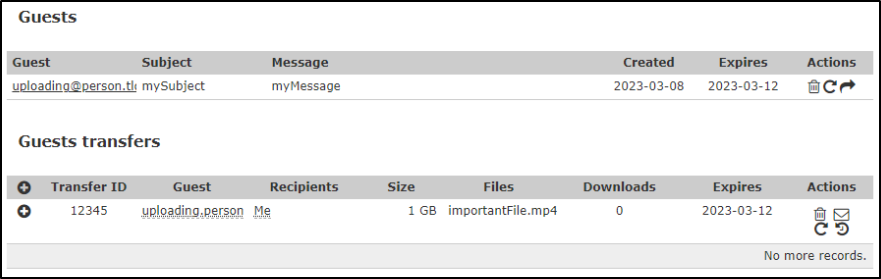
Under the menu item Guests you can see the following sections:
- Guests: contains the invitations that you have sent to external persons. If you delete an invitation here, the invited person cannot upload any more files. However, the files that have already been uploaded remain available.
- Guests transfers: overview of the files currently available. If you delete a file here, it can no longer be downloaded. The associated invitation is not affected by this and the invited person can upload further files.
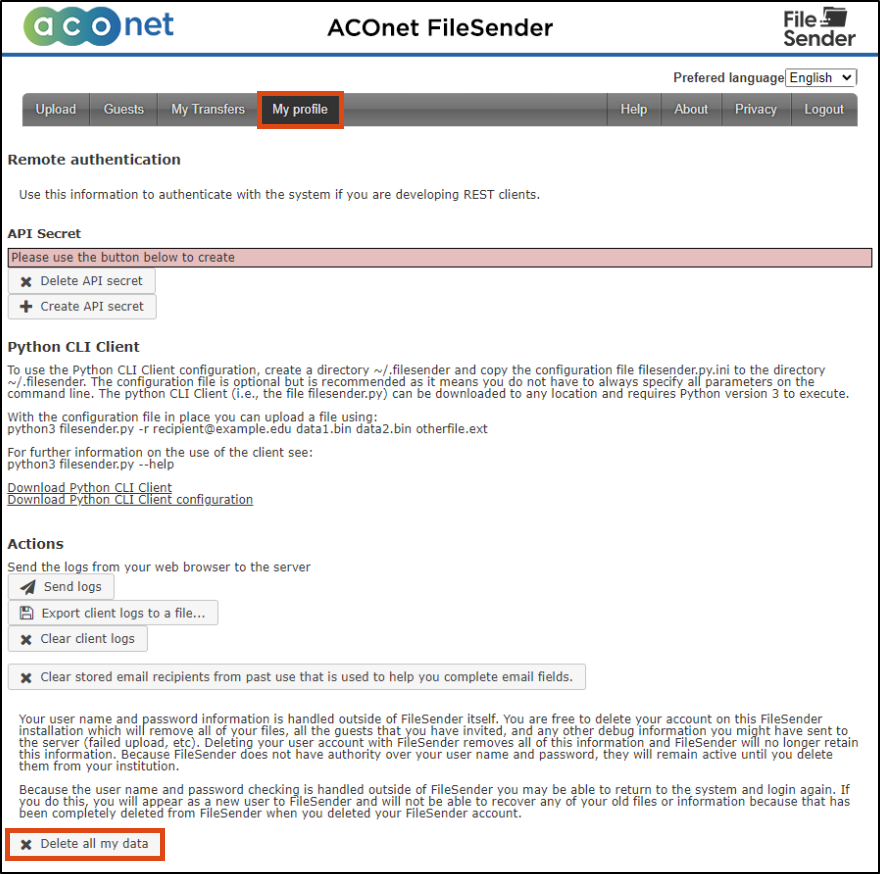
Deleting all data
Even if files are deleted, the log for this remains in the My Transfers menu item in the Closed transfers tab. To delete this log, go to the menu item My profile and click on the button Delete all my data at the very bottom of the page.
Sending file as external person
When you are invited to send a file with FileSender, you will receive an e-mail from the sender ACOnet FileSender <filesender@aco.net>. If you do not receive an e-mail,
- check the spam folder in your inbox.
- ask the person who invited you to check under the menu item Guests in the Guests section whether the e-mail address in the Guest column has been entered correctly.
Also note the expiry date stated in the e-mail. After this date, it is no longer possible to use the voucher.
Click on the voucher link in the e-mail.
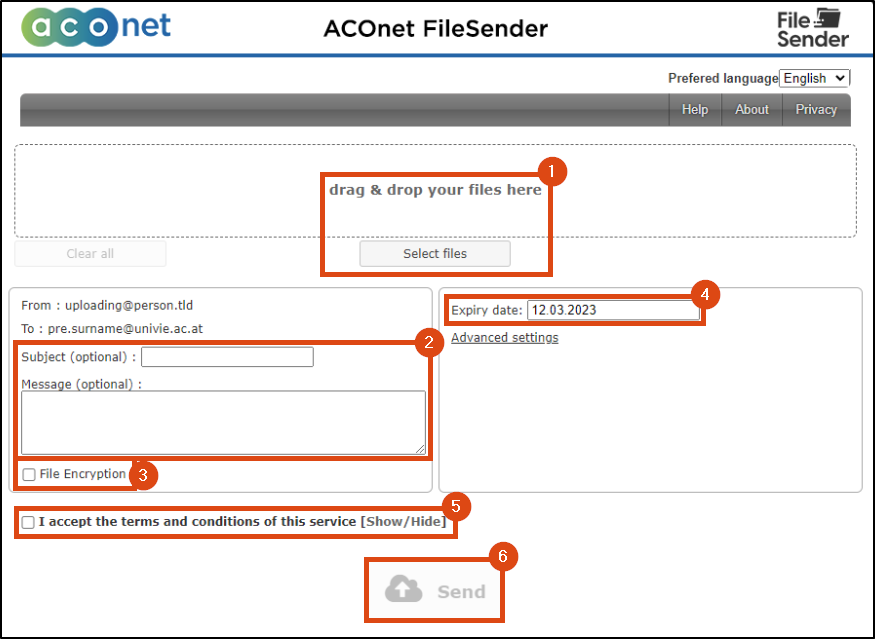
- Select a file by clicking on the Select files button or insert the file by drag-and-drop.
- Optionally, you can enter a subject or a message. These are sent to the person from whom you received the invitation.
- If you are sending files with sensitive content, activate File Encryption. In this case you will be asked to enter a password. The ZID recommends using the Generate password option. If you choose a password yourself, follow the ZID‘s password tips. You must later give the password to the person who is to receive the file.
- Choose an expiry date (default 5 days, maximum 15 days).
- Read and accept the terms and conditions of the service.
- Click on Send. You will then also receive the download link by e-mail.
If you have activated encryption: Send the password to the person who is to receive the file. Use a different channel than the message from the file sender. End-to-end encrypted communication, phone calls or personal delivery are suitable for this. Should either of the two pieces of information fall into the wrong hands, the file is still protected from unauthorised access.