OpenScape Mobile Pro – iOS devices
This user guide helps you to use u:phone via the OpenScape Mobile Pro app on your iOS device.
Requirements
- You have a personal u:phone profile.
- The device on which you want to install OpenScape Mobile Pro uses iOS version 11 or a later version.
Note
OpenScape Mobile Pro is not a SIP client. This means that the software treats all calls as mobile phone calls. Calls you make and calls you receive via OpenScape Mobile Pro are always processed via your mobile number. When you are abroad, this can result in high costs for incoming calls (passive roaming).
Installing OpenScape Mobile Pro
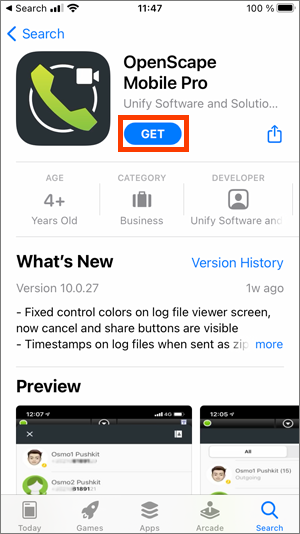
Install the OpenScape Mobile Pro app via the App Store.
Take the following steps to configure the app and pair it with your u:phone:
Tap the OpenScape Mobile Pro icon on your device to start the app.
- You will be prompted to allow OpenScape Mobile Pro to send you notifications and to access your location. The ZID recommends allowing notifications and allowing location services while using the app.
- Read and accept the End User Licence Terms and the Emergency Calls Disclaimer by tapping Accept twice.
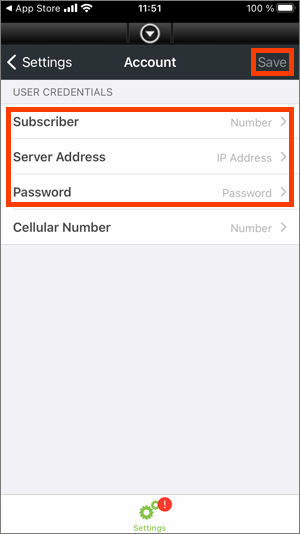
- Under Account enter the following information:
- Subscriber: your u:account userID
- Server Address:
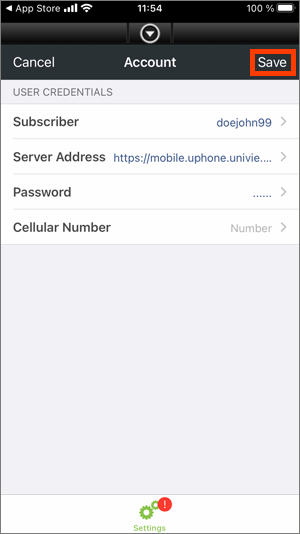
https://mobile.uphone.univie.ac.at:8443/axis/services/ - Password: your u:account password
- Tap Save.
- You will be prompted to allow OpenScape Mobile Pro to access your contacts, camera and photos. Tap OK to allow the app to access your contacts, camera and photos.
- Tap Save. You are now logged in and can use the app.
Handling calls via OpenScape Mobile Pro
Notes
- The call recipient will only see your 5-digit extension, no matter whether you have installed the app on your private device or on your official mobile phone.
- The app treats all calls as mobile phone calls. Calls you make and calls you receive via OpenScape Mobile Pro are always processed via your mobile number. When you are abroad, this can result in high costs for incoming calls (passive roaming).
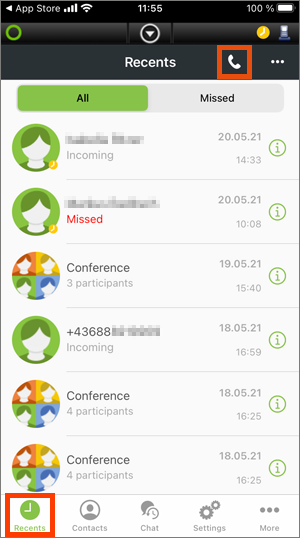
- Open the app and tap Recents in the bottom left corner.
- Then tap the handset icon in the top right corner.
- Enter a phone number in the keypad.
- Then tap the green handset icon at the bottom to make the call.
- The telephone system will call you first and then establish a connection to the recipient.
Alternatively, you can directly tap and call a contact from the call log.
Setting up call forwarding
To set up call forwarding to a device, you have to select it as the preferred device in the app.
Notes
- Callers who try to reach your extension will still only see your 5-digit extension and not the number of the device to which your call is forwarded.
- Only call back via the app (see instructions on Handling calls via OpenScape Mobile Pro). Otherwise, the call recipient will see the actual number of your device.
- If the preferred device is abroad, you may incur costs (such as roaming costs).
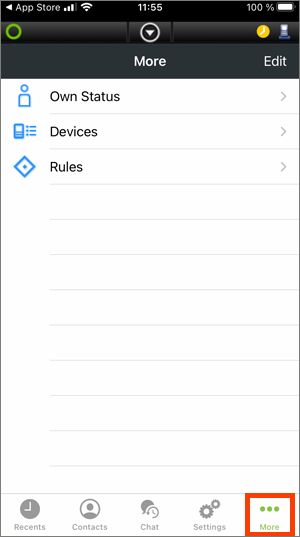
Open the app and tap More in the bottom right corner, then tap Devices.
- You can chosse from the following devices provided by default:
- Auto-Pilot: do not choose this option
- Work Phone: forward all calls to your u:phone device
- OpenScape Mobile: do not choose this option
- +4314277EXT+1: forward all calls to the OpenScape Desktop Client
- If you want to set up your official or private mobile phone or your voicemail as a preferred device, you have to add it as a device first. For further information, see instructions on Adding a new device.
- Tap the desired device to select it.
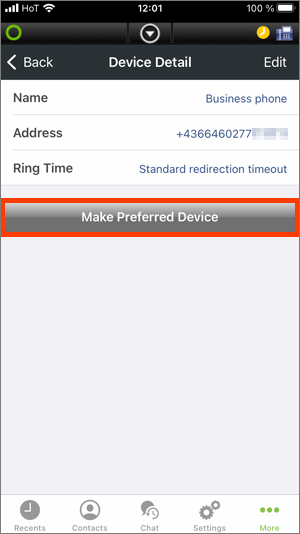
Then tap Make Preferred Device.
Adding a new device
Tap More in the bottom right corner.
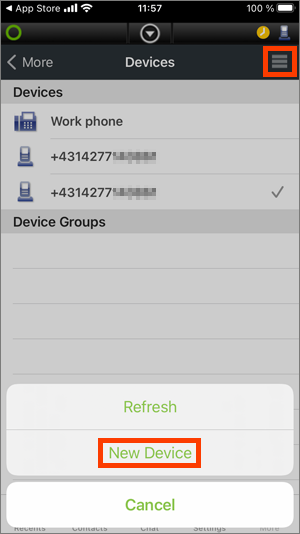
Tap the Menu icon (3 horizontal lines) in the top right corner, then tap New Device.
- Enter the following information:
- Name: freely selectable
- Address: phone number in international format, for example:
Business phone: +43664817xxxxx
Substitute with extension: +4314277xxxxx
Private mobile phone Magenta: +43676xxxxxxxx
Private mobile phone Germany: +491520xxxxxx
Phone number Vienna: +431xxxxxxx
Voicemail: +43142778008 - Ring Time: Standard redirection timeout
- Tap Save to confirm.
The device is now listed in your device list and can be selected as a preferred device.
