Managing call forwarding list
When you activate a call forwarding list, a call is forwarded from the first entry in the call forwarding list to the next entry after a certain time interval.
This user guide explains how to create and manage a call forwarding list with the OpenScape Web Client.
Note
- When forwarding calls to a mobile phone, a charge incurs. If the mobile phone is abroad, roaming costs incur (active costs for the extension and passive costs for the mobile phone).
- If a device in the call forwarding list cannot be reached, the call will be ended at this point.
- The persons calling only see your 5-digit extension regardless of the devices listed in the call forwarding list and of the device answering the call.
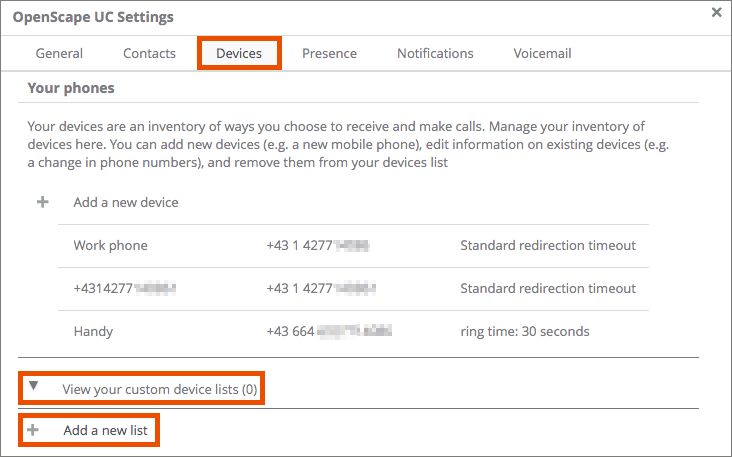
Creating a call forwarding list
- Click your name in the menu bar.
- Click Settings.
- Open the Devices tab.
- Scroll down to the entry View your custom device lists. Click this entry.
- Click Add a new list.
- Under List name, enter a name of your choice.
- Then click Choose a device and add the devices that should be called one after the other. You have to add these devices beforehand.
- You can change the ring time as described under Changing the ring time.
Note
- You should choose a ring time, depending on the number of devices on the list, so that all devices on the list can be reached within approximately 30 seconds.
- You should choose a ring time of the individual devices that avoids an answer by the device’s voicemail.
- For example: A ring time of 5 seconds on the u:phone device, then forwarding of the call to the business mobile phone with a ring time of 10 seconds, then forwarding of the call to the personal mobile phone as the last device on the list.
- Please note that the voicemails of some providers announce the mobile phone number and thus make it known to the caller. To prevent this, deactivate the announcement or configure the voicemail of the University of Vienna (EXT 8008) as the last device in the list.
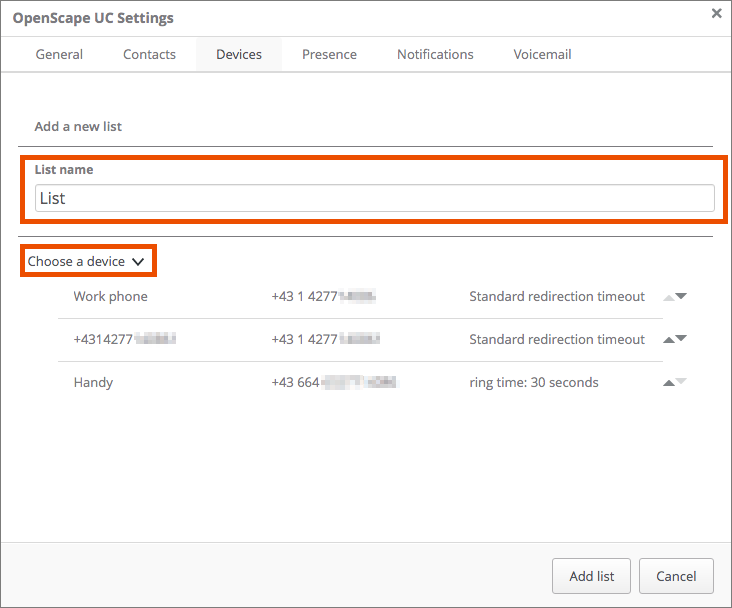
- Click Add a new list.
- As a last step, click Save.
Activating a call forwarding list
Click the headset icon in the menu bar.

Scroll down to the name of the call forwarding list and click it.
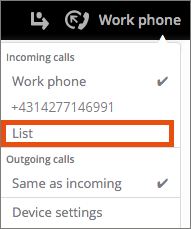
The call forwarding list is now activated. The display of your preferred devices changes as follows:
- On the left hand side, you can see the call forwarding list to which all incoming calls are redirected.
- On the right hand side, you can see the device from which all outgoing calls are made.
Changing the preferred device in the active call forwarding list
If you would like to change the preferred device for outgoing calls while the call forwarding list is active, take the following steps:
Click the headset icon in the menu bar.
Under Outgoing calls, select the desired device. In this case, this is the business mobile phone.
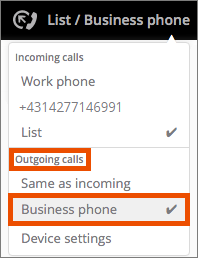
The display of the preferred device changes. Now, every call you make in the Web Client will be made via your business mobile phone.
Deactivating a call forwarding list
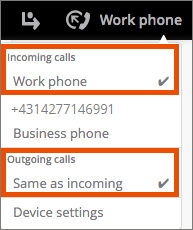
Click the headset icon in the menu bar.
Under Incoming calls, select a different device, such as the u:phone device. If also all outgoing calls should be made with the u:phone device, select Same as incoming. These settings are immediately active.
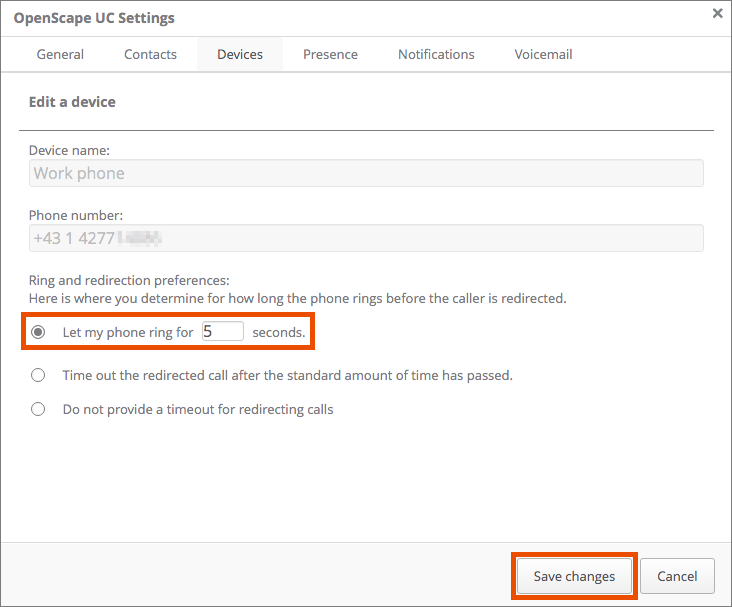
Changing the ring time
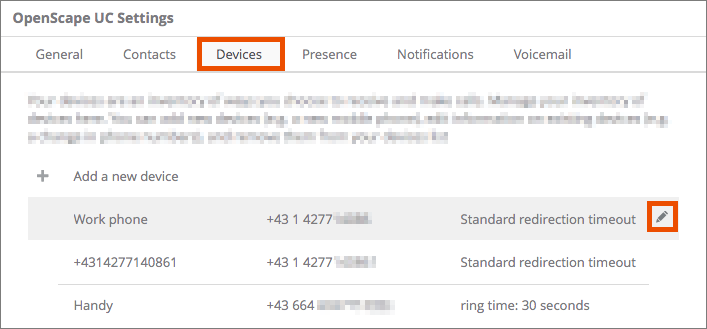
- Click your name in the menu bar.
- Click Settings.
- Open the Devices tab.
- Move the mouse to the desired device and click the pencil icon on the right hand side.
- Under Let my phone ring for... seconds, you can change the ring time for the call forwarding list.
- Confirm by clicking Save changes.
- The change is automatically made in the current call forwarding list.