Using UC team
This user guide helps you to create a UC team in the OpenScape Web Client and to use the associated functions. Team members can take calls from each other, chat as a team or easily send an e-mail to all team members.
Creating UC team
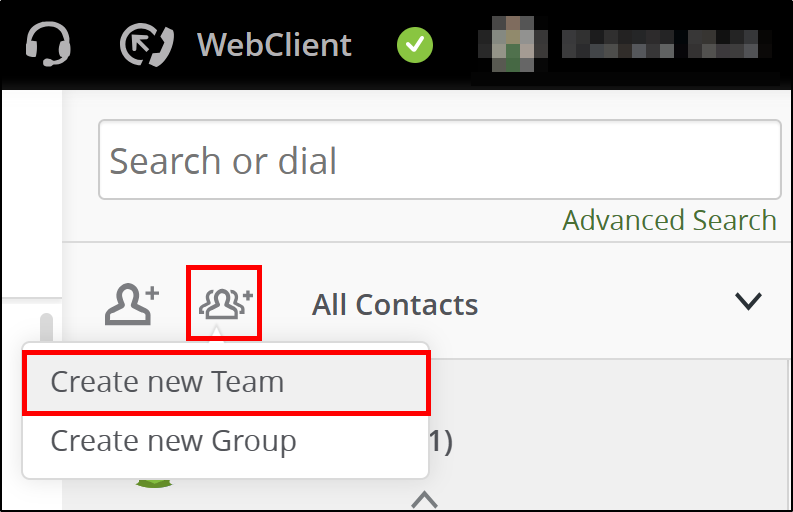
Click on the team icon in the contact column and select Create new Team.
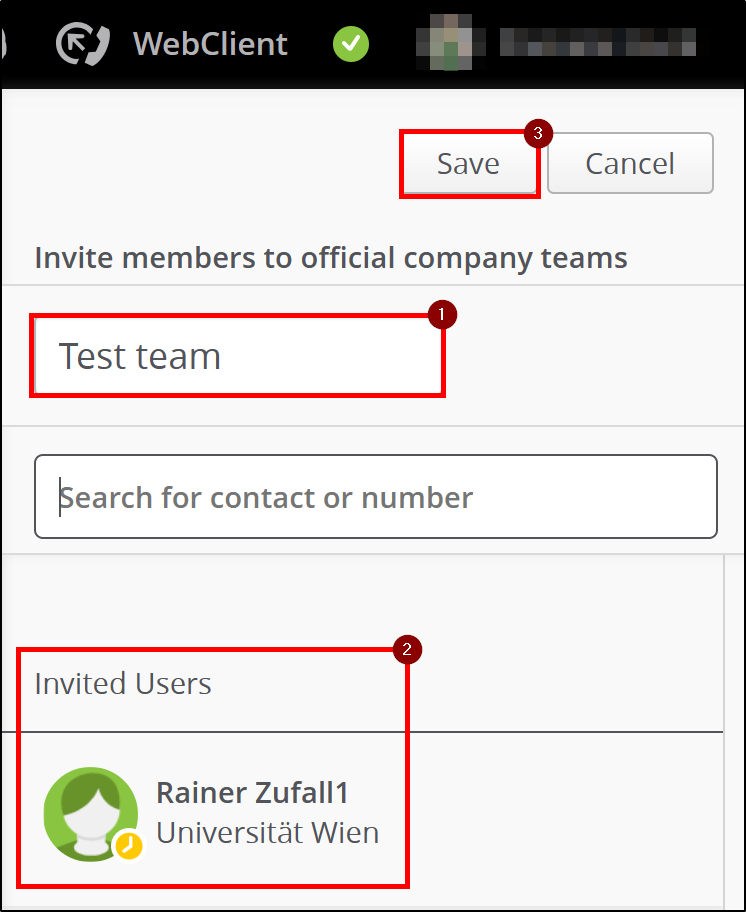
- Give the team a name and add contacts.
- The added contacts are displayed under Invited users and receive an invitation. When a contact accepts your invitation, they will be displayed in the member list and you will be notified.
- Then click Save. The team is displayed in the contact column.
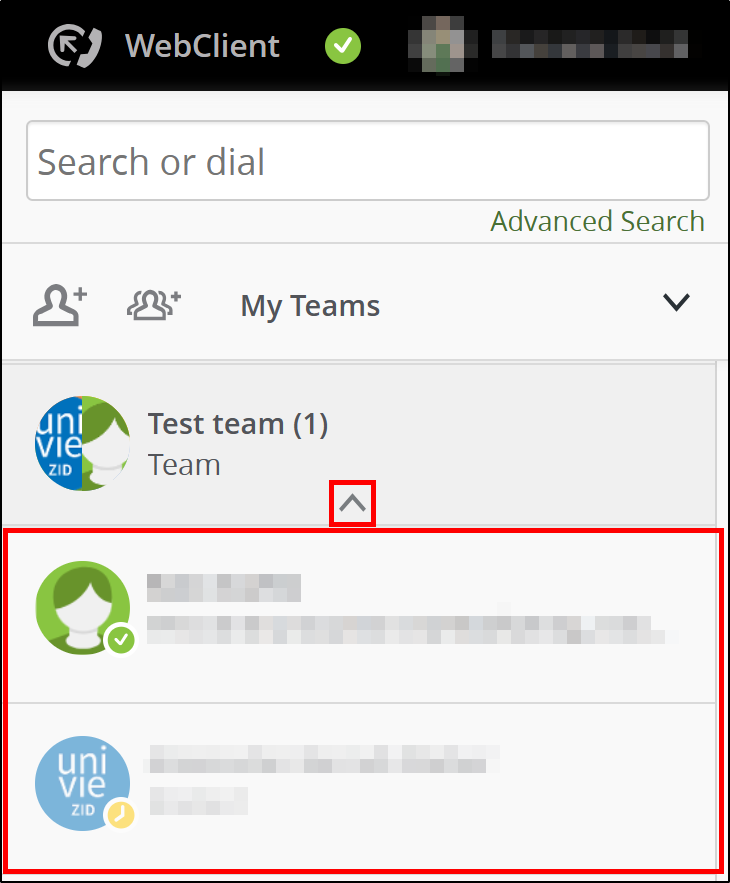
By clicking on the arrow in the middle of the entry, you can expand and collapse the team's list of members.
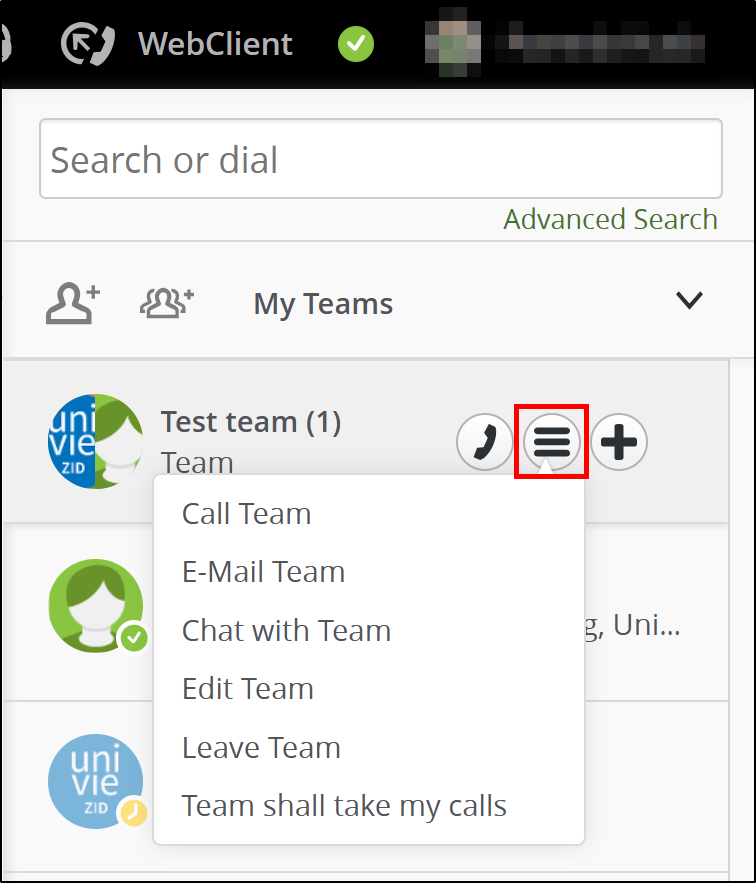
Managing UC team and taking actions
Click on the Communication Options icon next to the team name. In the following context menu, click on the desired action:
- Call Team: Start a conference call with the whole team. A conference call can also be initiated directly by clicking on the telephone receiver icon.
- E-mail Team: Your e-mail program opens and automatically inserts all team members as recipients in a new e-mail.
- Chat with Team: Enter a name for the chat and click on Done. The chat window opens and you can send a message to the whole team.
- Edit Team: Add or remove one or more contacts.
- Leave Team: This function is only available to the added members. Once you have created the team, you must delete the team to be able to leave it. To do this, click on Edit Team and then on Delete Team at the bottom right.
- Team shall take my calls: Authorise all team members to take incoming calls to you. If this function is active, the menu item is marked with a tick.