Migrating to new software
This user guide will help you to migrate to the new software. You can use it to access u:cloud from your desktop or laptop.
Windows
Notes
- Before you install the new software, you must remove the old software.
- You need administrator rights to be able to install the software.
- Windows 10 or newer must be installed on your device.
Removing old software
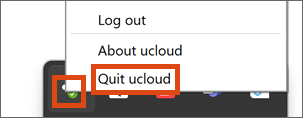
Click on the cloud icon for the u:cloud in the toolbar at the bottom right. Select Quit ucloud in the menu that opens.
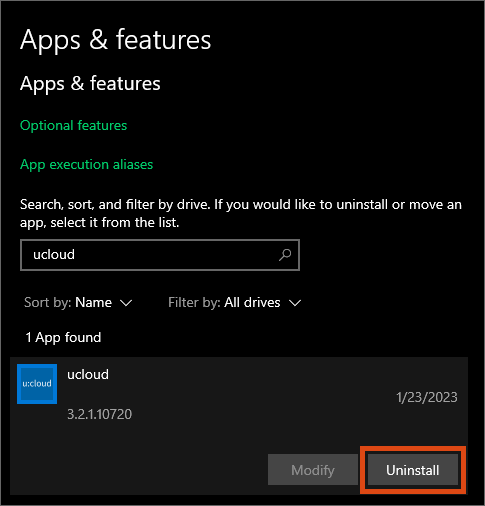
- Click Start – Settings – Apps and search for ucloud.
- Click ucloud to display the Uninstall option.
- Click Uninstall and follow the instructions of the uninstall process.
Notes
- Restart your PC if you are prompted to do so after uninstalling.
- Do not remove the local u:cloud folder which is located in your user folder. The folder will be taken over by the new software.
Installing new software
- Download the software.
- Execute the downloaded MSI file by double-clicking on the file.
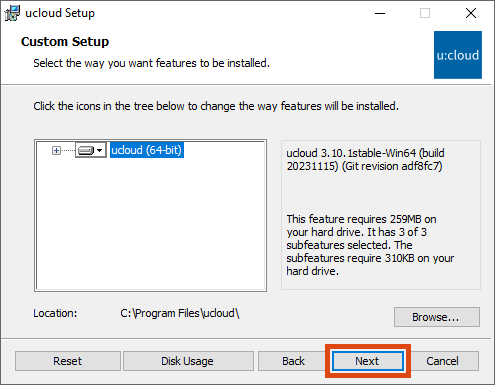
- The installation program starts. Click Next.

Click Next again.
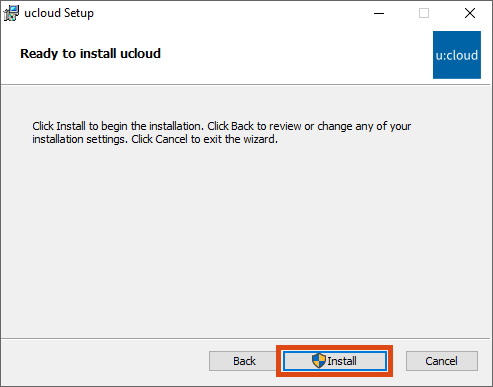
Click Install to start the installation.
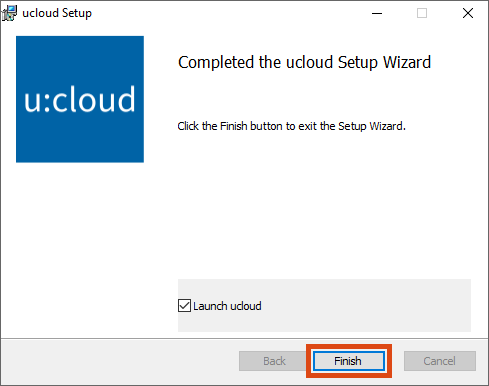
Click Finish.
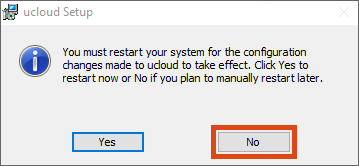
At the end of the installation process, you will be prompted to restart the PC. Click No.
As soon as the installation is complete, the software will start automatically.
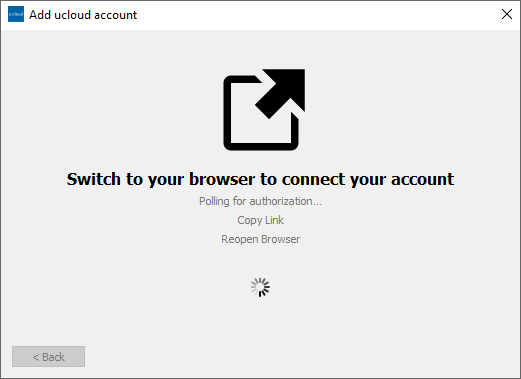
A browser window for login will open. Click on Log in.
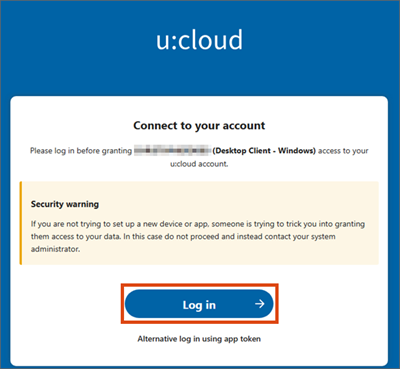
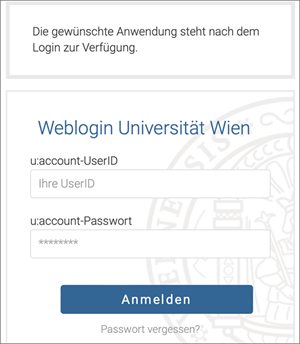
You will now be taken to the weblogin page of the University of Vienna. Enter your u:account UserID and the corresponding password.

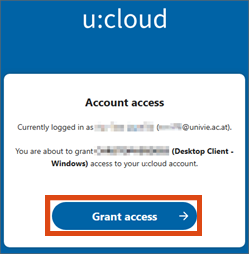
Click Grant access to allow the software to access the u:cloud.
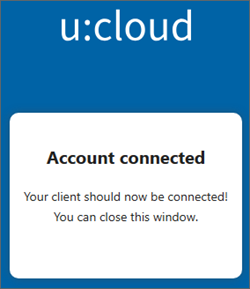
A confirmation is now displayed with the information Account connected.
You can now close the website. The software will connect automatically in the background. This may take a few minutes, do not close the software.
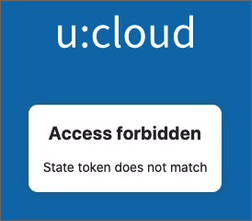
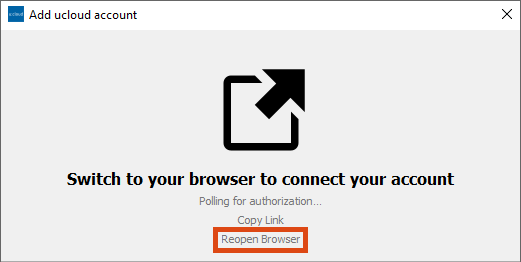
If the message Access forbidden appears, close the browser window. In the Add ucloud account window, click Reopen Browser. Repeat the login process and then click Grant access.
Notes
- As soon as the software has finished synchronising, you can restart the PC.
- You can find more information on the possible settings of the software (preventing automatic start, selecting folders for synchronisation) and how to use the software under Making settings.
macOS
Notes
- Before you install the new software, you must remove the old software.
- You will be prompted to enter the local account password when removing and installing the software. You will also be asked to give the software access to the download folder.
- macOS 10.13 or newer must be installed on your device.
Removing old software
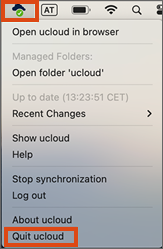
Click on the cloud icon for the u:cloud in the toolbar at the top right. Select Quit ucloud in the menu that opens.
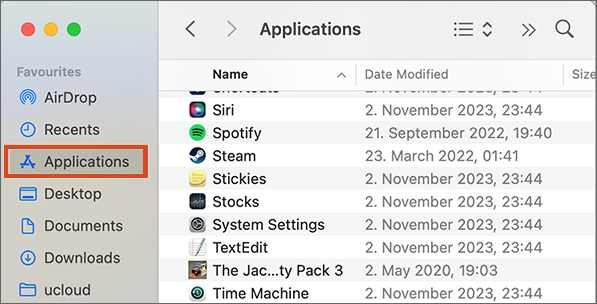
Open the Applications folder in Finder.
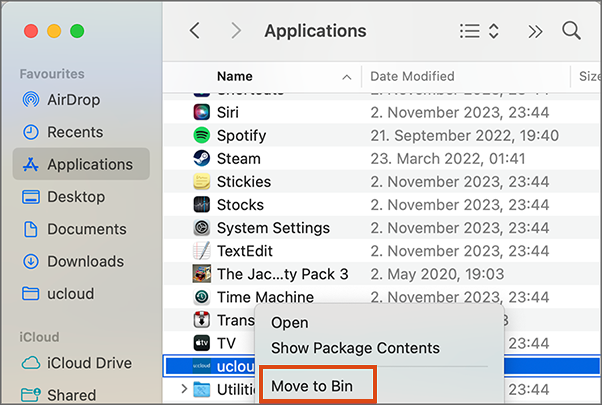
Right-click on ucloud. In the menu that opens, select the option Move to Bin.
Note
Do not remove the local u:cloud folder which is located in your user folder. The folder will be taken over by the new software.
Installing new software
- Download the software.
- Execute the downloaded PKG file by double-clicking on the file.
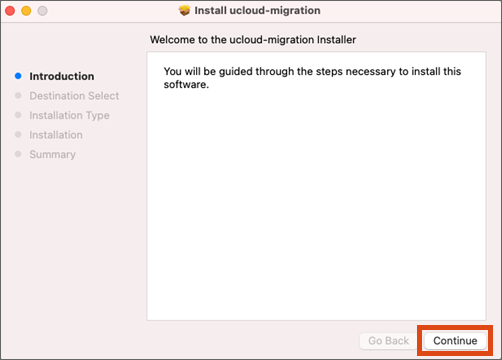
- The installation program starts. Click Continue.
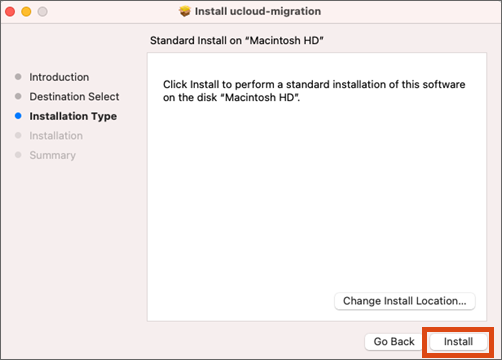
Click Install to start the installation.
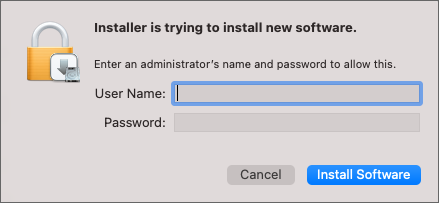
Enter your local user name and the corresponding password and click Install Software.
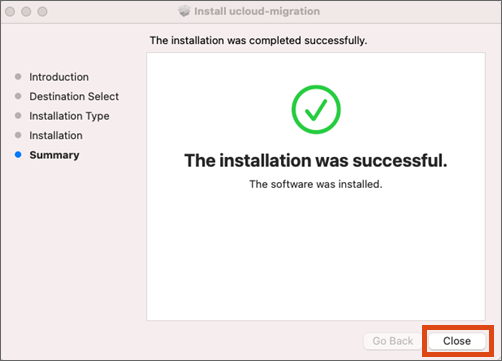
After successful installation, click Close.
You will be asked whether the installation program should be deleted. Click Move to Trash.
As soon as the installation is complete, the software will start automatically.

A browser window for login will open. Click on Log in.
You will now be taken to the weblogin page of the University of Vienna. Enter your u:account UserID and the corresponding password.
Click Grant access to allow the software to access the u:cloud.
A confirmation is now displayed with the information Account connected.
You can now close the website. The software will connect automatically in the background. This may take a few minutes, do not close the software.
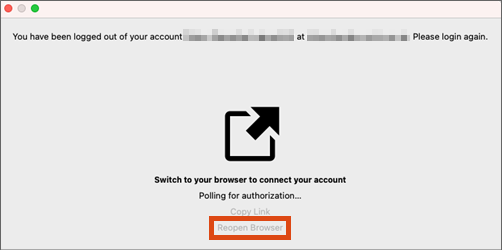
If the message Access forbidden appears, close the browser window. In the Add ucloud account window, click Reopen Browser. Repeat the login process and then click Grant access.
Note
You can find more information on the possible settings of the software (preventing automatic start, selecting folders for synchronisation) and how to use the software under Making settings.
Linux
Note
Before you install the new software, you must remove the old software.
- Remove the old software.
- Download the new software (AppImage) and copy it to a suitable location.
- Make the AppImage executable.
- Start the AppImage.
A browser window for login will open. Click on Log in.

You will now be taken to the weblogin page of the University of Vienna. Enter your u:account UserID and the corresponding password.
Click Grant access to allow the software to access u:cloud.

A confirmation is now displayed with the information Account connected.

You can now close the website. The software will connect automatically in the background. This may take a few minutes, do not close the software.
If the message Access forbidden appears, close the browser window. In the Add ucloud account window, click Reopen Browser. Repeat the login process and then click Grant access.
Note
You can find more information on the possible settings of the software (preventing automatic start, selecting folders for synchronisation) and how to use the software under Making settings.