Windows 10
These user guides help you to install Wi-Fi via eduroam in Windows 10.
Note
- If your laptop has a switch to activate the Wi-Fi function, switch it on.
- eduroam offers a secure internet connection via Wi-Fi: The authentication as well as the data transfer are encrypted and therefore secure from access by unauthorised persons.
Requirements
- u:account UserID in the form
UserID@univie.ac.at - Wi-Fi password
- Device running with Windows 10 equipped with Wi-Fi
- Correctly set system date on the computer
- Access point in reach
Setting up eduroam
Click on the network icon in the bottom right of the screen.

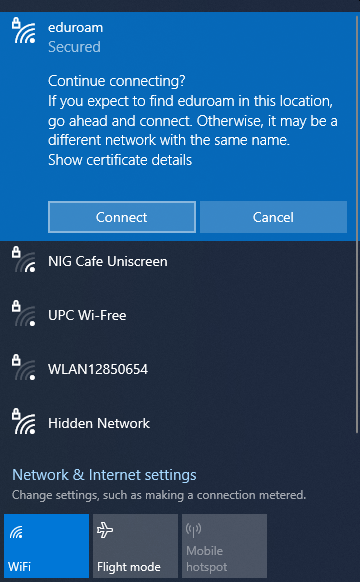
If in reach of an accesspoint, you can see eduroam as well as other accessible networks in the area.
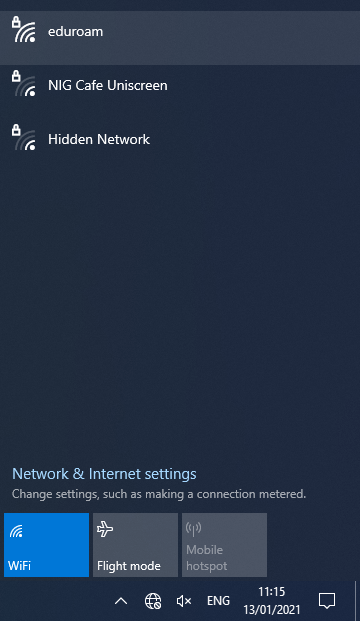
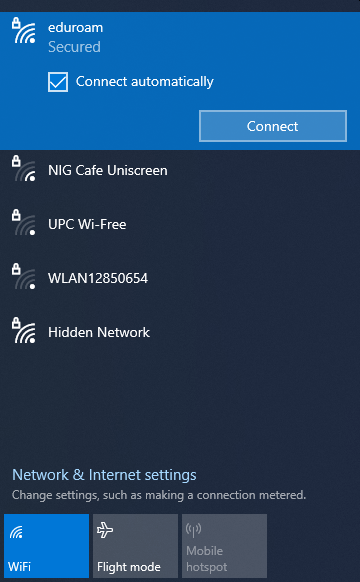
Select eduroam and click Connect.
If you want to save your u:account access details on your device, activate the option Connect automatically (Automatisch verbinden). If this is not needed, deactivate this option.
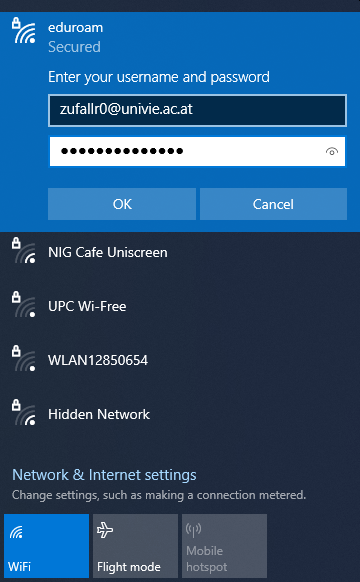
Type in the following details:
- User name: Your u:account userID in the form
UserID@univie.ac.at - Password: Your Wi-Fi password
Press Connect.
Windows recognises the validity of the server certificate but shows a warning.
Click Connect.
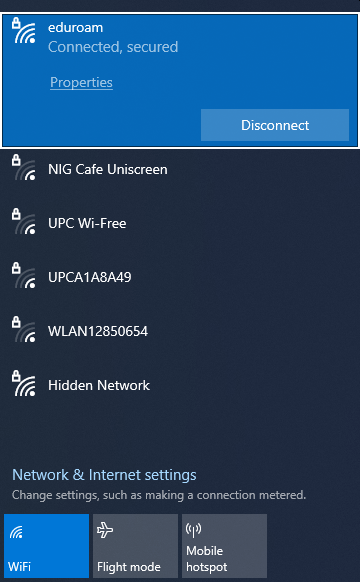
You are now connected to eduroam.
Remove eduroam
This is how you remove personal eduroam access details from your device:
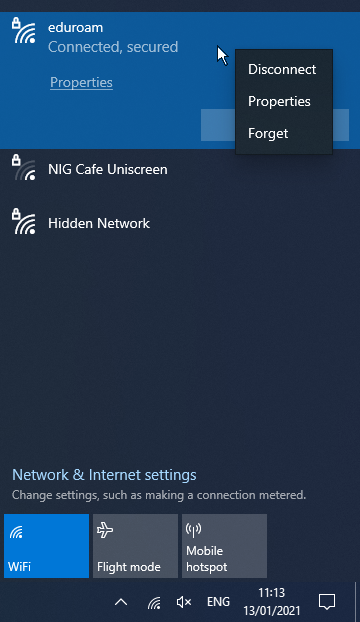
Click on the network icon in the bottom right of the screen.
With a right click on the eduroam connection and a click on Forget you can remove your eduroam access details.
Manually setting up eduroam
If you have already set up an eduroam network on your device, delete it.
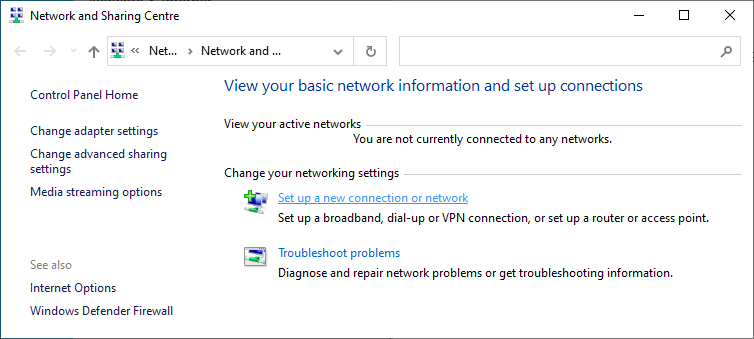
Click on the network icon in the bottom right of the screen and open the Network & Internet settings.
Choose WiFi and click Network and Sharing Centre in Related settings.
Depending on the display, you'll find the link to Network and Sharing Centre on the bottom or on the left of the window.

Click Set up a new connection or network.
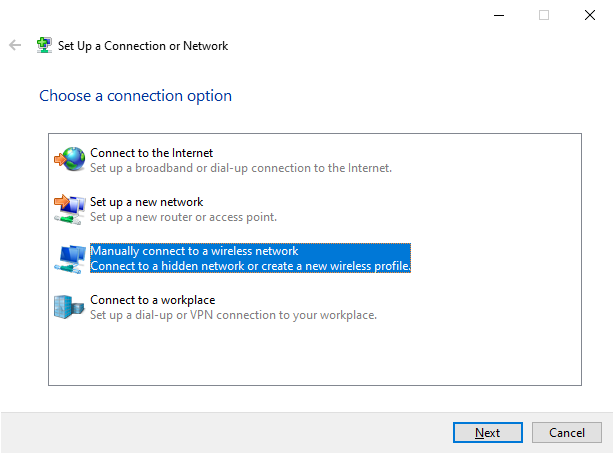
Select Manually connect to a wireless network then select Next.
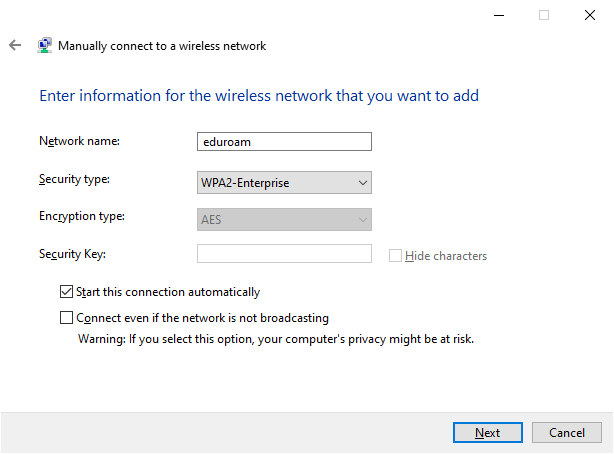
Type in or select the following details:
- Network name: eduroam
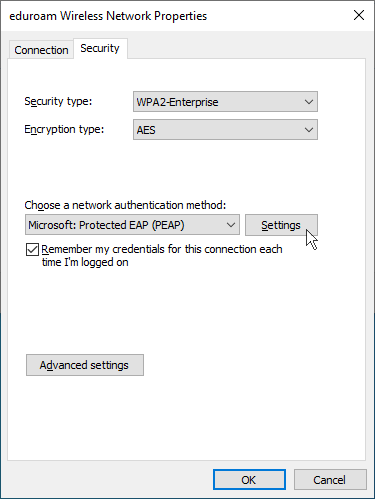
- Security type: WPA2-Enterprise
Click Next.
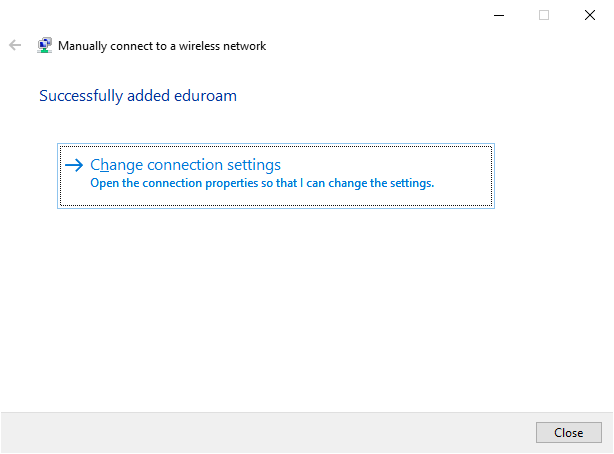
Click Change connection settings.
Change to Security.
In network authentication, the option Microsoft: Secured EAP (PEAP) should be selected.
Next to it, click Settings.
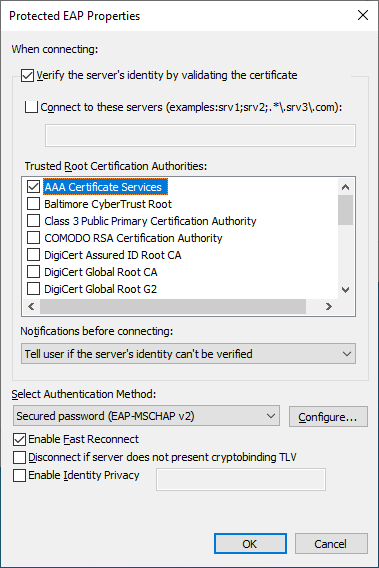
- The option Verify the server’s identity by validating the certificate should be activated for security reasons.
- In Trusted Root Certification Authorities the option AAA Certificate Services should be selected.
Now click OK.
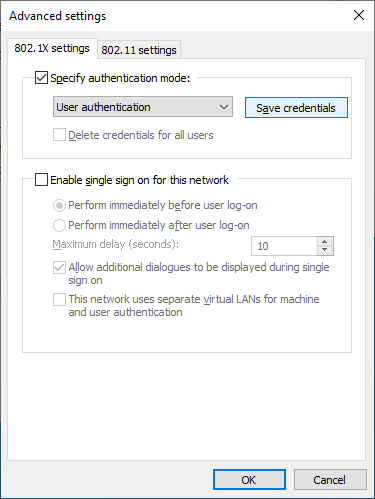
Click Advanced Settings.

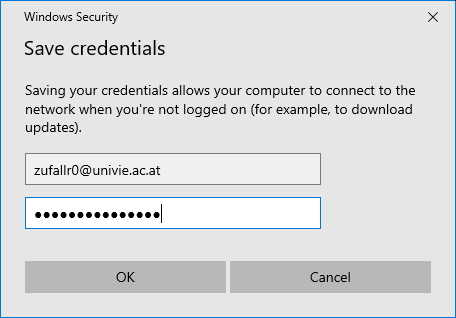
Check Specify Authentication mode and choose User Authentication. Click Save credentials.
Type in the following details:
- Your u:account userID in the form
UserID@univie.ac.at - Your Wi-Fi password
Then click OK.
Close all open configuration windows with OK or Close.
You should now be connected to the eduroam network.