Zoom meetings in Moodle
With the Zoom Meeting activity you can offer your participants a video conference in your Moodle course. Users do not need a Zoom account to participate. Meetings are possible for up to 200 participants (end-to-end encryption) or 300 participants (advanced encryption). Additional licences are available for teaching up to 1,000 participants.
Prerequisite: You have already registered a Zoom account with your u:account access data.
Adding the Zoom meeting activity to your course
Switch to edit mode with Edit.
Click +Activity or Create Material in the relevant section. Select the Zoom Meeting activity.
Then select the activity settings.
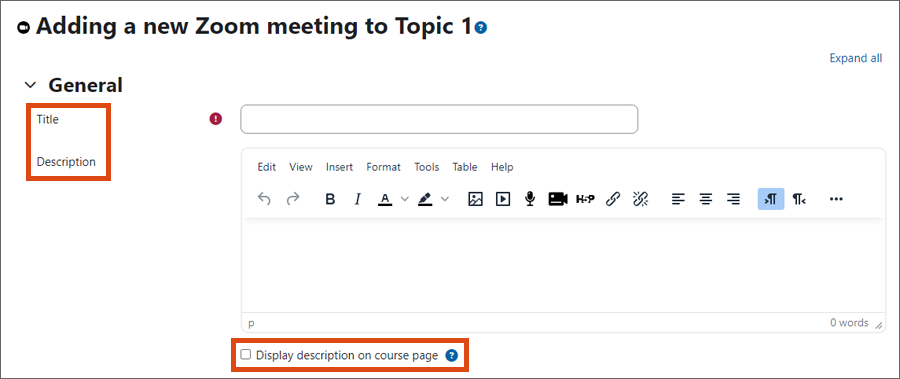
Title, Description: Set a name for the Zoom Meeting, such as Unit 1 – 17.2. The description is optional.
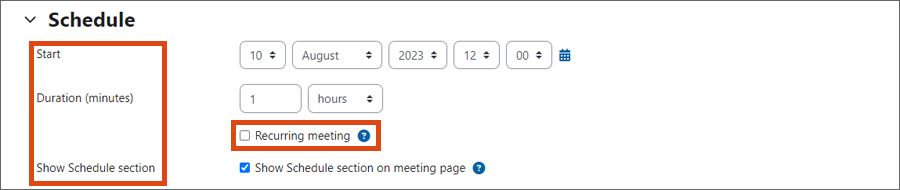
Start, Duration, Recurring, Show Schedule: Set a meeting time period and decide whether it is an appointment with a defined start and end time or whether it should be a recurring meeting that is always available.
A meeting can only ever be attended from the set time. After the specified duration, users can no longer enter the meeting. If you want to offer the meeting permanently, select the option recurring – here there is no start or end date. Also specify whether you want to display this section on your meeting page.
Breakout rooms: Here you can create breakout rooms in advance and assign people to them. To learn how to manage breakout rooms, visit the Zoom Help Center.
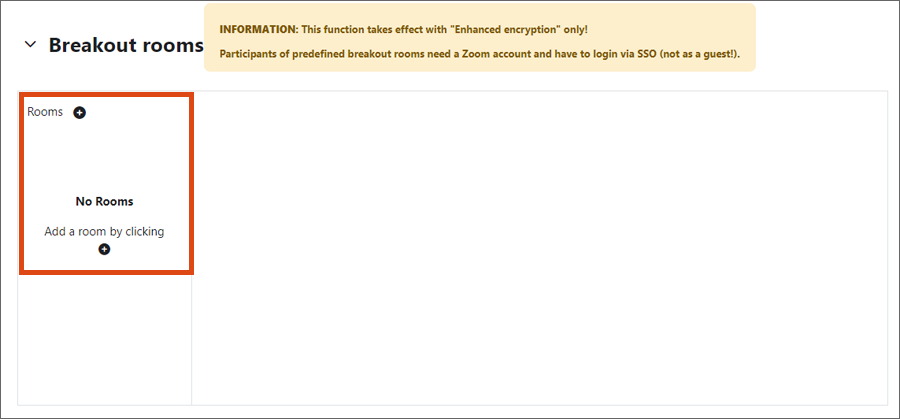
-
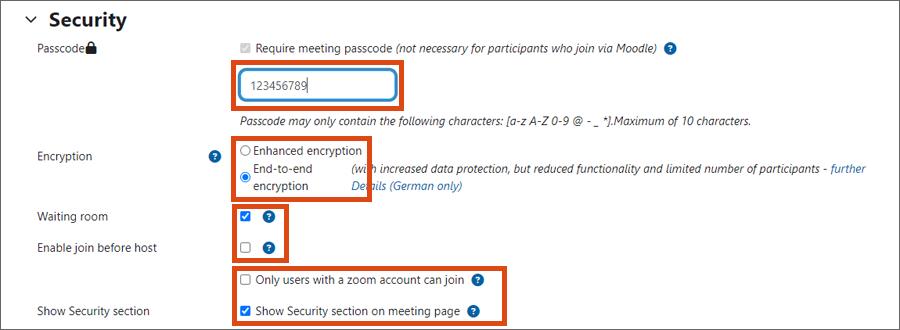
Passcode: A Zoom meeting in Moodle is by default a password-protected room. This cannot be changed.
The passcode applies to people who are not registered for the Moodle course (such as guests) and who join the meeting via the join link rather than via Moodle. The passcode is encrypted in the meeting link. If you forward the link in full, no passcode entry is necessary.
A person who has access to your Moodle course and clicks on the Zoom meeting link there does not need the passcode either. -
Encryption: If you cannot do without the advanced features, such as polls, recordings and breakout session, or if more than 200 people participate in the meeting, you must change the encryption of your meeting from "end-to-end" to "advanced". For data protection reasons, the University of Vienna recommends using the encryption activated by default.
- Waiting room: If this function is activated, participants can only enter the meeting room after they have been granted access by the moderator.
- Enable entry before host: Only activate this function if you want to allow participants to enter the meeting room before you. If the waiting room is activated, the function is disabled.
- Access only for participants with a Zoom account: Participants must be logged into Zoom to join your meeting. The ZID advises against enabling this setting.
- Show security section: Choose whether you want to display this section on your meeting page.
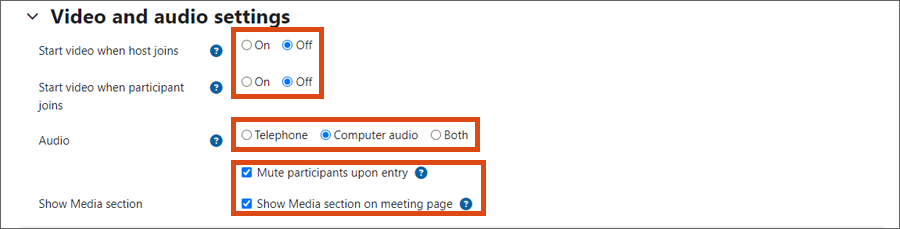
- Share host's video from the start
- Share participants' video from the start
- Audio: Participants can use phone audio, computer audio or both when joining the meeting.
- Mute participants when they join: Participants are muted when they join the meeting but can activate their microphones.
- Show media section: Choose whether you want to display this section on your meeting page.
Alternative hosts: You can give other people moderation rights in the meeting, including the right to start the meeting. The person must have a licensed version of Zoom (not a basic account) and have rights as a teacher, tutor or administrator for the Moodle course. People with these rights can also sign up independently as an alternative host in the Moodle activity at any time. When you add someone as an alternative host, they will be notified by email. You can activate or deactivate this notification in your personal settings under Meeting → Email Notification → When another host is assigned to or removed from a meeting. If you have already created an activity, you can easily create one or more alternative hosts by clicking on Edit.

- Recording: You can set whether new recordings for this meeting should be visible by default.

Note
The settings of a zoom activity can only be changed afterwards by the person who created the meeting. Other people cannot change the settings, even if they have editing rights for the corresponding Moodle course. An error message will appear.
Webinar
If you have an additional licence for webinars, you can schedule a webinar here. Otherwise this field is greyed out. In a webinar, only the moderator and all designated panelists can share their video, audio and screen. Other people can only participate as viewers.
- The University of Vienna has a limited number of webinar licences available for teaching purposes. Please notify us of any teaching needs using this service desk form. (Comparison of meeting and webinar)
Informing participants about the meeting
Use the announcement forum at the beginning of your course. Inform students about the new activity, for example by mentioning the link to the activity in the text. The post will be visible in the forum, and students will also receive the message by e-mail (in the evening at the latest). Students cannot reply to the message.
Starting meeting
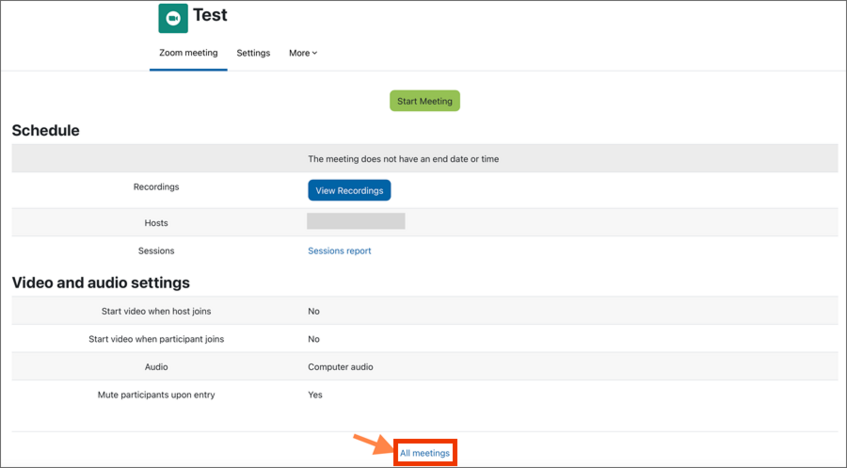
As a host, you can start the meeting via the access page as soon as the specified start time has been reached. Click on Start Meeting.
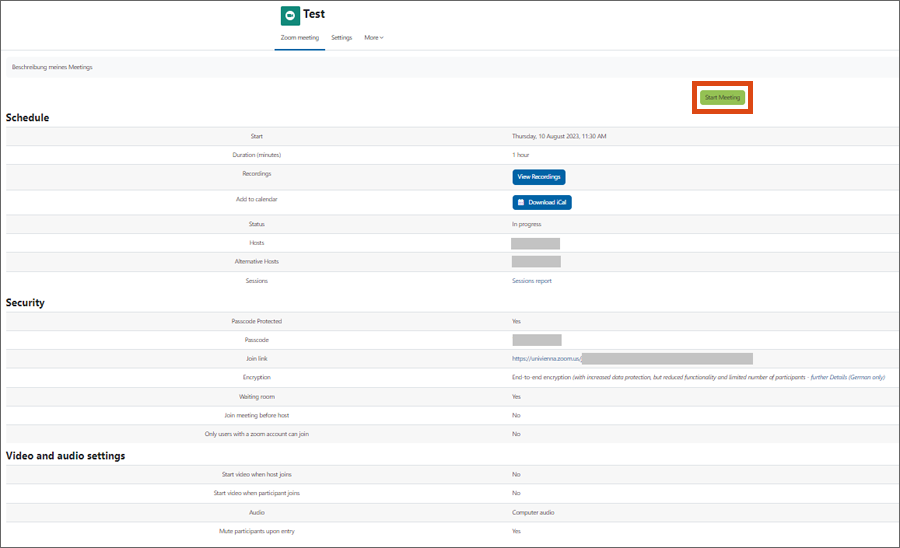
If the start time has not yet been reached or if the host has not yet entered the meeting room (and the Enable joining before host function is deactivated), the participants will be informed that the meeting has not yet started. This page reloads every 5 seconds so that the start time cannot be missed.
Before a participant can enter, they must enter their name. A Zoom account is not required for participation.
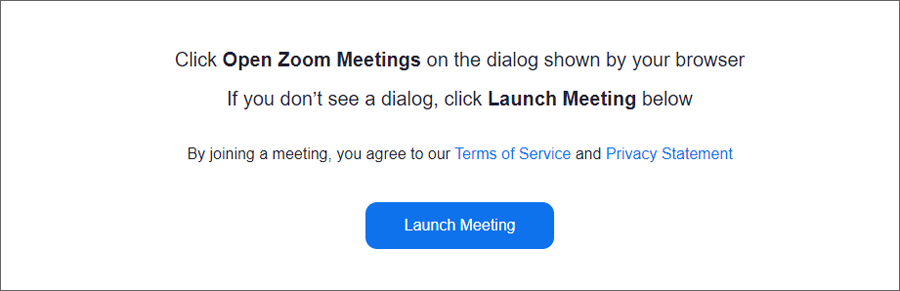
If you are not redirected directly to the meeting, it is because you are not currently logged in to Zoom and the following message will appear - click Launch Meeting:
Then click on Host Sign in.

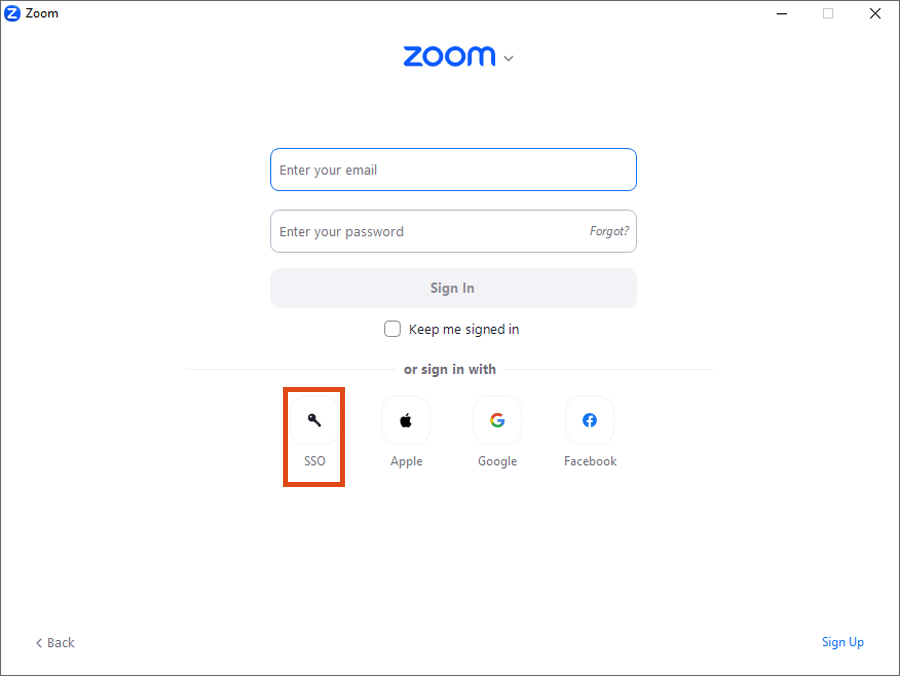
Log in by clicking SSO.
Enter the company domain univienna.zoom.us if it is not already pre-filled.
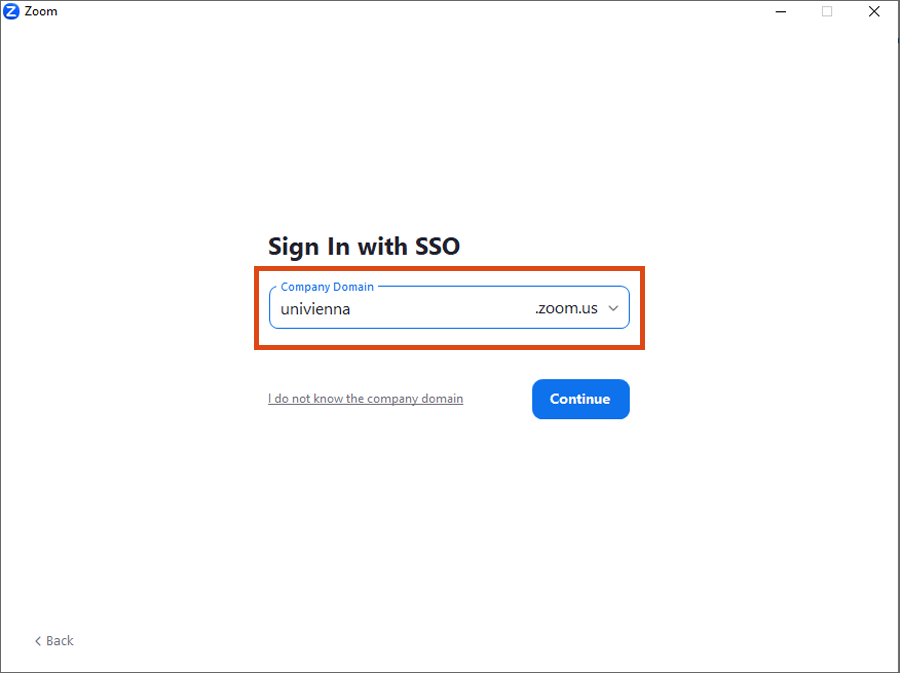
You will be redirected to the weblogin of the University of Vienna and can enter your u:account access data there. Afterwards, you will be immediately forwarded to the meeting.
During the meeting
Regardless of whether you have created the meeting in or outside of Moodle, the same functions are available to you after the start.
You can find an overview of the functions during a meeting on the Zoom instructions page.
After the meeting
You can find the following instructions on the ZID website:
Note
Recordings in the Zoom Cloud are available for 365 days – 7 days before deletion the creator will be informed by email.
Instructions on how to make Zoom recordings available directly in Moodle or via u:stream in Moodle as an alternative or after the 365 days can be found on the Moodle Wiki page.
Making a recording available in Moodle
You have several options for giving participants access to the recordings:
Share the recordings directly in your Zoom Meetings activity.
If you have included Zoom as an activity in your Moodle course, recordings are now automatically made available directly in Moodle and you no longer need to include them separately in your Moodle course. In order for the recordings to be available to students, you need to check Yes in the settings of your Zoom activity under Are recordings visible by default for this meeting? This will automatically make all recordings visible, you do not need to do anything else.

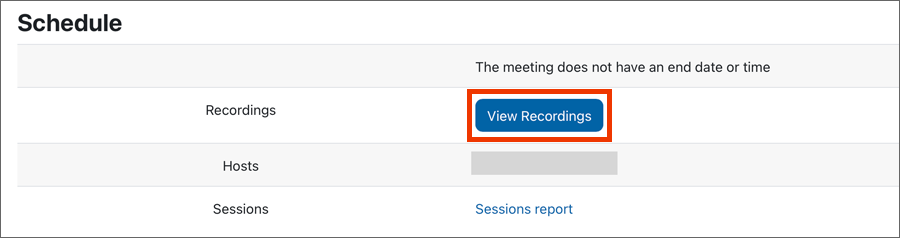
When you click on the zoom activity, you will find the View recordings button in the table after the recording has been automatically processed and linked to Moodle.
It may take some time for the recordings to be made available, but they should be within 24 hours. It is also possible that you have already received the automatic email from Zoom, but you will not see it published in Moodle until the next day. As a teacher, you can also edit the visibility of individual recordings at any time on the subpage or overwrite their selected default value of the setting – to do this, click on the corresponding button for the desired recording:

Send the link as a message in the announcement forum.
To do this, you must mention the link and the passcode in the text. If the recording is only available for a certain period of time, please inform your participants of this.
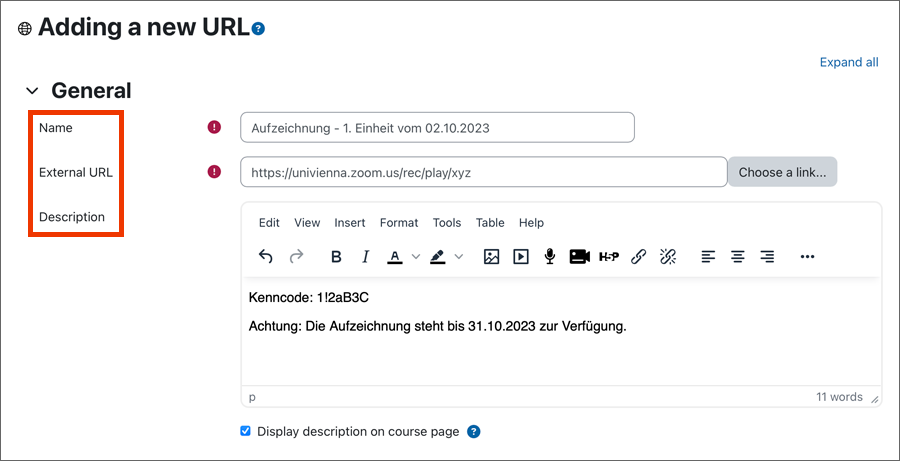
Add the link as an activity URL.
In the corresponding topic, click on +Material and create activity. Select the activity URL. Enter a name, the external URL and the description and save your entries.
If you go to the activity's access page and follow the All Meetings link at the bottom of the table in an activity, you will see an overview page of all upcoming and completed meetings in the Moodle course. Here you will also find reports on each meeting, such as when they took place, which people attended, etc.