Accessing with browser and getting to know the functions
This user guide will help you to access u:cloud with your browser and to get to know the functions of u:cloud.
Start
- Open ucloud.univie.ac.at with your browser.
- Enter your u:account userID and your u:account password.
- After you have logged in successfully you will see the u:cloud homepage.
Elements
Menu bar
- On the left the apps (Files, Photos, etc.) are displayed as icons. Move the mouse over one of the icons to display the name of the app. Click on one of the icons to go to the respective app.
- On the right you will find the search (magnifying glass icon), the contact search (business card icon) and the user account (profile picture). You can access the Settings via the user account. Under Appearance and accessibility you can select a dark or light-coloured design for the user interface.

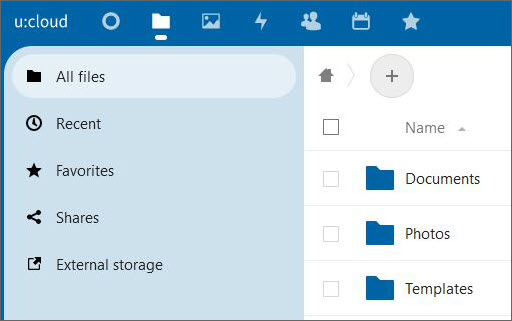
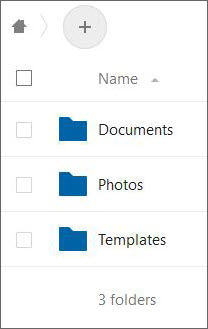
Files app
- Here you can see your files, the file size, the alteration date and if the file has been shared.
- Above you can find the file directory, starting with the home directory. This is marked by a house icon.
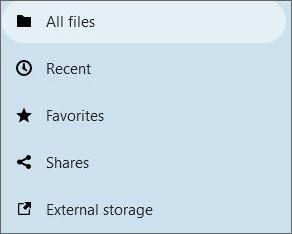
Left panel
- You can choose various filters to change the view of your files. For example: Recent, Favorites, Shares.
By default, All files is chosen. - At the bottom you can access your Deleted files. More information on restoring deleted files
Managing files and folders
In the Files app you can create and upload files and folders.
Creating files and folders
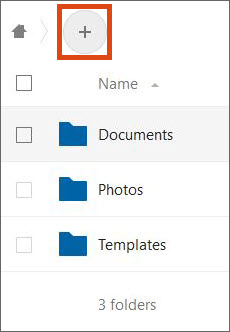
- Click on the plus icon on the right, next to the house icon.
- You can upload files and folders (maximum file size 1 GB) or create a folder or a document.
Uploading files and folders
Drag the file or folder (maximum file size 1 GB) you want to upload into the browser window and drop it. You can also click on the plus icon and then on Upload to upload files.
Downloading and sharing files, restoring versions
- By clickling on the file you can download the file and save it locally to your device.
- Via the share icon or Shared you can share a file or folder with other users and give them reading or editing permissions. You can find more information in the user guide Sharing files and folders.
- With a click in the column Modified a bar opens on the right. In the tab Versions you can restore older versions of the file there.
Move and rename files as you would on your local PC.
Note
If you want to move your file, you can do so by moving the file to a different layer.
Restoring deleted files
If deleted files are still in the recycle bin, you can restore them from there. To do so, click on Deleted files at the bottom left and then on the desired file on the right on Restore.
Folders and files are kept in the recycle bin for at least 30 days and a maximum of 180 days before being permanently deleted.
Note
The recycle bin can use up to half of the available storage space. If this limit is exceeded, the oldest data or data that is more than 30 days old is deleted from the recycle bin until the recycle bin occupies no more than half of the free space.
Menu bar
You can switch between various apps in the menu. The Files app is activated by default.
Files
- Main window: All files and folders
- Left panel: Add various filters to change the view of how to show your files. All files is activated by default.
Photos
Photos shows all pictures in your u:cloud and all pictures shared with you.
Activity
Activity shows all changes in your u:cloud and the changes in shared folders.
Contacts
- Main window: You can find the list of your saved online contacts.
- Left panel: You can find menu points with options to add new contacts, add filters and switch to your menu settings.
Calendar
- Main window: Add new appointments and share them with others
- Left panel: Set up and share new calendars orchange the view. You can expand the Settings further down. Scroll down in this area to see further settings. Among other things, you will find the option to copy the CalDAV link (e.g. for use in Thunderbird).
Bookmarks
- Main window: Here you can find all your saved bookmarks.
- Left panel: Options to add or search for bookmarks, as well as the menu settings can be found here. Select it by clicking on the gear icon at the bottom. Scroll down in this area to see further settings.