Editing a WordPress page
First steps
You can edit a WordPress page at the following web addresses:
- Personal website: https://homepage.univie.ac.at/firstname.lastname/wp-admin/
- Website for business purposes: https://hostname.univie.ac.at/wp-admin/
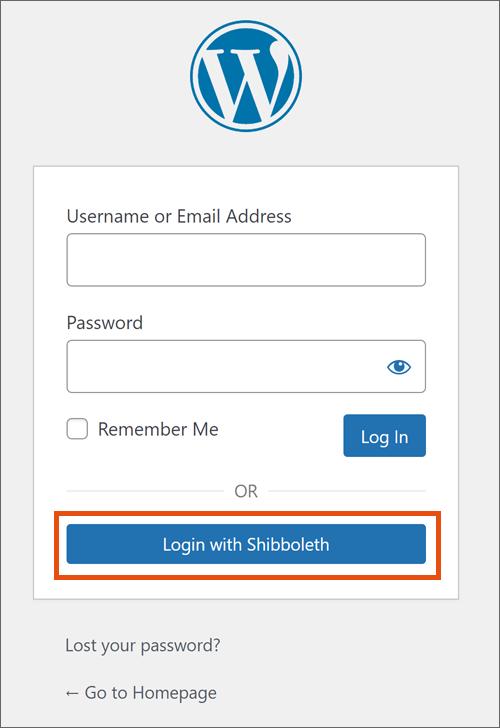
Click Login with Shibboleth. You will be forwarded to the weblogin of the University of Vienna. Log in with your u:account UserID and the corresponding password.
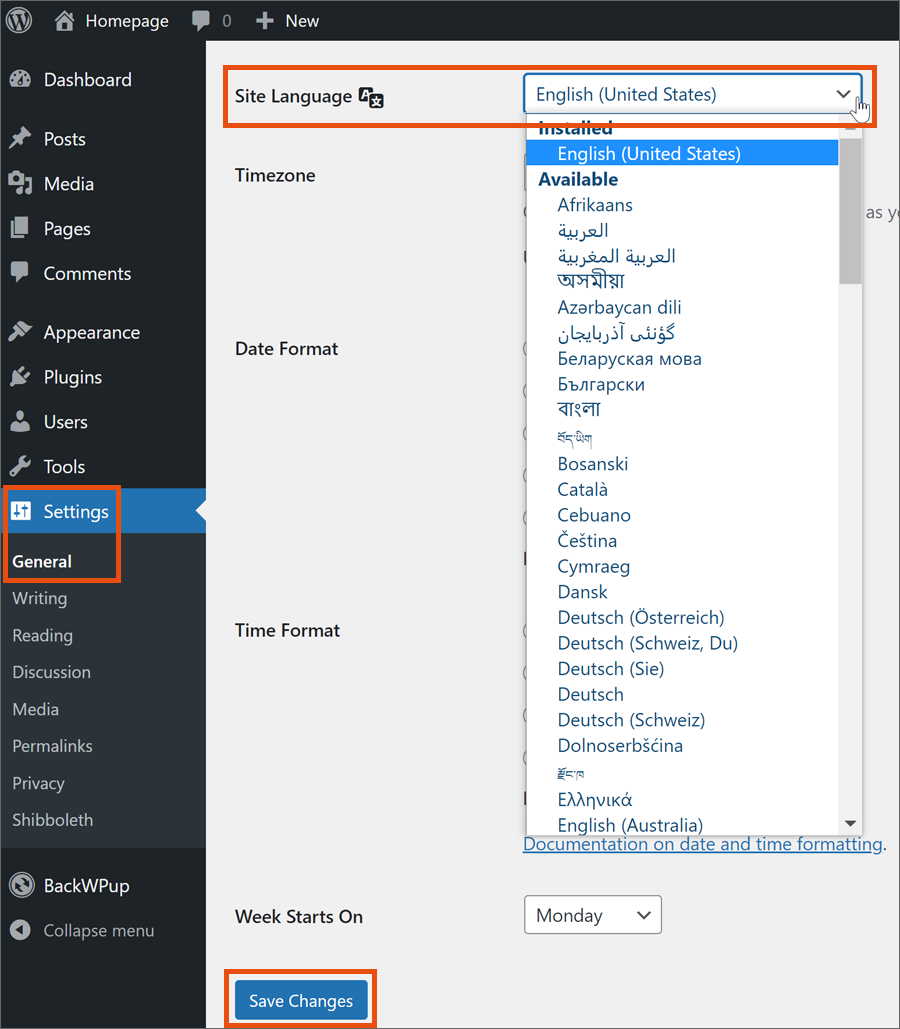
The standard language option is English. To change the language, click Settings followed by General Settings. Scroll to Site Language and select a language, a time zone as well as a date and time format. Click Save Changes to save these settings.
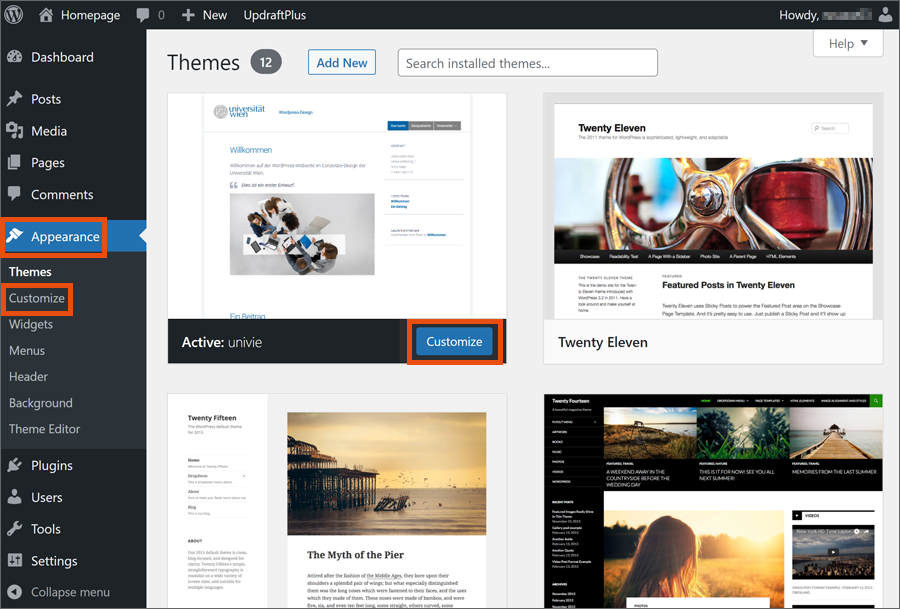
After installation, click on the Dashboard to change to the main view. Then click Appearance in the left sidebar to make changes.
Select Customize to make choices regarding the looks of your website.
You can choose the respective settings on the left side again.
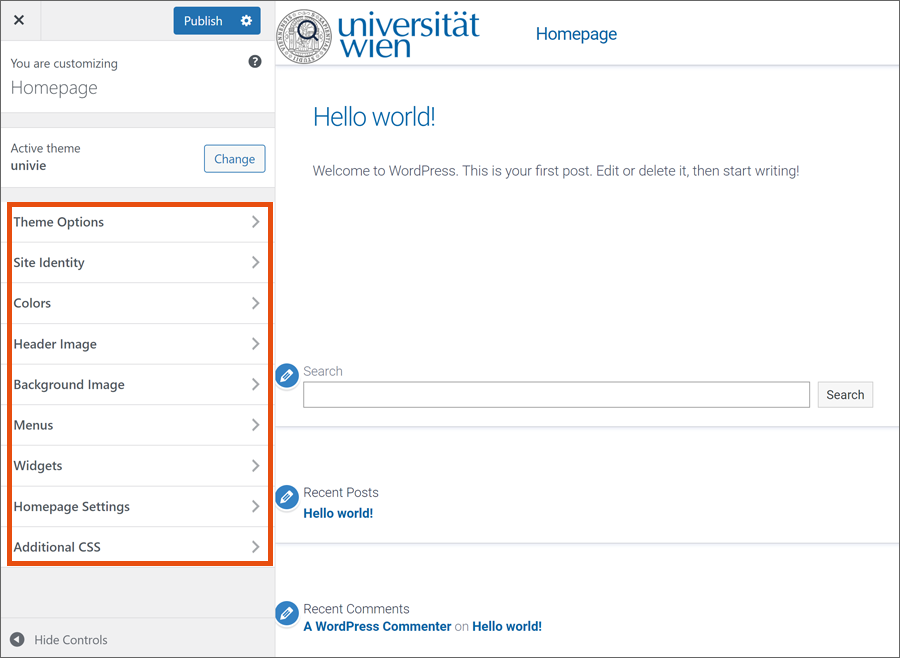
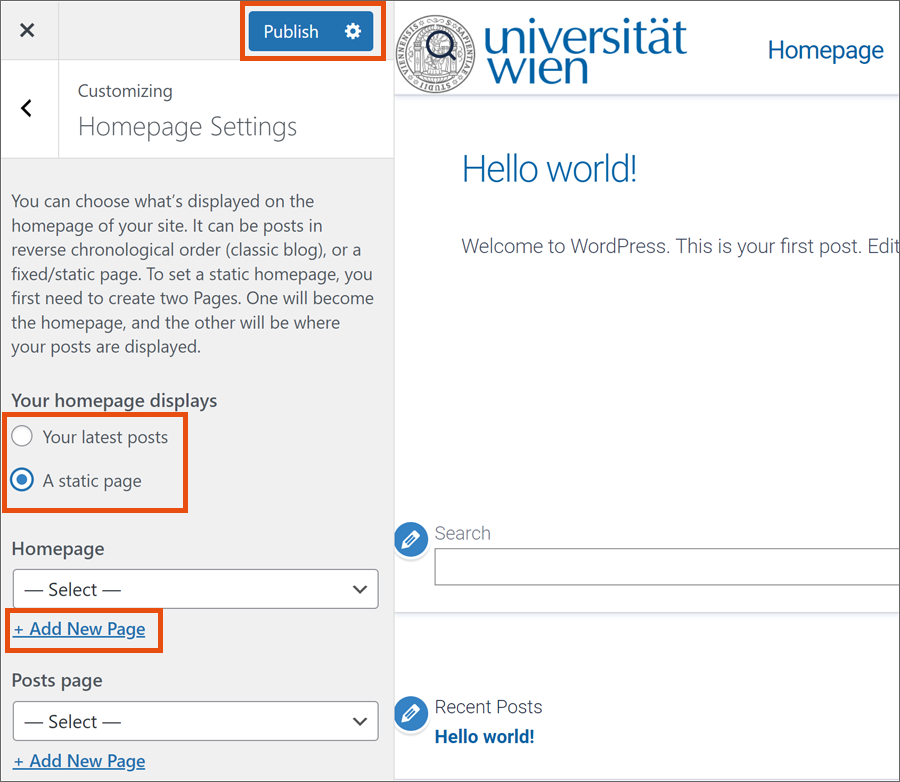
In the Homepage Settings, choose whether your website should have a post-oriented or static homepage.
In the standard setting, new posts will be listed in chronological order. To select a different order, choose A static page before creating the main page. To do so, enter a page name under New page title.
Click Publish to save and publish all changes.
Creating posts
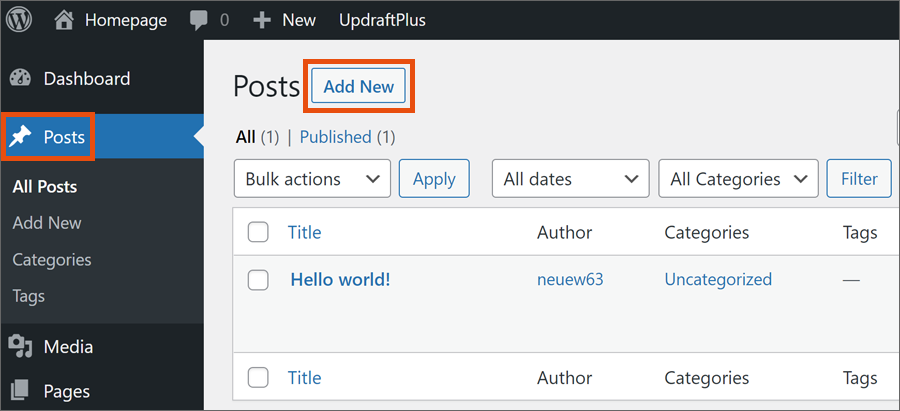
With the WordPress template available in the system, you can easily create posts. To do so, click Posts followed by Add New.
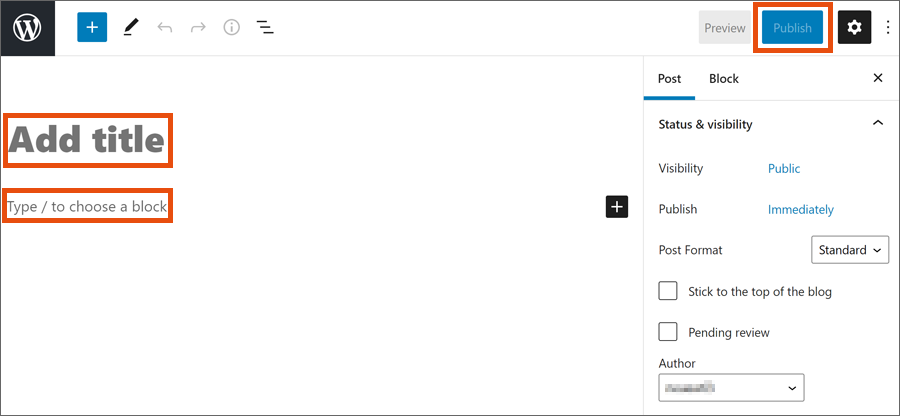
Enter a title and content for the post. When you are done, click the Publish button to put your post online.
Note
Click the Preview button to see what your post will look like before publishing it.
Creating page content and new pages
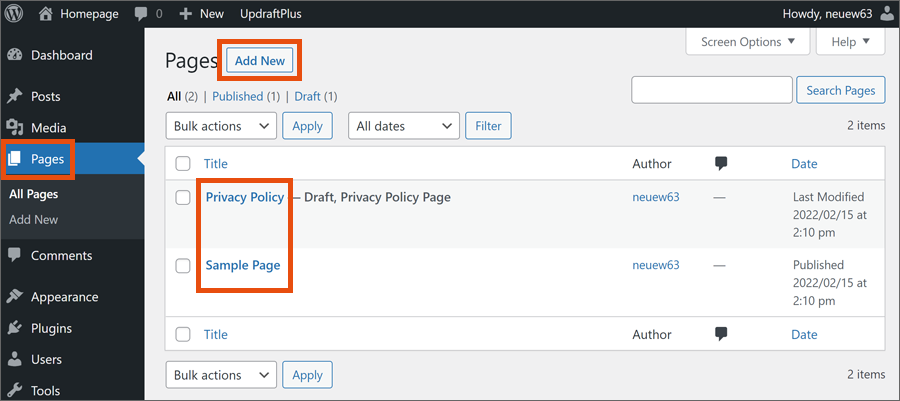
Click Pages in the left sidebar. You can create new pages and upload content to existing pages here.
To add content to an existing page, hover over the title of the page you wish to edit with your cursor and click Edit. You will be forwarded to the respective page. After making your changes, click Publish.
Using menus
If you create pages and/or sub-pages, providing a menu could help visitors to your website find their way around. To set up a menu, got to Dashboard → Appearance → Menus.
Then click on Manage with Live Preview.
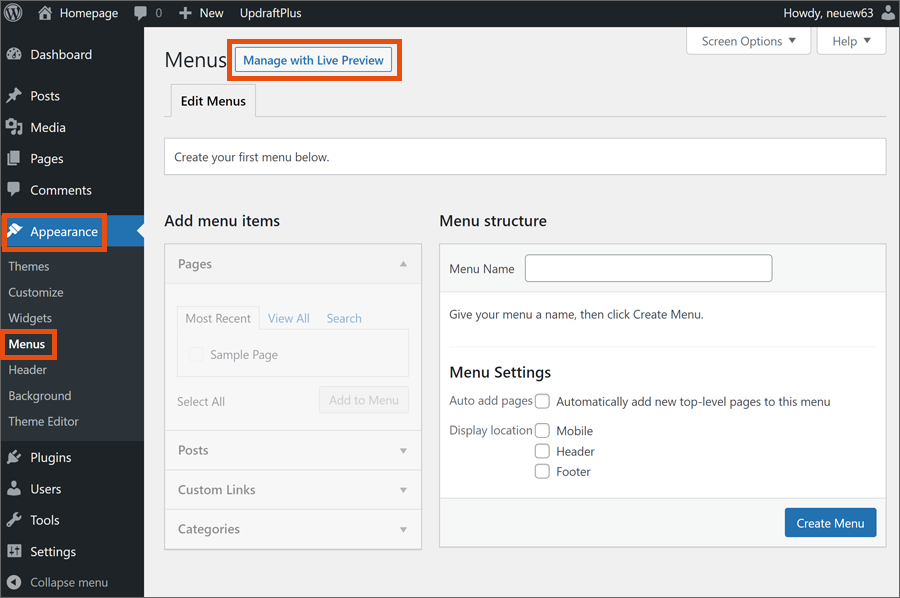
A window will pop up in which you can create a new menu.
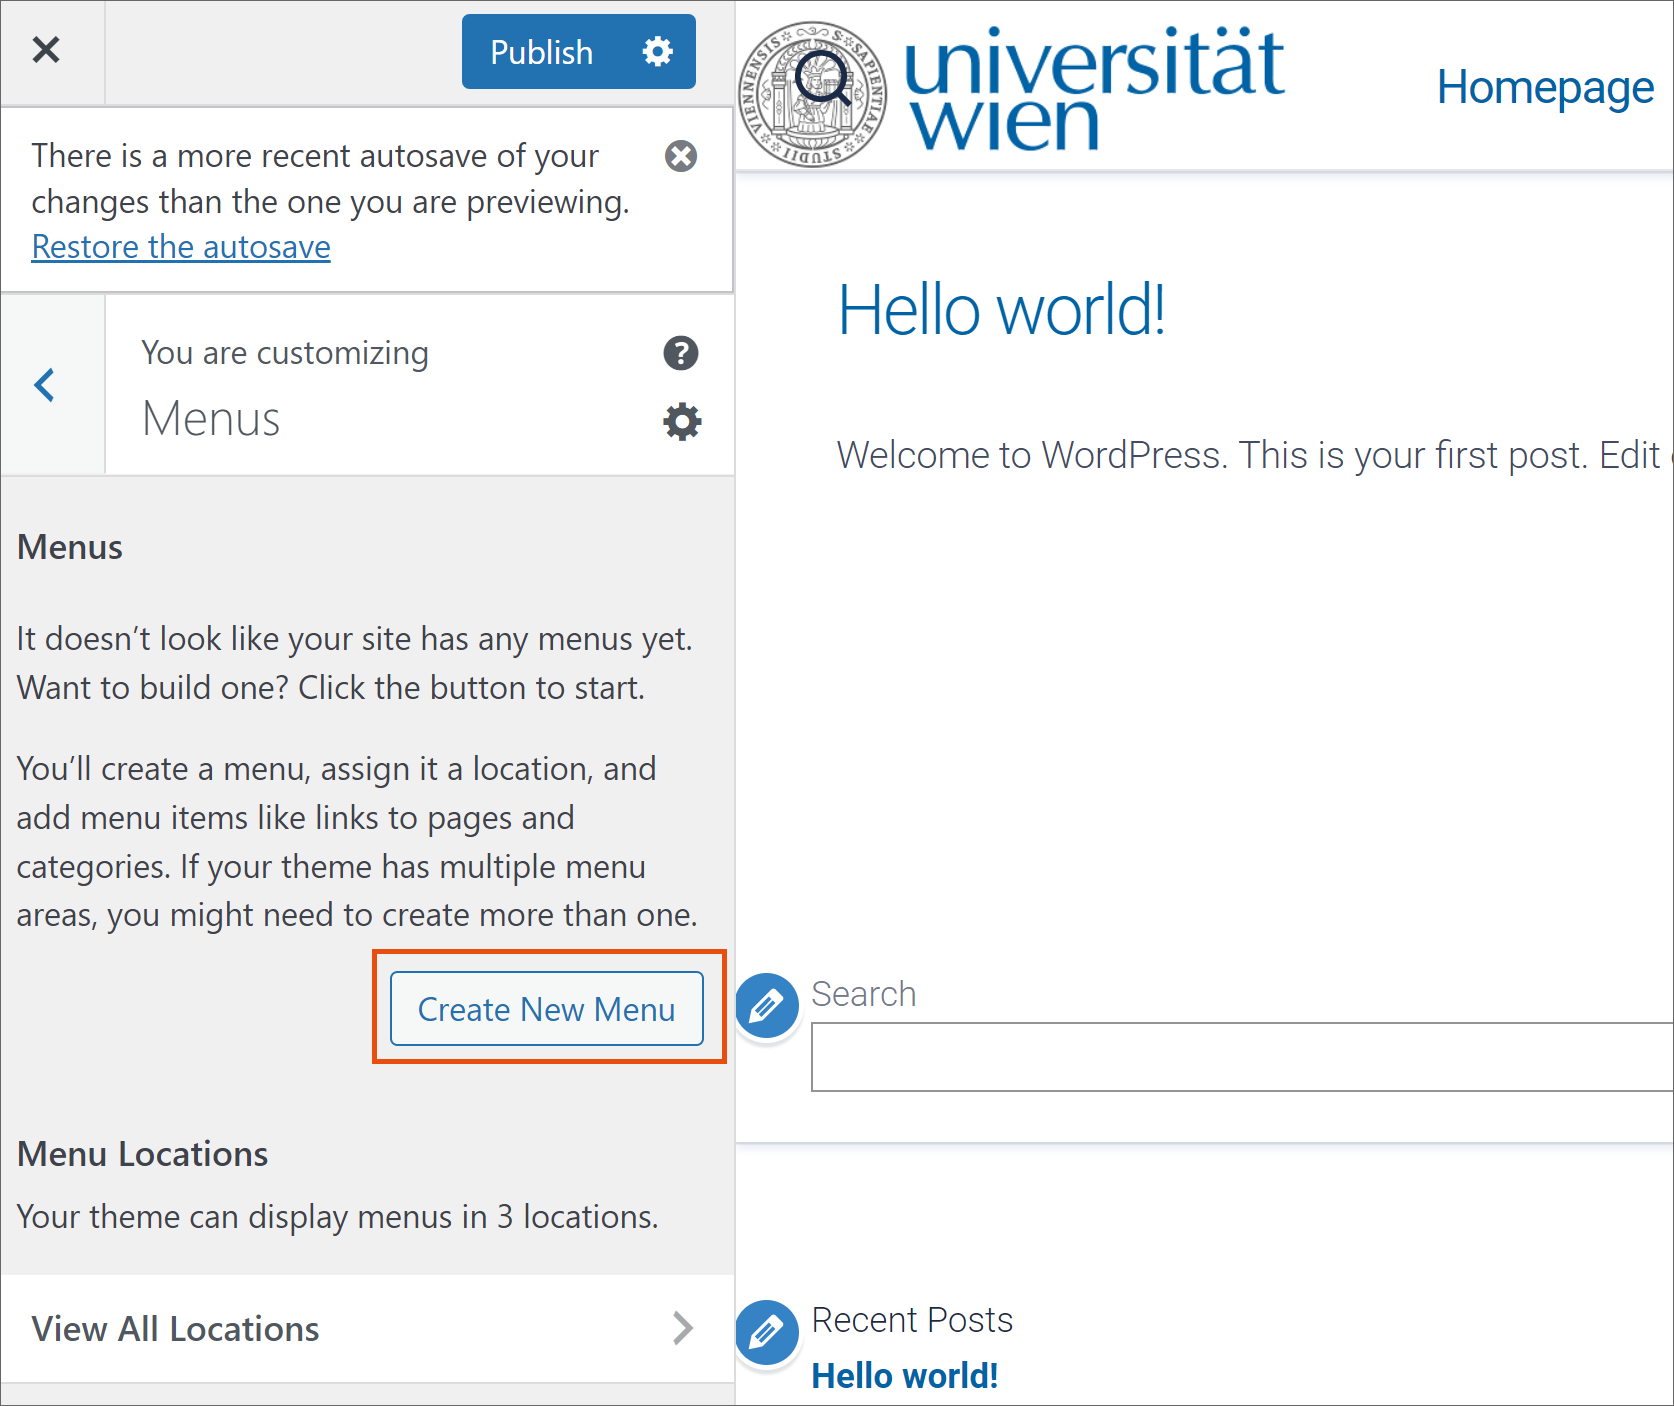
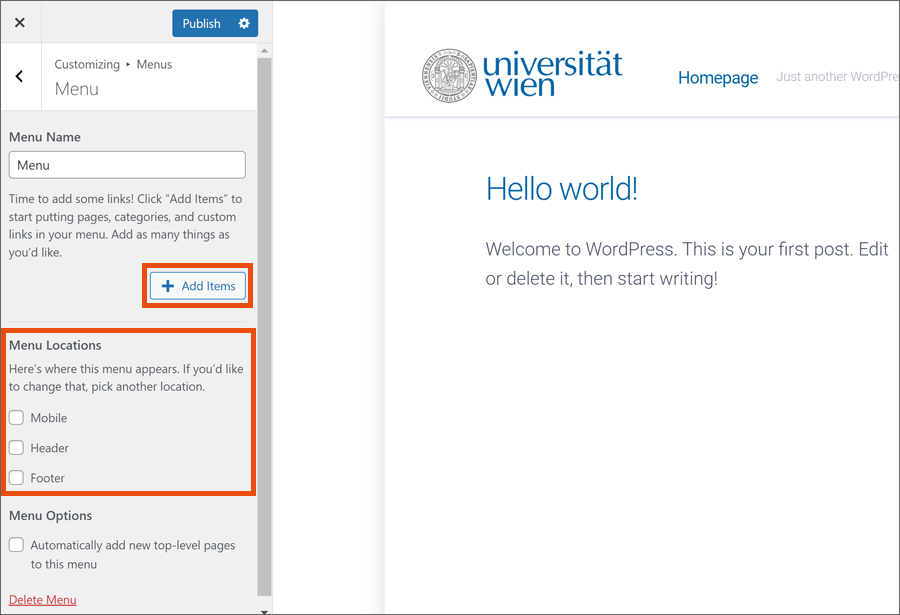
You can then add new items to the menu. Select the pages, posts, links and/or categories you wish to add to your menu and click Add to Menu.
At Menu Locations, you can select where the menu will be displayed on your website.
Managing users
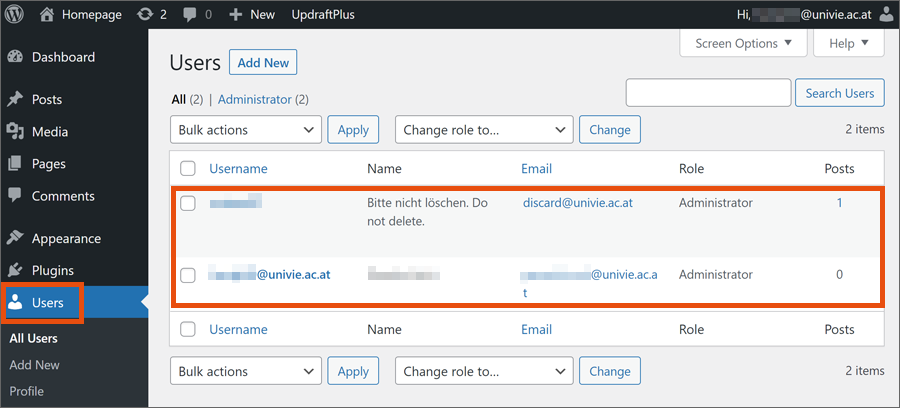
Click Users. You will see at least 2 list entries with the Administrator role::
- The webspace account
- Your personal u:account
Note
The webspace account must not be deleted from the user administration in WordPress. This is also indicated by the note Bitte nicht löschen. Do not delete. visible in the Name column.
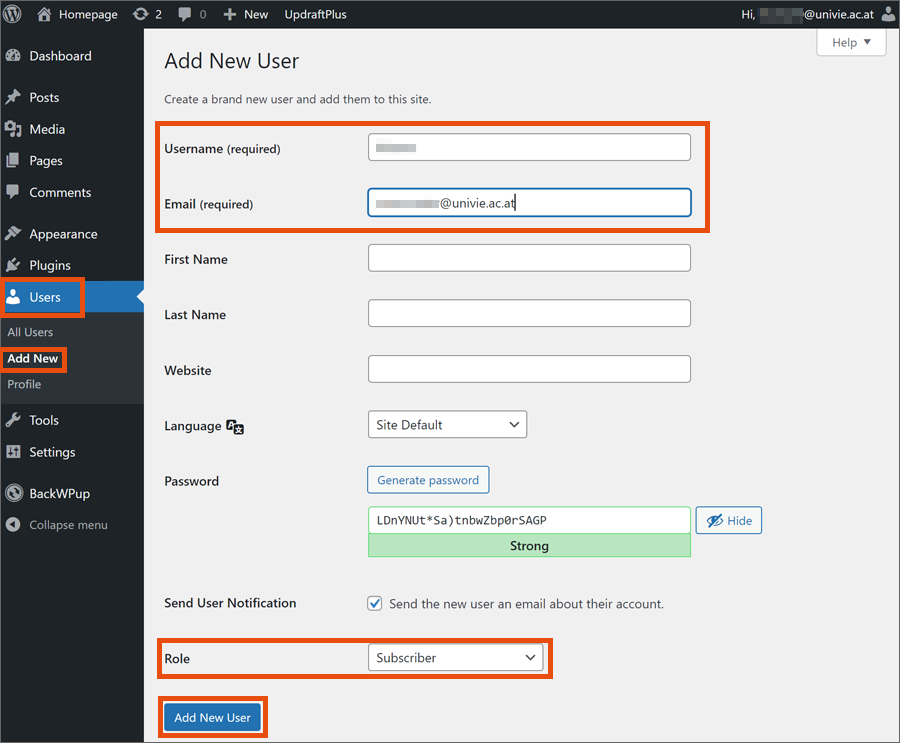
To add another user, click Add new.
Enter at least Username and Email.
Then select the Role you want to assign to the user and click Add New User.
Note
The user receives the desired role only for editing the WordPress website. They are not being authorized to manage the webspace under Webspace-Admin.
Managing widgets and plugins
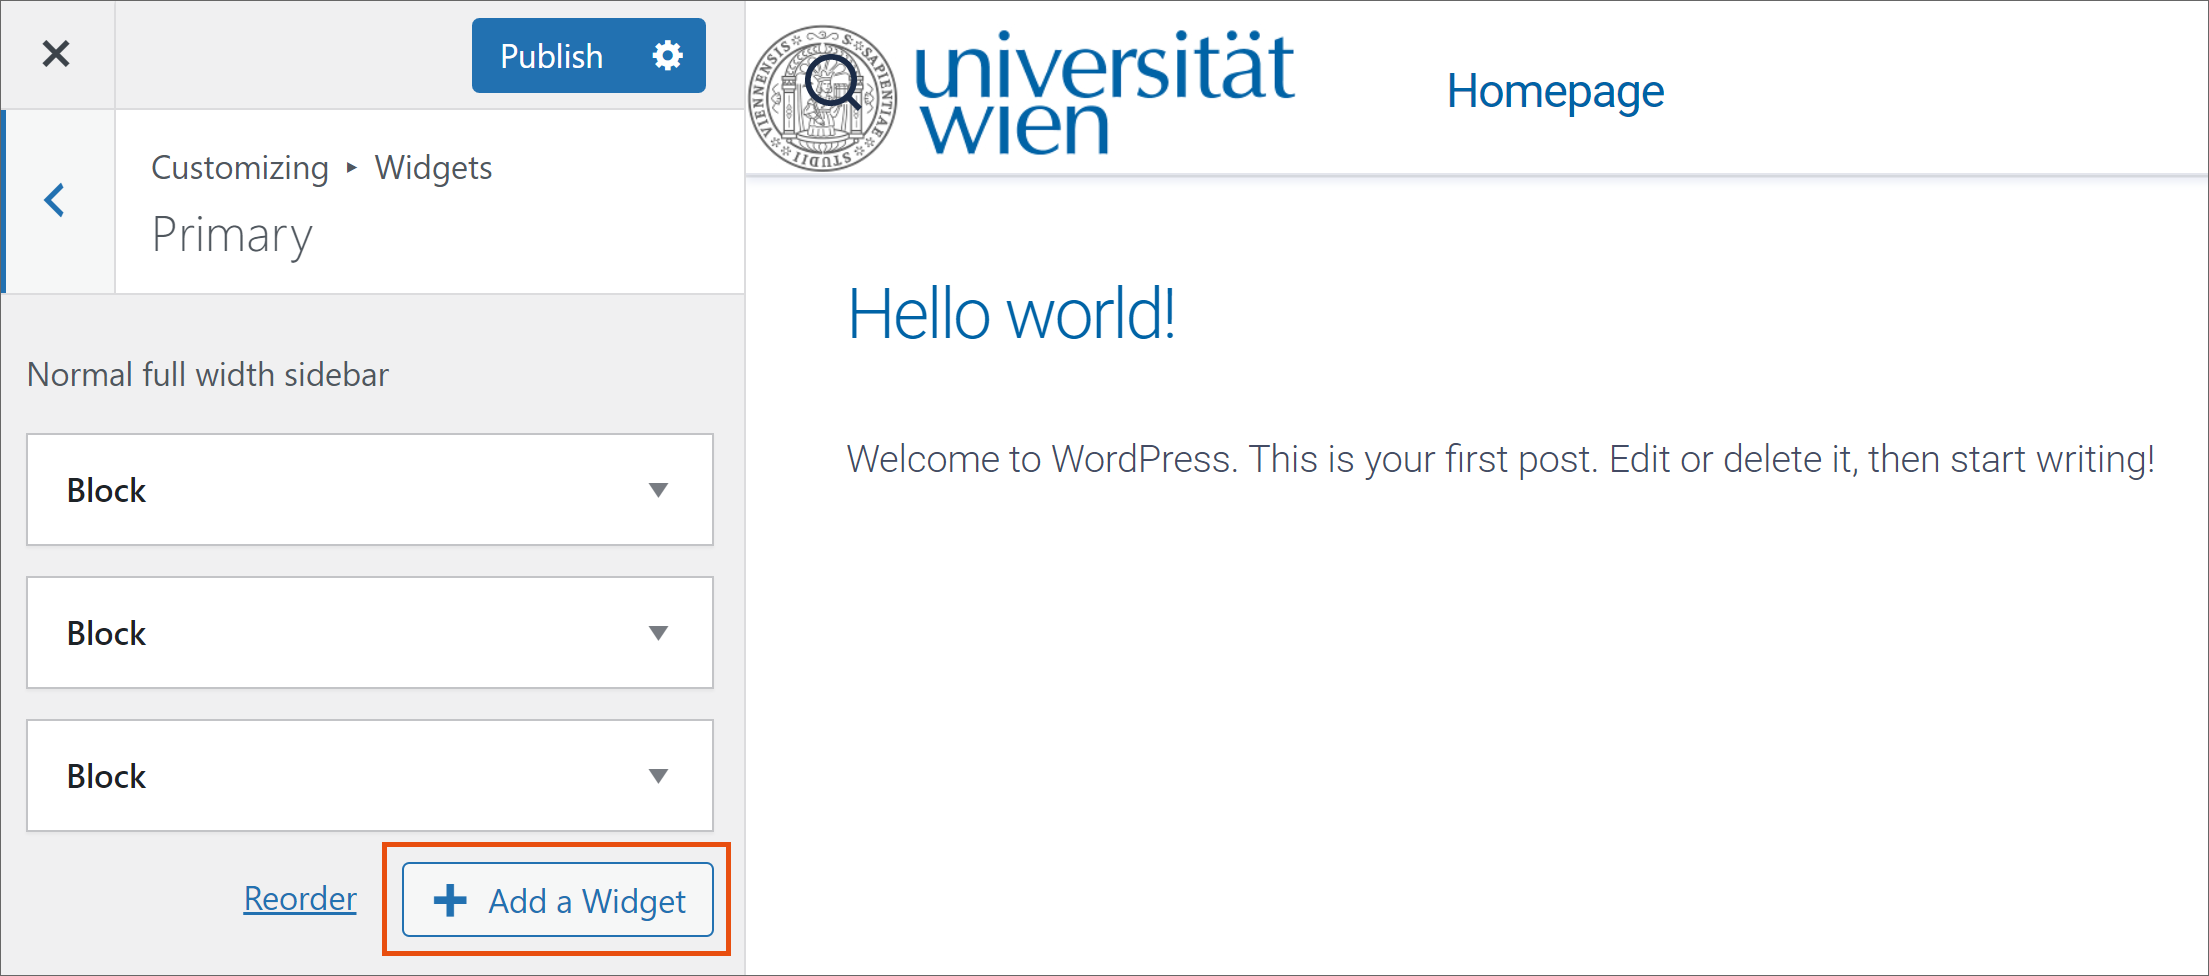
In the default setting, your website already contains blocks of information called widgets. These can be used to add further elements (audio content, images, etc.) to your website. To edit widgets, go to the Dashboard and click Appearance followed by Widgets.
To remove a widget, select it in the left sidebar and click Delete.
To activate further widgets, click Add a Widget.
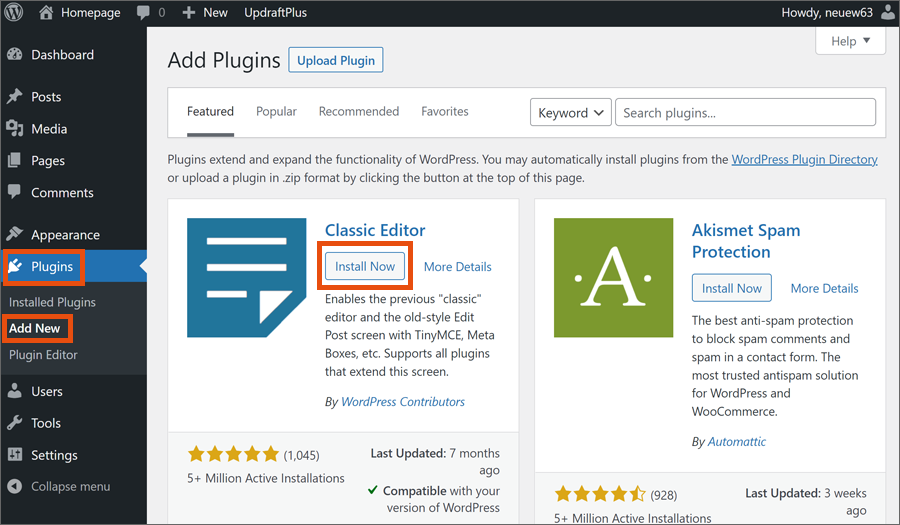
Plugins can be used to add functionalities to WordPress. Click Plugins in the left sidebar to see a selection of the available plugins. If you have found a plugin you would like to use, add it by clicking Install Now.
Note
Plugins are external software programs offered by WordPress (https://wordpress.org/plugins/), which is why their quality and functionalities can vary considerably. Please use them cautiously.
