Migrating web database
With the help of this instruction you can create a backup of your web database and restore it if necessary.
General information
You can perform the migration either with the tool phpMyAdmin in the web interface or on the command line. The phpMyAdmin variant is suitable for small to medium-sized databases, but does not work with very large databases. In this case, you can use the migration via the command line.
In both cases, the migration consists of four steps:
- First, a new database is created.
- Then a complete backup file of the old database (OLD_DATABASE) is made.
- This backup file is imported into the newly created database (NEW_DATABASE).
- Finally, the new data (database user, database password, database name and database host) are entered in the configuration file of the corresponding web application (Limesurvey, Typo3 etc.).
Setting up target database
To create a new database for the new webspace, log in to the Webspace Admin form with your u:account data. Under Manage Webspace, select the webspace you want to edit.
Click on the spy symbol to display the password of the web space account.

Log in to the Manage Web Database form with the web space account and password just displayed and create a database. The following data of the new database is displayed:
- Username of the webspace account (NEW_USERNAME), example: newfantasyname10
- the corresponding password (NEW_PASSWORD)
- Database name (NEW_DATABASE), example: newfantasyname10
- Database host (NEW_HOST), example: newfantasyname10.mysql.univie.ac.at
Migration via web browser (phpMyAdmin)
This type of migration is suitable for small to medium-sized databases. If your database is too large, the backup will abort with a timeout error message. In this case, try the migration via the command line or contact the ZID Helpdesk.
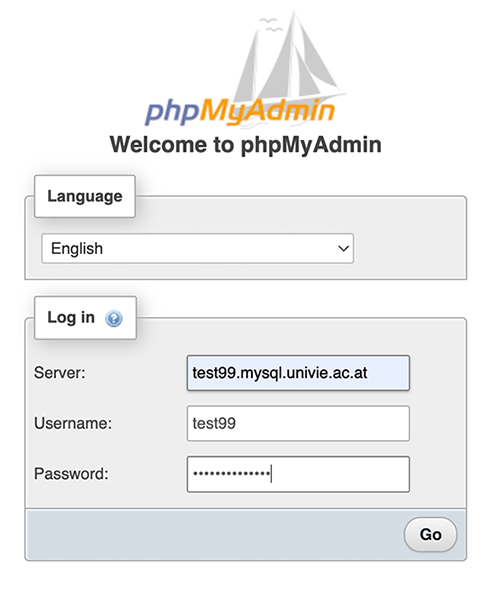
Log in with the data of the old database (OLD_USER, OLD_HOST and OLD_PASSWORD) in the Web Database Admin form.
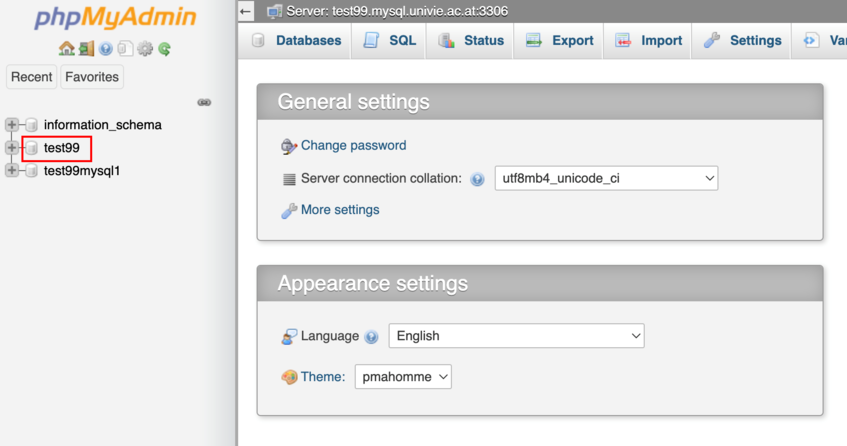
Select the desired database in the left column. After the selection, the tables of the database contained in it are displayed in the menu and in the main screen.
Click on Export in the top right-hand corner. Leave all options at the preset value and export the database with the Go button.
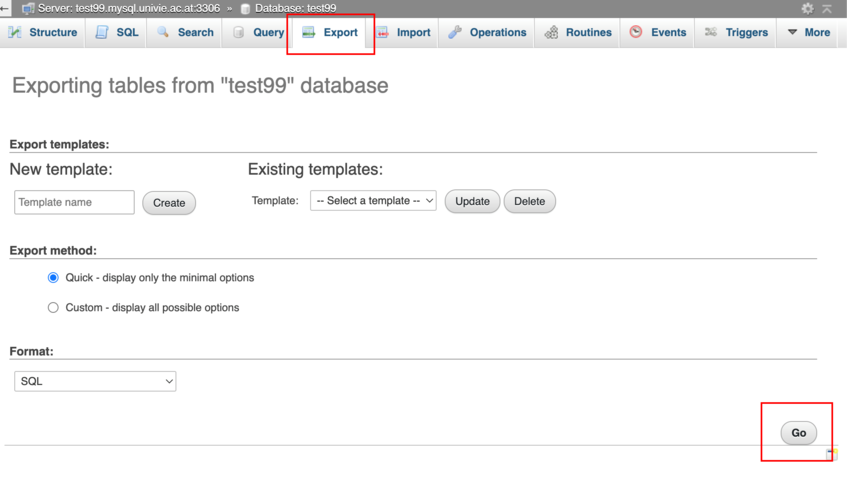
Save the created file on your computer and exit phpMyAdmin.
In the next step, log in to the Web Database Admin form with the login data of the new database (NEW_USER, NEW_PASSWORD and NEW_HOST).
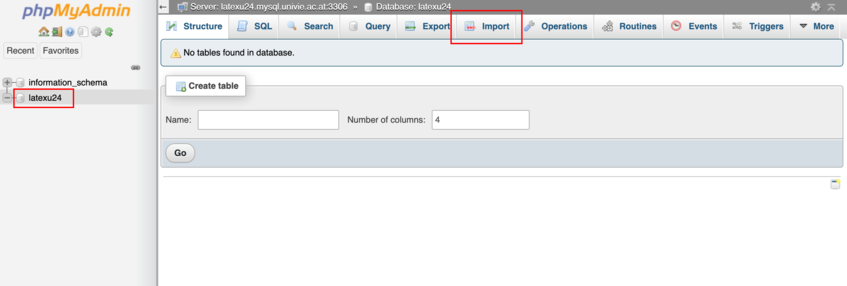
In the left column, select the new database into which the content of the old database is to be loaded. No tables should be displayed, this database should be completely empty.
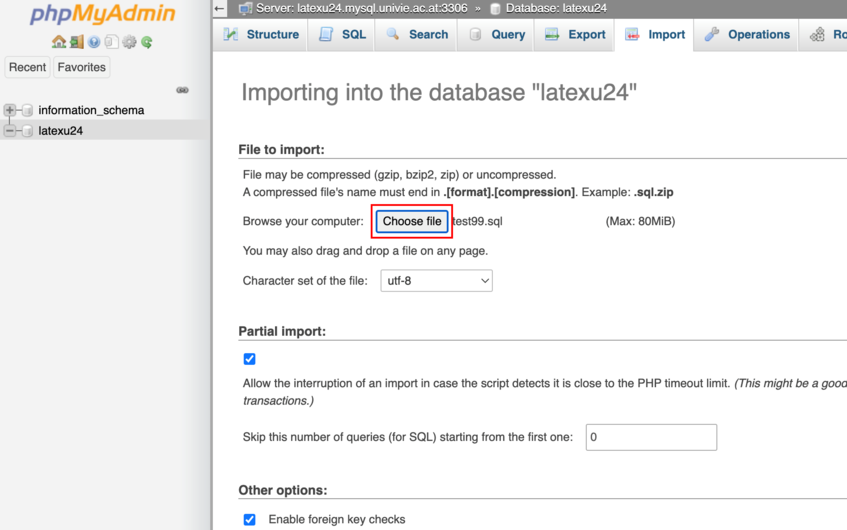
Then click on Import at the top right.
Under Choose file, select the database backup file created in the first step and leave the other settings at the default value.
Click on Go to load the contents of the backup file into the new database.
Now OLD_USER, OLD_DATABASE, OLD_HOST and OLD_PASSWORD must be replaced by NEW_USER, NEW_DATABASE, NEW_HOST and NEW_PASSWORD in the configuration file of the associated web application.
If you want to be sure that the old database is no longer used, you can delete it permanently via the form Manage Web Database.
Migration in the command line
In webspace-access.univie.ac.at (e.g. in the host) create via SSH with the following command a complete backup file of your database:
mysqldump -u OLD_USER -h OLD_HOST -pOLD_PASSWORD OLD_DATABASE > sicherung.sql
There must not be a space between the -p and the old password.
The created backup.sql file is now imported into the new database:
mysql -u NEW_USER -h NEW_HOST -pNEW_PASSWORD NEW_DATABASE < sicherung.sql
Same as before, there must not be a space between the -p and the old password.
Now replace OLD_USER, OLD_DATABASE, OLD_HOST and OLD_PASSWORD in the configuration file of the corresponding web application with the corresponding NEW_USER, NEW_DATABASE, NEW_HOST and NEW_PASSWORD.
If you want to be sure that the old database is no longer used, you can delete it permanently via the Manage Web Database form.