Creating resources
The Zentraler Informatikdienst (ZID) is only responsible for the administration of the Azure environment and the allocation of permissions. You have to configure and manage the Azure services and resources that you want to use by yourself. This user guide helps you to set up resources in Azure via a browser.
Note
Alternatively, you can create resources programming controlled (e.g. with Azure CLI, PowerShell, REST API).
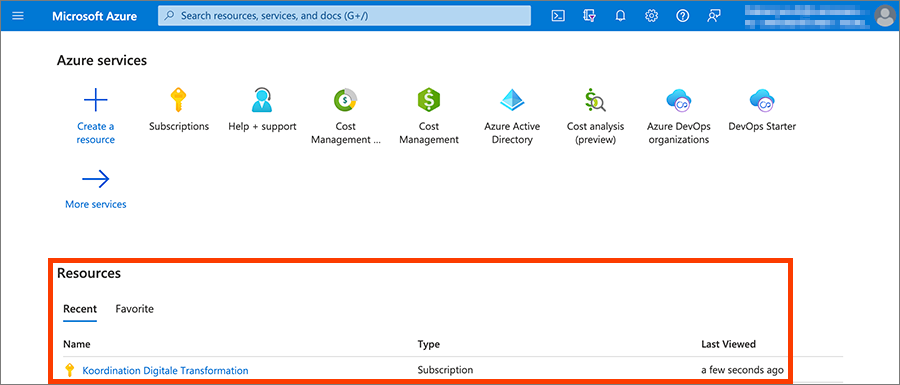
After you have logged in to Azure via your browser and have selected the right environment, you can see the following view. The resources area shows the Azure subscription or the Azure resource group you are authorised for.
Resource groups are containers with Azure resources, similar to a folder for files on your computer. To create resources in Azure you will need at least 1 resource group. If you are already authorised for a resource group, you can skip the next step and continue with the section Creating resources.
Creating resource group
If you are authorised for a full subscription, you have to create a resource group:
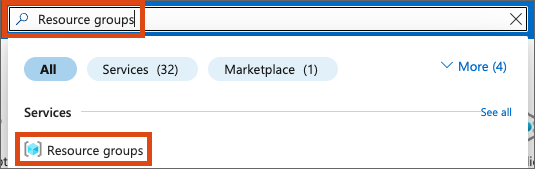
Enter the term Resource groups in the search bar and select the search result with the same name.
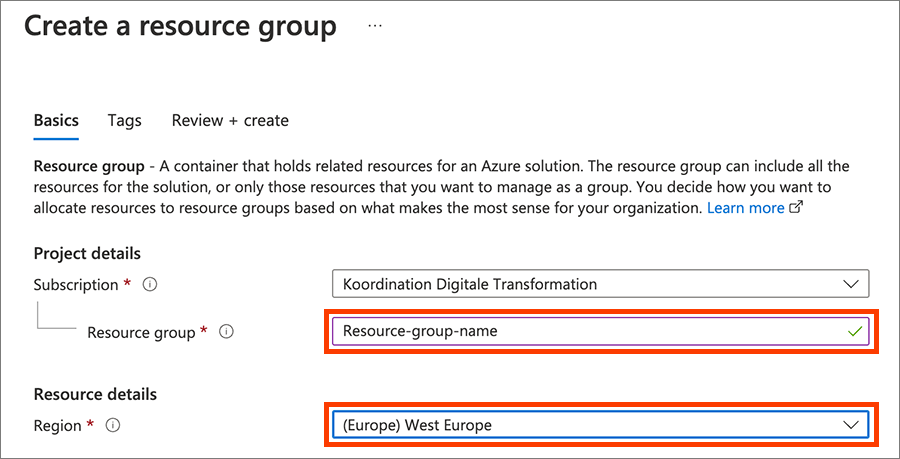
Click Create.

In the field for Resource group type in a name and select a European location in the Region drop-down. Then click Next.
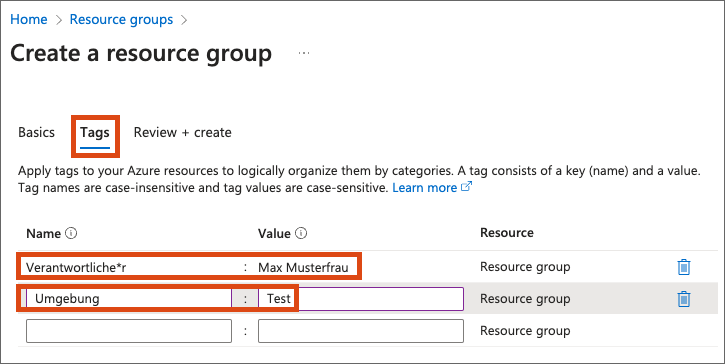
In the Tags tab, the tags Verantwortliche*r (person responsible) and Umgebung (environment) must be set due to the Terms of Use. To do this, enter:
- in the Name column, enter the tag Verantwortliche*r and in the Value column, enter your name or the name of the main user for this resource group.
- in the Name column, enter the tag Umgebung and in the Value column, enter one of the following 4 values that is most suitable for your application scenarios: Prod, Test, Dev or Lehrveranstaltung (course).
Click Review + create and then, after successful review, click Create.
The resource group is created within a few seconds and will be visible in Resource groups. You can now create resources in this resource group.
Creating resources
This section explains how you create a virtual computer within a resource group. The process can vary with each Azure service, however the menu guidance stays consistent.
Select the desired resource group and click Create.

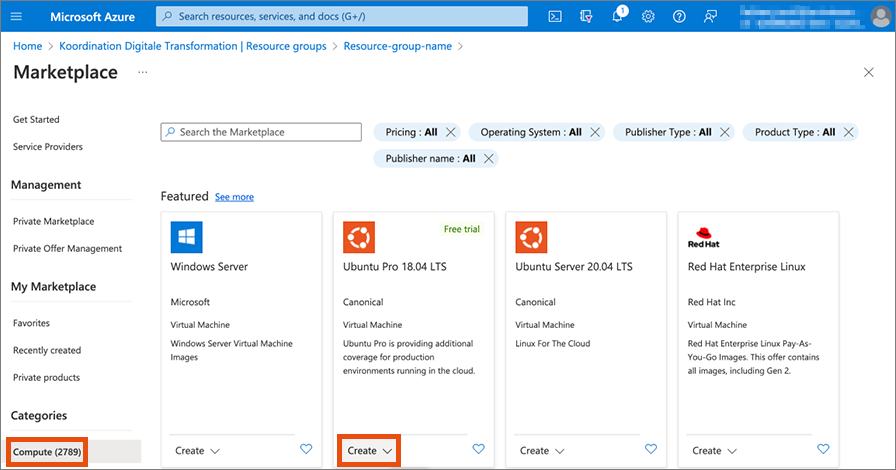
The Azure Marketplace opens. From here you can make use of all available Azure services.
- For virtual computers select the category Compute on the left.
- On the right, select a product that suits you.
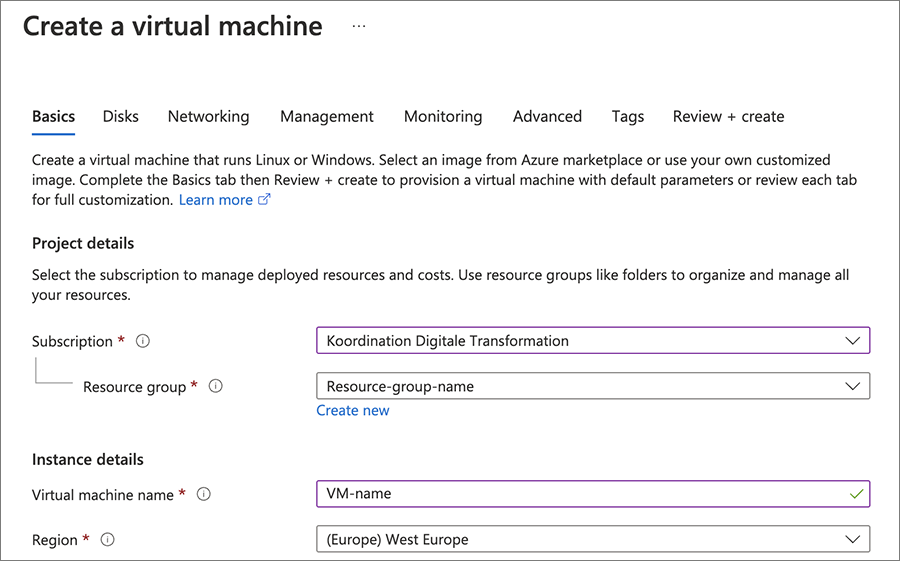
The configuration menu opens. Make sure you have selected the correct resource group and then configure your virtual computer as desired. After you have filled out all service-specific fields, click Review + create and then Create.
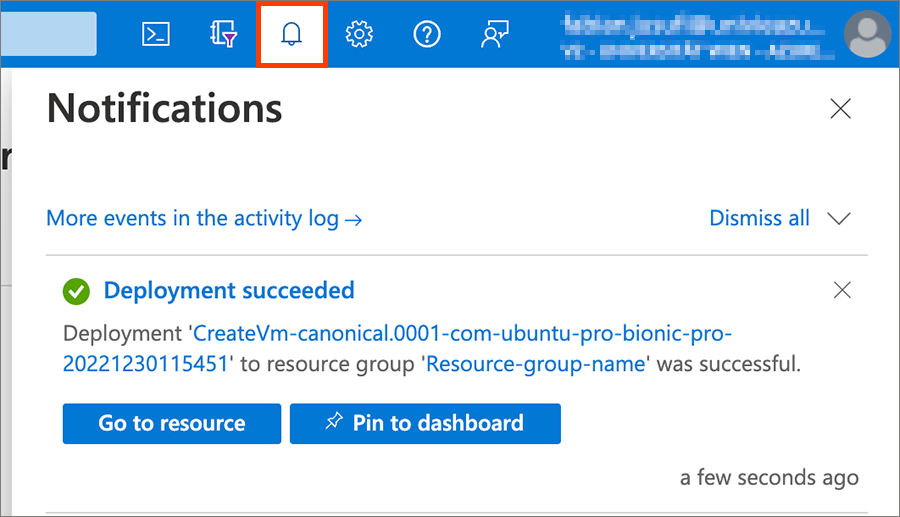
The virtual computer will be created within a few minutes and will then start. As soon as the service becomes available you will receive a notification on the top right in the portal via the bell symbol.
Alternatively, you can search for and create resources via the search bar:
- Type in the desired term in the search bar.
- Click on the appropriate search result to open the configuration menu.
Note
Make sure you have selected the correct resource group during the creation process.
