Editing folder structure, form, e-mails and submit page
This user guide will help you create a meaningful folder structure for your forms, edit forms, create multi-page forms, and edit the e-mails and submit pages.
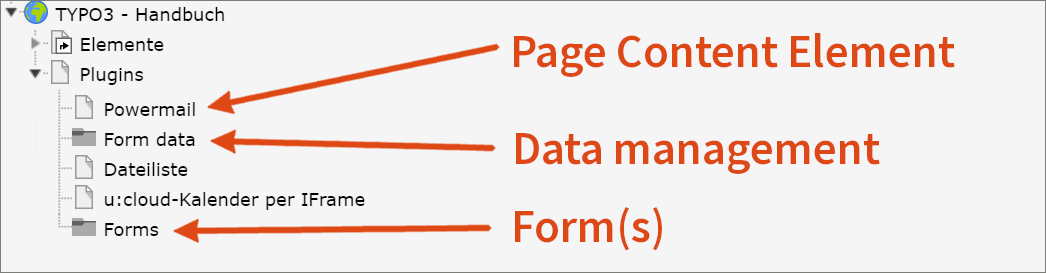
Creating a folder structure
A meaningful folder structure could be to store your forms in a central folder. Under each page where you use a form, you create a folder and store the form data in it.
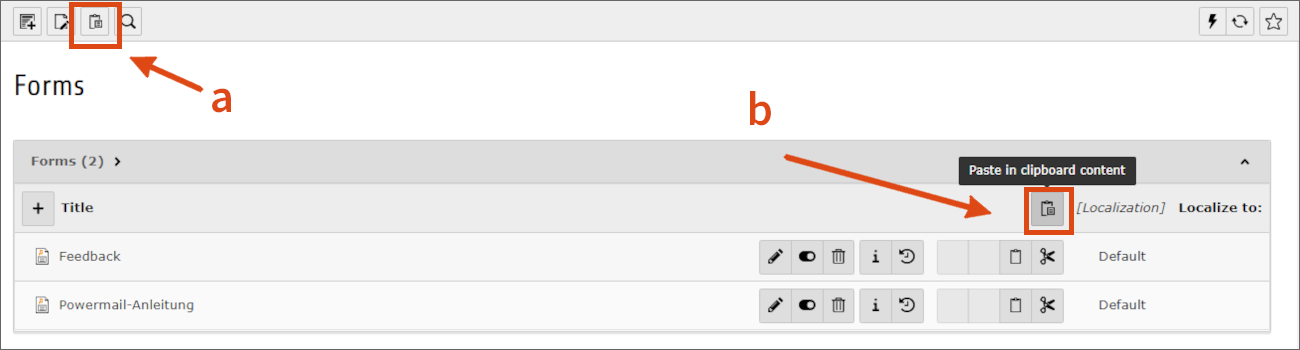
To move a form, cut it in the module List. Then switch to the destination folder and click the Paste in clipboard content icon in the gray bar above the working area. If the folder is empty, only the icon under a is available.

You define where the reply e-mails are saved in the page content element under the Plugin – Main Settings tab.
Here you can not only choose which form is used, but at the very bottom you can also set a folder as the location for the e-mails. So you can use the same form several times on your page and save the responses in different folders.

Editing a form
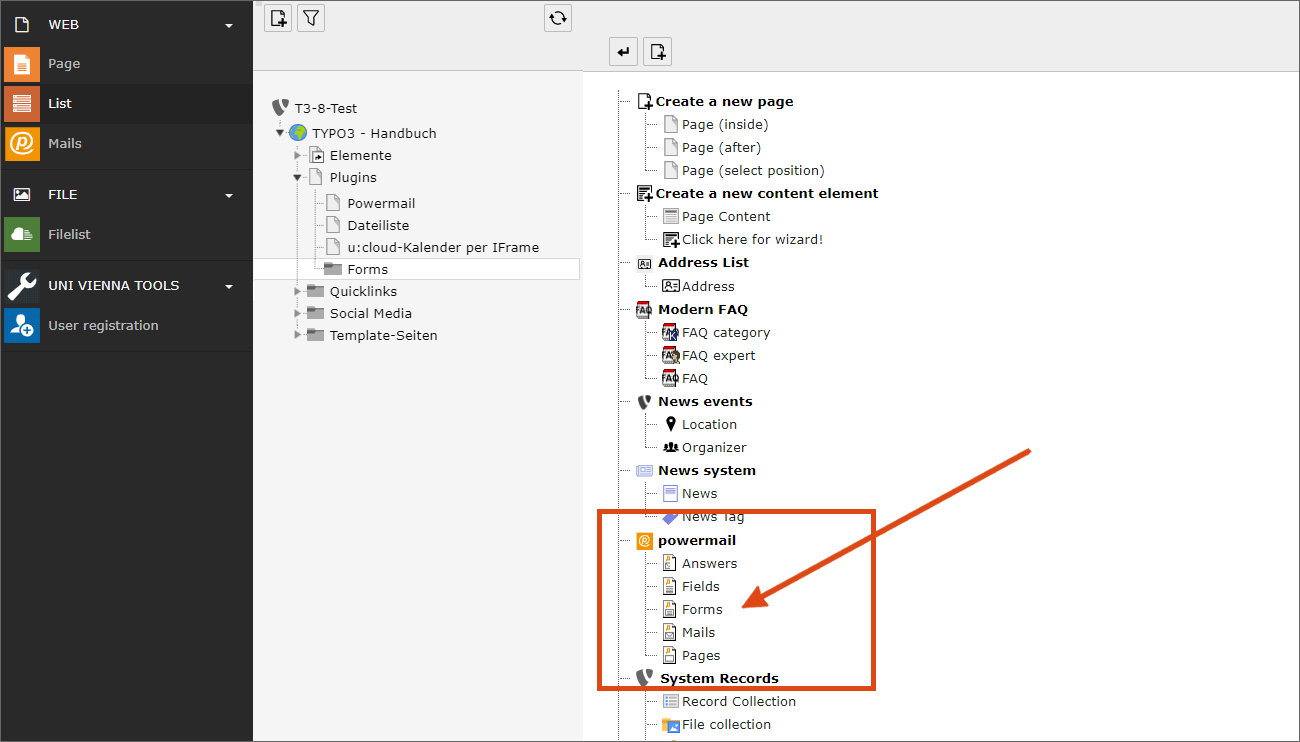
In practice, you will create and edit your forms using the module List rather than the page content element:
- In the page tree, select the folder where you want to store your forms.
- Click the Create new record icon above the working area.
- Then select Forms in the Powermail section to create a new form.
Note
Entries of the type Answers, Fields, Mails and Pages cannot be usefully created directly in the module List. The result would be orphaned entries that cannot be subsequently assigned to a form. However, you can edit form fields that have already been created directly; the assignment to the form is retained.
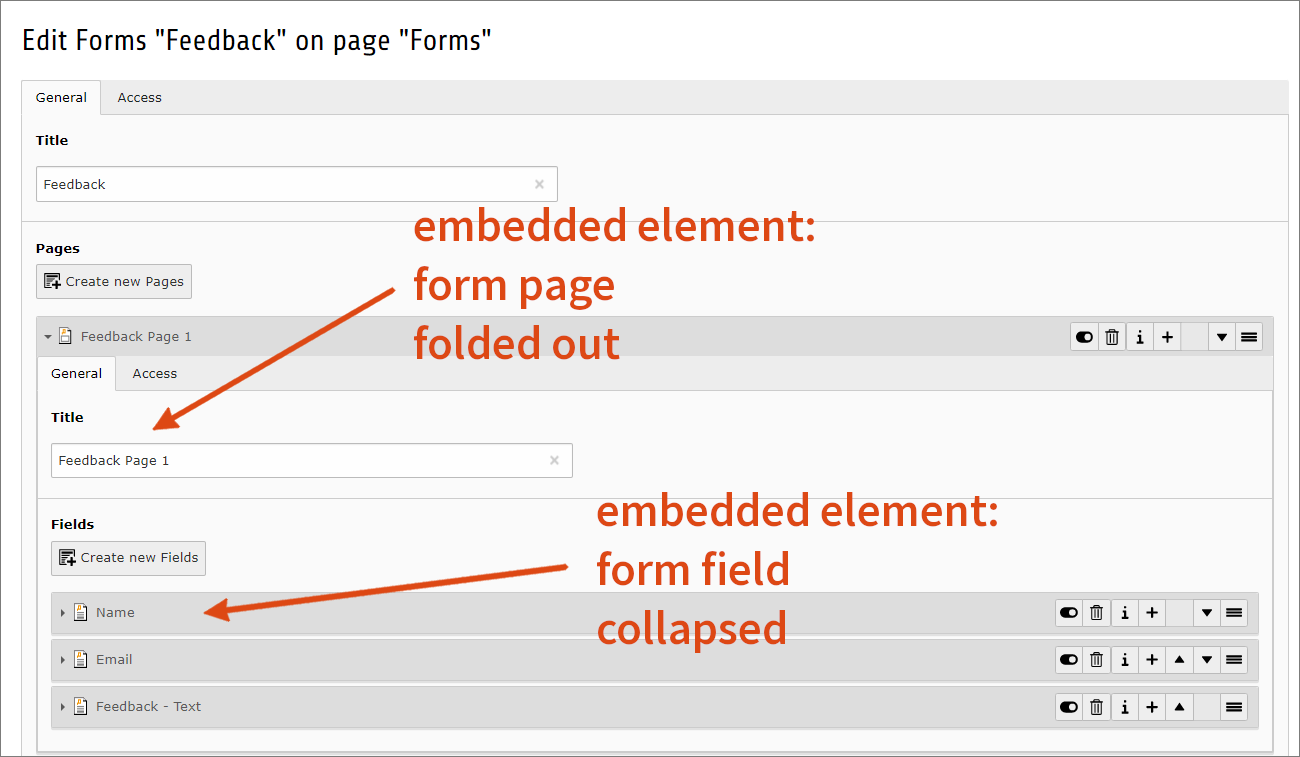
The form itself has:
- a field for the label
- a button to create new form pages
These form pages also have:
- a field for the label
- a button to create form fields
TYPO3 displays these embedded records as elements. Each embedded element starts with a gray bar and can be expanded and collapsed by clicking on it. In addition, various icons appear on mouse-over, for example to delete, move or hide the element.
The form fields have 3 tabs: General, Extended and Access.
Under General you will find the settings for the field type and the checkboxes to specify whether it is the name or the e-mail address of the form sender. You have already learned about these fields when creating the first form.
Under Extended there are a number of fields that you can use to control validation and set default values. You can find these functions and a detailed overview of the different form field types under Form field types.
Creating a multi-page form
Longer forms can be created with multiple pages to save users from scrolling. The individual form pages are displayed as tabs:
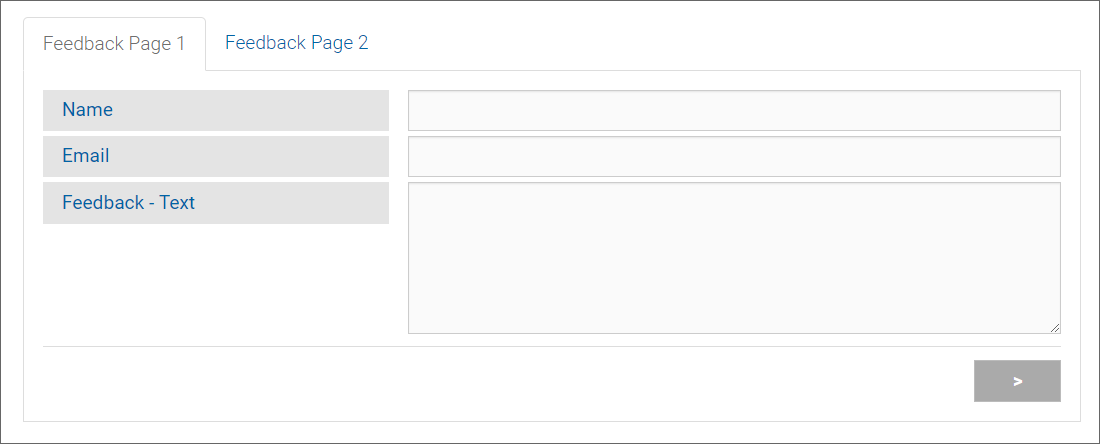
You have already learned that you always have to assign the individual fields to form pages. Normally, the labels of these form pages are not displayed.
However, as soon as you activate the option Do you want to split each page (step by step)? in your page content element under the Plugin – Main Settings tab, you will get the form view with the tabs. The label of the form page is used as the caption.
Note
Use this view only where necessary due to the length of the form, and always position the submit button at the end of the last form page.
Editing e-mails and submit page
The page content element for displaying and controlling your Powermail form has the following child tabs under the Plugin tab:
- Mail to Receiver: defines the e-mail you receive yourself
- Mail to User: defines the e-mail confirmation to the person filling in the form
- Submit Page: defines content of the web page after filling in the form
In all 3 cases the predefined text is {powermail_all}. This placeholder will be replaced by a table with the submitted form data when filling out the form.
You can add any response text here. In addition to {powermail_all}, placeholders are also available for the data entered. The variable name can be found at the bottom of the form field under the Extended tab. It usually corresponds to the lowercase name of the field in curly brackets, for example {name}.
Note
If your form contains hidden fields, they will be included in the {powermail_all} placeholder and displayed both on the submit page and in the e-mail confirmation. Therefore, you should only use this placeholder for the e-mail to the recipient.