Creating a form
This user guide will help you to create forms using the Powermail plug-in.
Powermail is a tool that lets you create forms. The form data will be e-mailed to both you and the person who filled out the form for confirmation. In addition, you can query and export the collected form data in the backend via its own data management.
Powermail therefore consists of 3 components:
- Form: contains the details of the fields to be displayed
- Page content element: regulates, among other things, the sending of the response e-mails
- Data management of the received form data
Note
Despite their functionality, Powermail forms are not suitable to handle complex tasks like a course registration. Therefore, only use the tools provided by the ZID for course registrations.
Creating a form
Filling out a Powermail form is like sending a standardised e-mail: The person filling out the form sends you their form data. Therefore, when you create a content element of the Plugins – Powermail type, you will find 2 tabs under Plugin labeled Mail to Receiver and Mail to User.
Note
If subject or e-mail address are missing, this disables e-mail sending. But TYPO3 saves the entered form data anyway and you can evaluate and export them (see below).
Mail to Receiver: the recipient is you. Therefore, enter your name, e-mail address (if more than one, then one e-mail address per line, separated by a break) and a subject here.
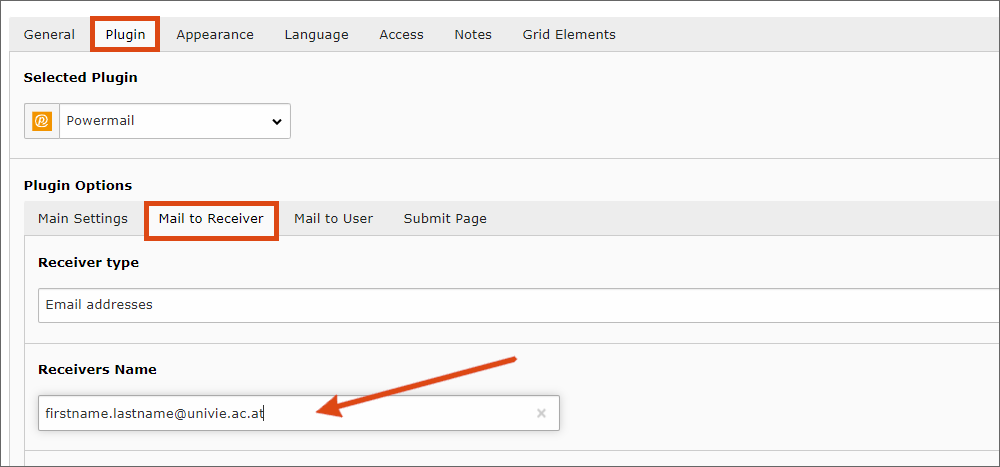
Then click on the Mail to User tab. Here you define the settings for the e-mail confirmation to the person who filled out the form. Therefore, you are the sender and must also enter your name, e-mail address and a subject.
The recipient details must be entered by the person completing the form. The corresponding form fields are necessary for this:
- To do this, click on the first tab labeled Main Settings. If no form has been created on your page yet, this area should look like the following image.
- Click the black plus to create a new form.
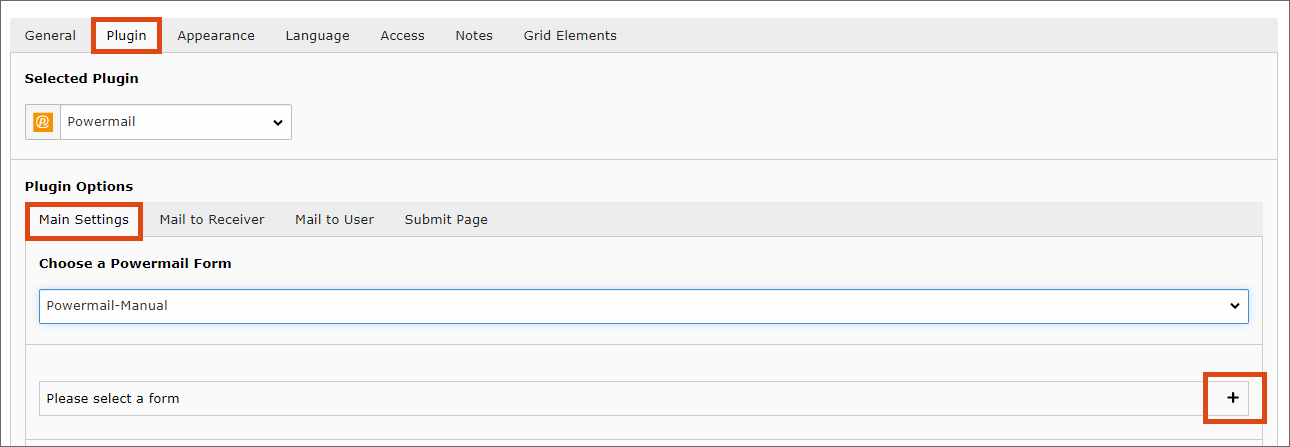
- Enter a name for the form in the Title field.
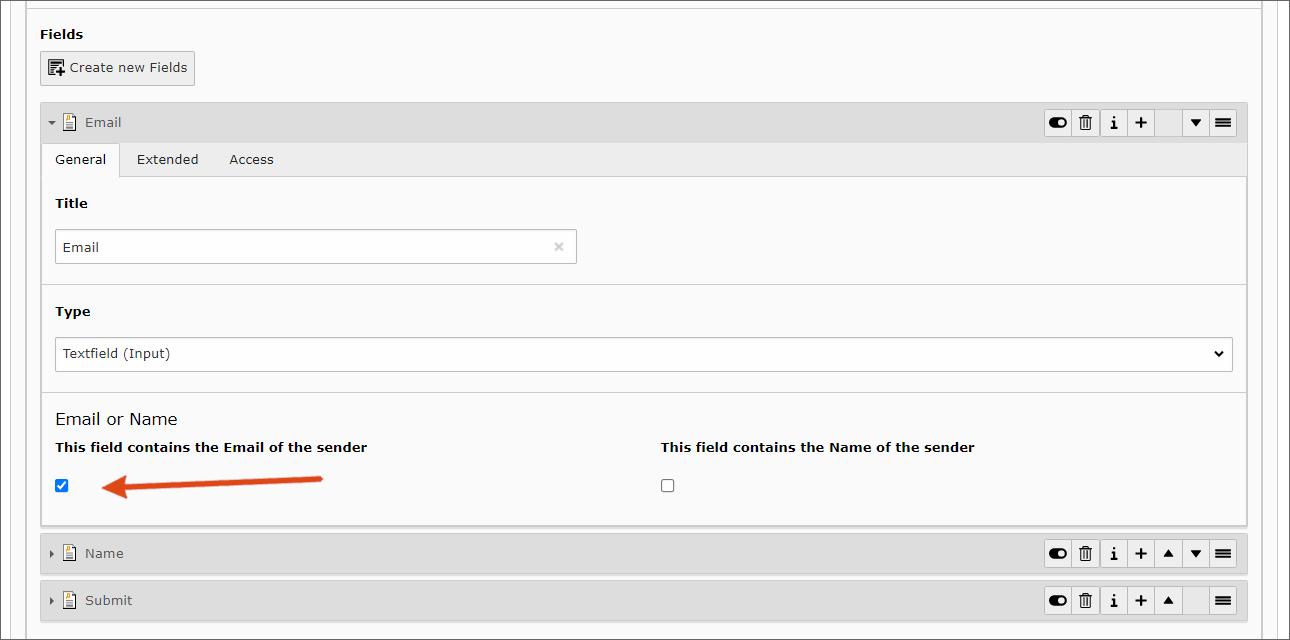
- Use the corresponding button to create form fields, for example, for the name, the e-mail address, and a button for submitting the form.
- For the name and e-mail address you can leave the default Type Textfield (Input), for the submit button select Submit field.
- Make sure that the checkboxes for This field contains the Email of the sender and This field contains the Name of the sender are selected for the corresponding fields.
You can then save the form and return to your page content element. Under the Plugin – Main Settings tab, your new form is now also (automatically) entered there and you can test it in the frontend.

Database
If users fill out the form in the frontend, 2 e-mails are sent with the completed data:
- to the e-mail address entered in the Mail to Receiver tab
- to the e-mail address specified by the person completing the form
Additionally, the entered data is stored in a database.
If you have created the form as described above, this data will be on the same page as your page content with the plug-in. In the module List you will see the following entries:
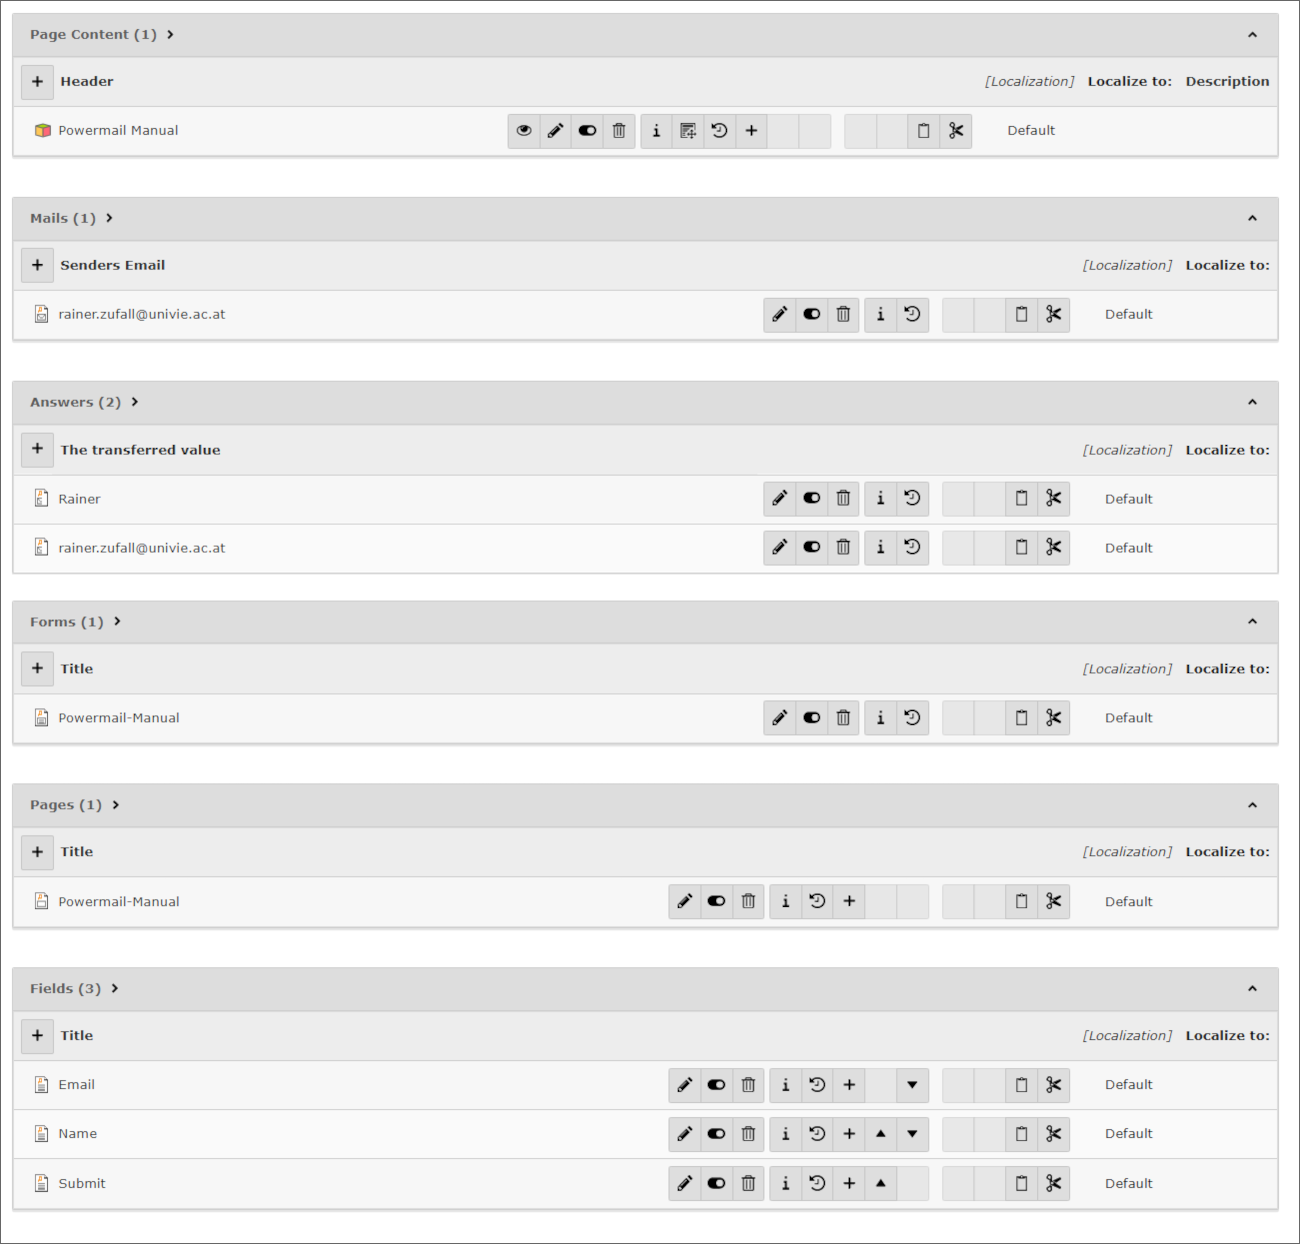
Powermail uses 5 different tables, as you can see in the picture: Mails, Answers, Forms, Pages and Fields.
Forms contain pages and pages contain fields. If you move or delete a form, this also affects the pages and fields it contains. The same applies to mails and the responses they contain.
You can save forms and mails in separate folders. Search and export functions are available for evaluating the responses.