Publishing a recording
This user guide helps teaching staff to publish recordings made in the u:stream lecture halls.
The most common way to publish recordings is in a Moodle course. You have 2 options:
- If you want to publish all recordings of a series automatically in Moodle, use the Moodle Activity u:stream and include all recordings with the Series ID. You can find information on this in the user guide Publishing series with u:stream activity.
- If you want to publish individual recordings of a series in Moodle, use the Moodle activity u:stream and include the individual recording using the Video ID. To find out how to do this, please refer to the user guide Publishing a single video with u:stream activity.
- Alternatively, you can publish the link to the player of the video in the Moodle course for individual recordings. This is described in more detail in the user guide Embedding the link to the recording in Moodle.
- You also have the option of embedding videos from PHAIDRA in Moodle. To do this, follow the user guide Publishing a video from Phaidra in Moodle.
Alternatively, you can publish the recordings outside Moodle, e.g. on websites or Typo3 pages of the University of Vienna. There are several possibilities for this as well, these are described in more detail in the user guide Publishing recordings outside Moodle.
Note
As soon as you make recordings available, students can watch them with a player. Downloads are not offered by default. However, students can generate downloads of the recordings easily with the right software. The ZID cannot prevent this technically.
Access to videos and livestreams of your series can be restricted to students from one or more Moodle courses if required.
Publishing recordings in Moodle
Publishing series with u:stream activity
- Open your Moodle course and go to Edit mode.
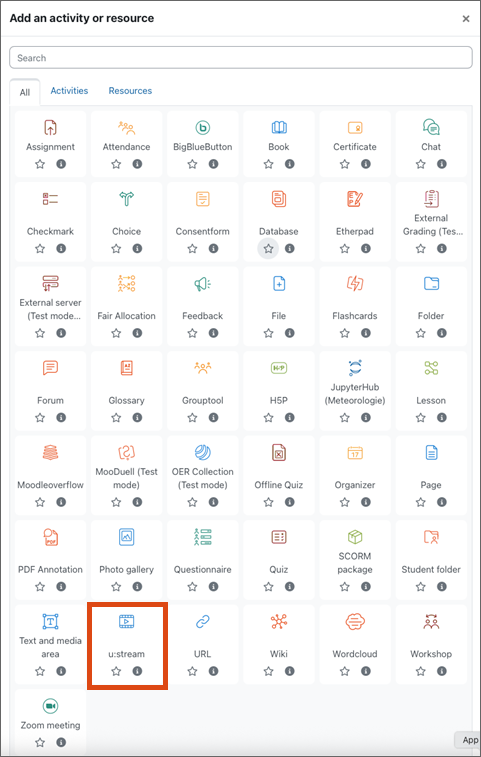
- In the desired subject block, select the field Add an activity or resource.
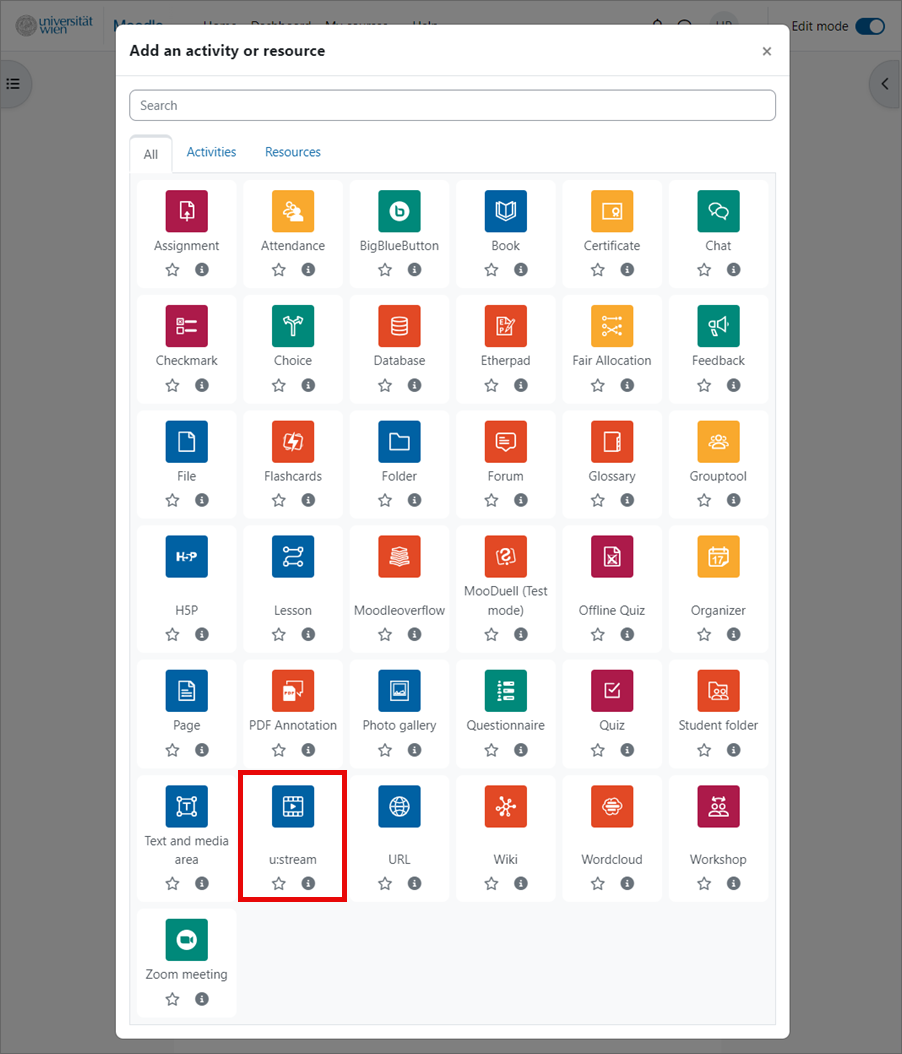
- A window opens. Select the u:stream activity.
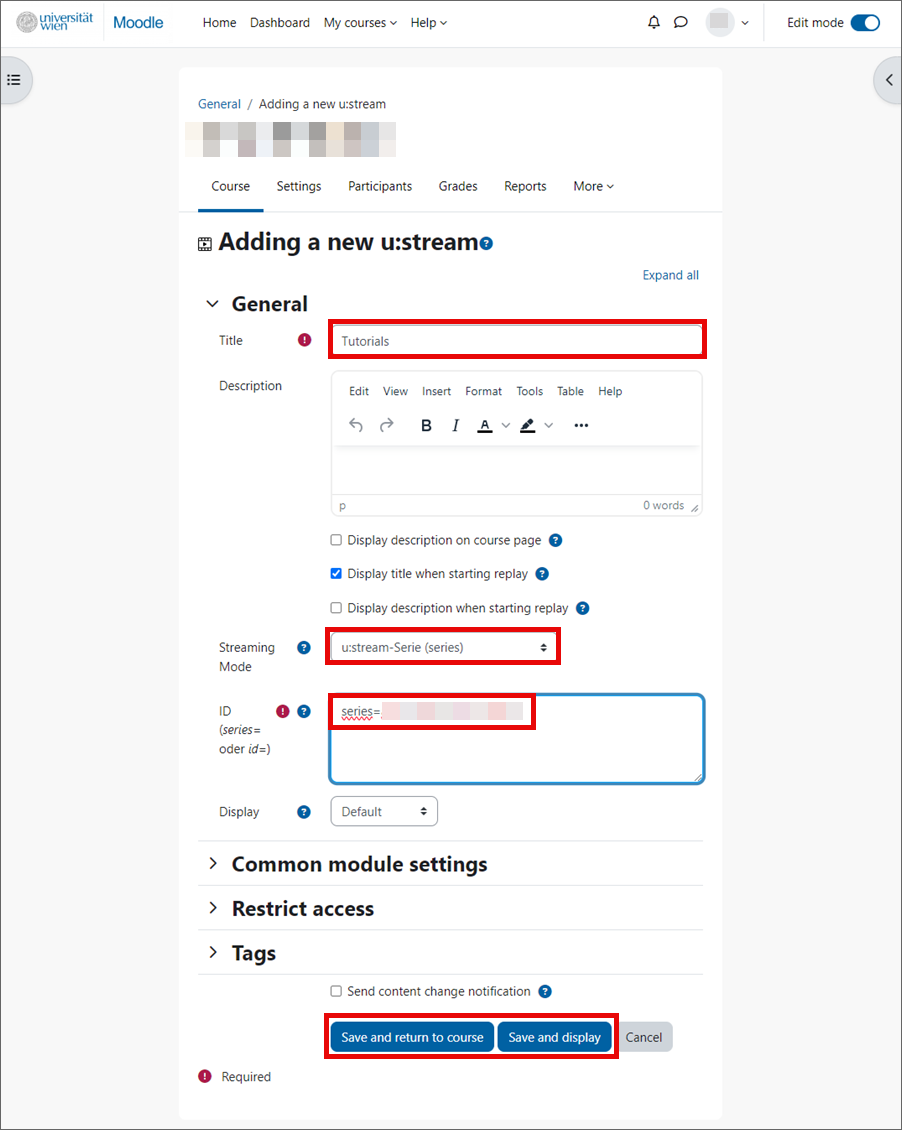
- Assign a descriptive Title.
- If required, you can add a description and display it in the desired place. You can use this field for legal notices to students, for example.
- Leave u:stream-Serie (series) as the Streaming Mode.
- Under ID, add the series ID (series= ...) that you received in the e-mail for registering the series for u:stream. Please enter the ID including series=.
- Under Display, select Default.
- Save the settings you have made.
All recordings of the particular course series are now automatically published in the activity as soon as the processing is completed.
Publishing a single video with u:stream activity
- Open your Moodle course and go to Edit mode.
- In the desired subject block, select the field Add an activity or resource.
- A window opens. Select the u:stream activity.
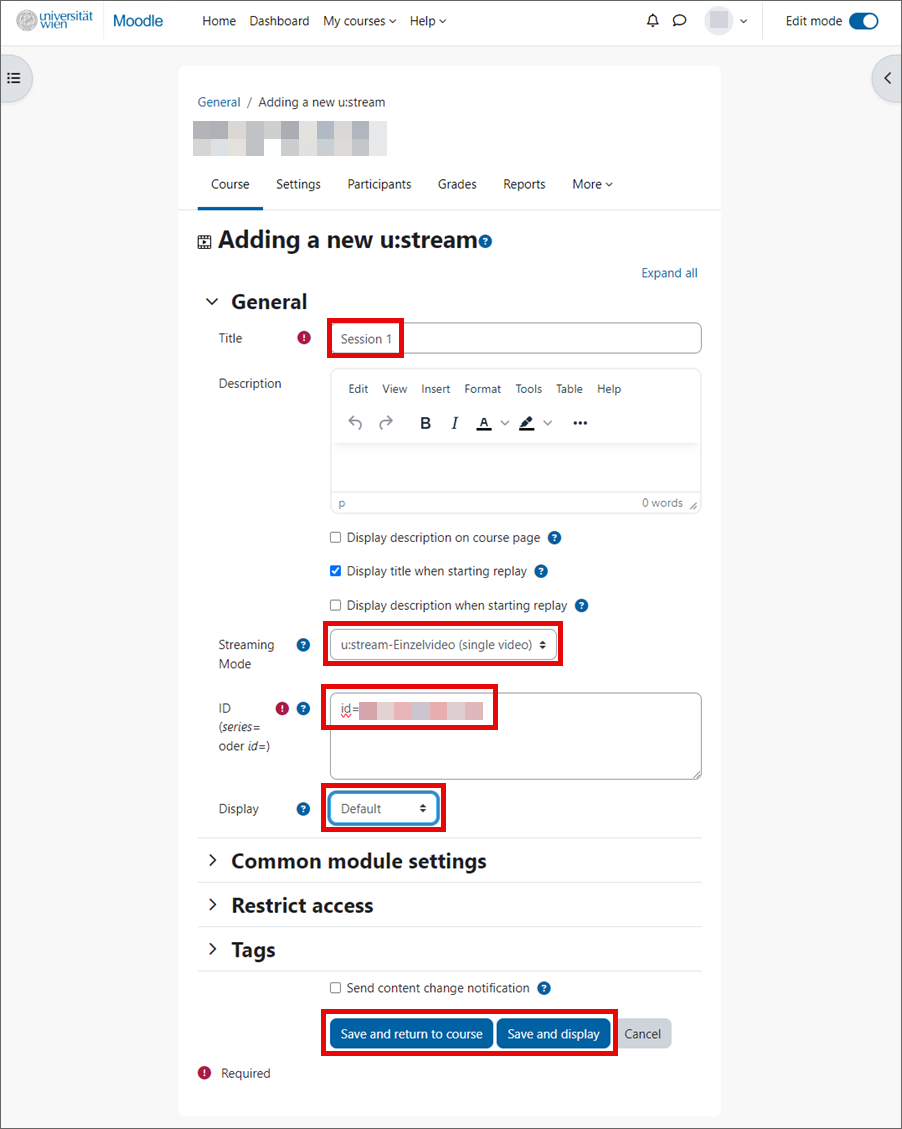
- Assign a descriptive Title.
- If required, you can add a description and display it in the desired place. You can use this field for legal notices to students, for example.
- Under Streaming Mode, switch to u:stream-Einzelvideo (single video).
- Under ID, add the video ID (id= ...) that you received in the e-mail confirming the successful processing of the recording or audio/video file. Please enter the ID including id=.
- Under Display, select Default.
- Save the settings you have made.
The recording can now be accessed via the u:stream activity.
Embedding the link to the recording in Moodle
- Open your Moodle course and go to Edit mode.
- In the desired subject block, select the field Add an activity or resource.
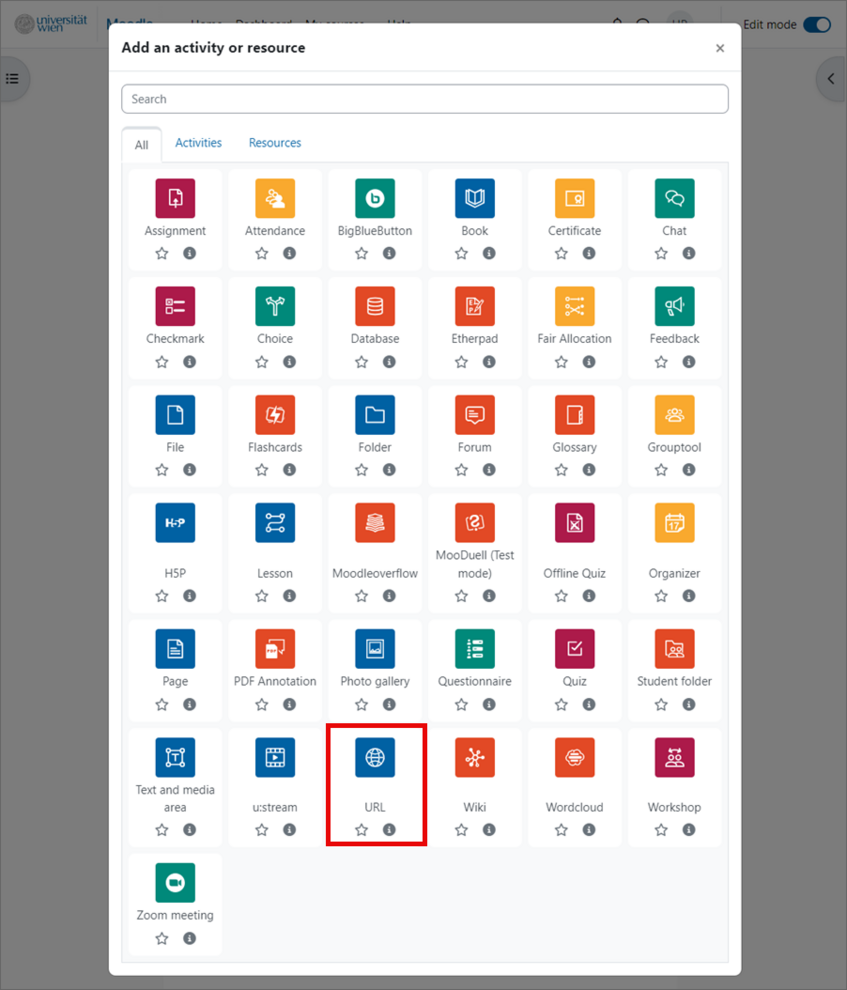
- Switch to the Resource tab in the window and select URL.
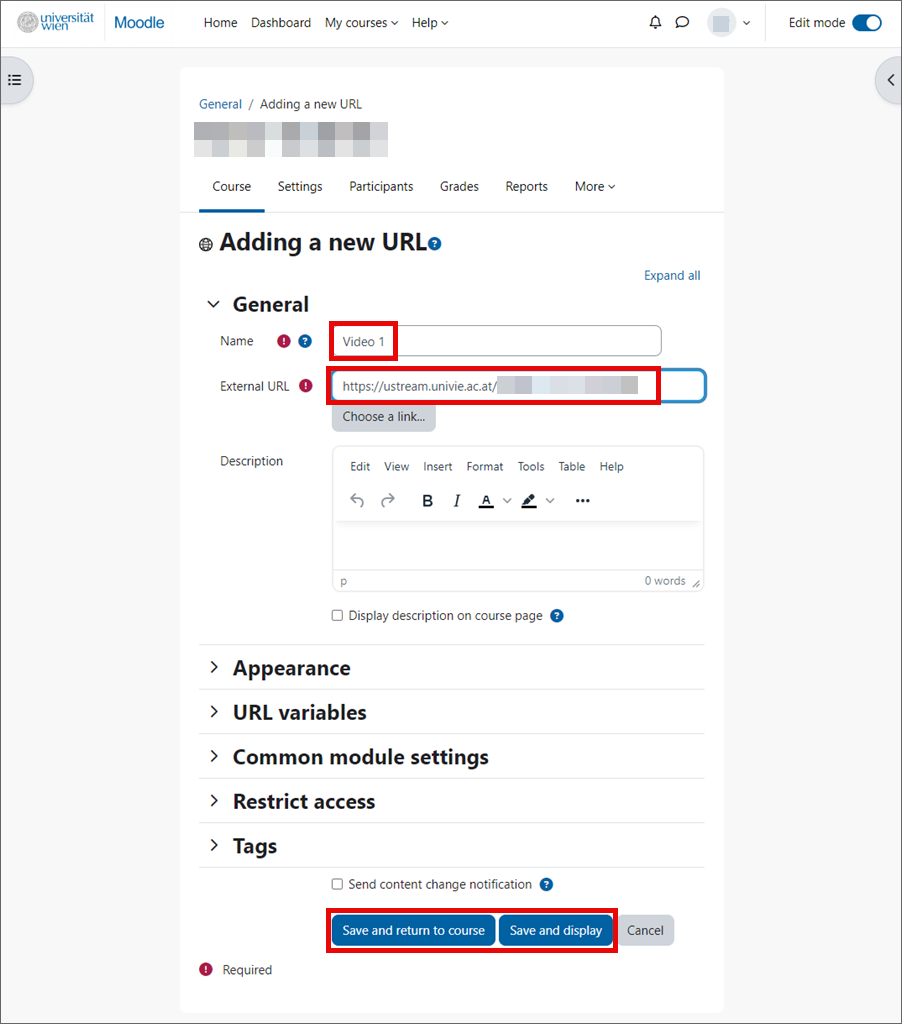
- Assign a descriptive Name.
- Under External URL, insert the link to the Player that you received in the e-mail for confirming the successful processing of the recording or audio/video file.
- If needed, you can add a Description, you can have the Display description on course page. You can use this field for legal notices to students, for example.
- Finally, save.
The recording can now be accessed via the u:stream activity.
Publishing a video from PHAIDRA in Moodle
You can also embed videos from the PHAIDRA repository in Moodle.
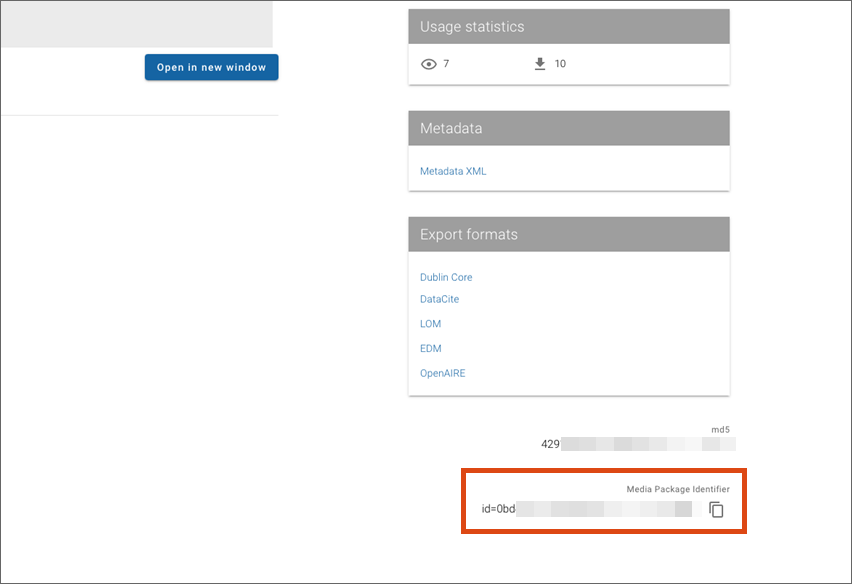
- Open PHAIDRA and search for the desired video.
- In the metadata of the video, you will find the entry Media Package Identifier. Copy the corresponding entry.
Go to Moodle and open the course in which you want to publish the video.
- Click on Edit mode.
- In the desired subject block, click on the field Add an activity or resource.
- A window will open. Select the activity u:stream.
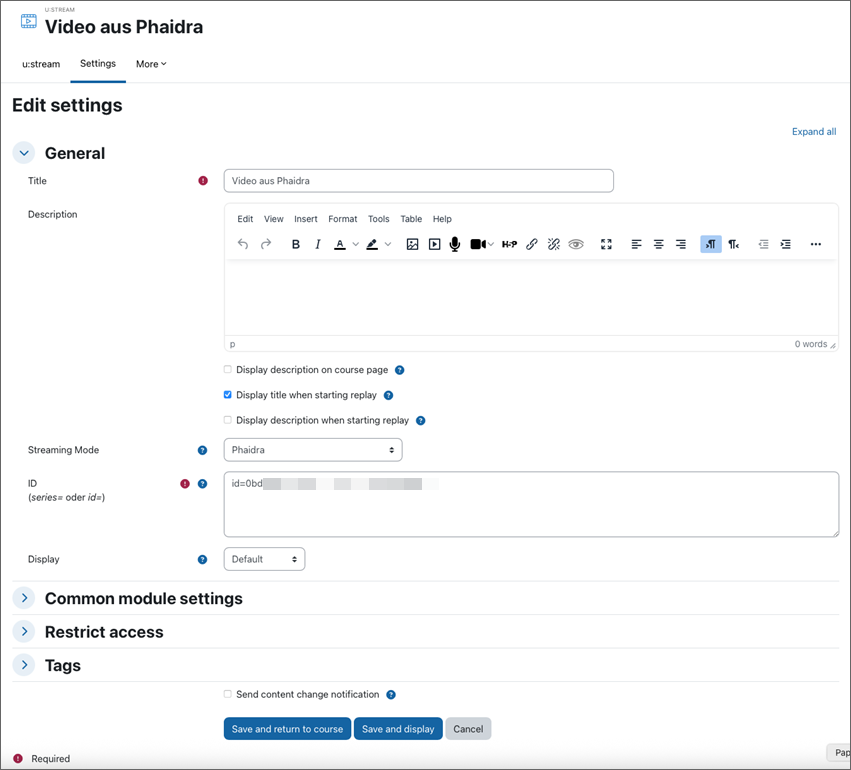
- Assign a descriptive Title.
- If needed, add a Description and display it.
- In the Streaming Mode drop-down menu, select Phaidra.
- In the ID section, enter the videos Media Package Identifier that you copied from PHAIDRA. Please include the preceding id=.
- In the Display drop-down menu, select Default.
Save the settings you have made.
The video can now be accessed via the u:stream activity.
Publishing recordings outside of Moodle
You can also publish recordings and uploaded audio/video files outside of Moodle on any website. You have two options for this:
- Publishing a recording via link: In the e-mail for the successful processing of the recording or the audio/video file, you can find a link under Player. Copy this link and paste it to the desired place on your website. Visitors on your site can access a player with the recording via this link.
- Embed code for embedding in websites: In the e-mail about the successful processing of the recording or the audio/video file, you can also find an HTML code to embed a player with the recording into your website. To do this, insert the HTML code into your web page at the desired position. If necessary, you can adjust the size of the player by changing the values for width and height. Just make sure to maintain the ratio of width to height.
There is a separate plug-in for publication on Typo3 pages of the University of Vienna. This plug-in allows you to integrate a player with the recording into your Typo3 page. Information about the use of this plug-in can be found on the Typo3 support pages.