Starting a stream in the lecture hall
This guide helps teaching staff to record and/or live stream (teaching) events in the u:stream lecture halls.
Note
The functions described in this user guide are only available in lecture halls with u:stream equipment.
Starting a recording or stream
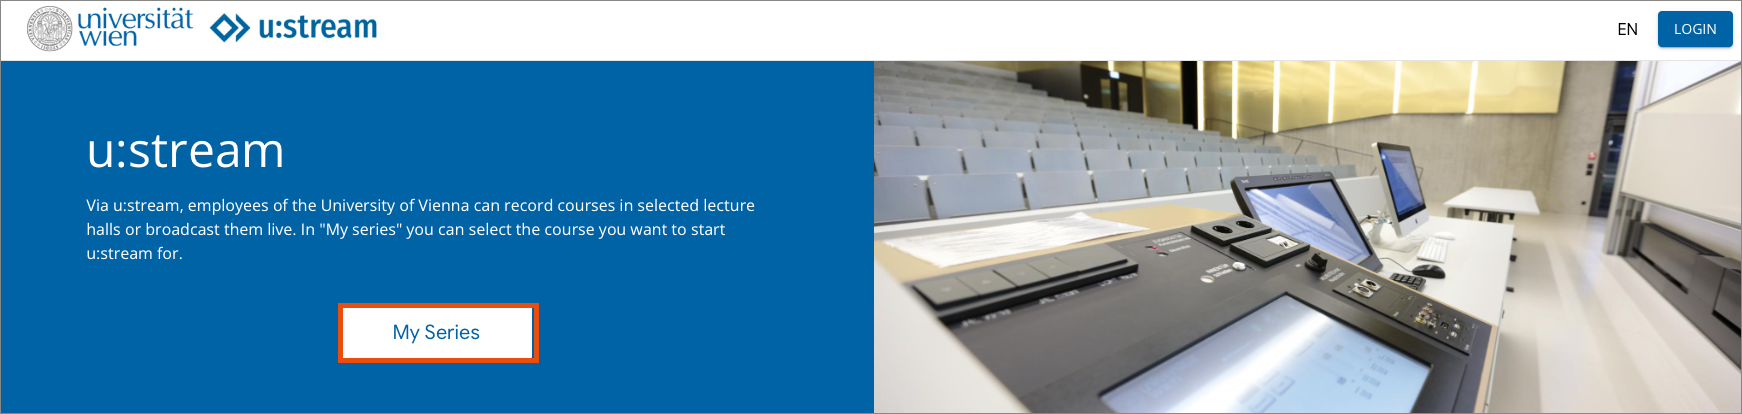
u:stream is controlled via the lecture hall PC. Open the u_stream link on the desktop of the lecture hall PC.

On the start page, you can log in by clicking on the following buttons:
- My series: Record or livestream from the lecture hall using u:stream.
- Camera controls: use the u:stream camera in a video conferencing tool. This function is only available in lecture halls that have been equipped with the additional equipment for hybrid teaching.
- You can also access u:stream via Login, but you will not be redirected directly to either of the two areas.
Click on My Series.
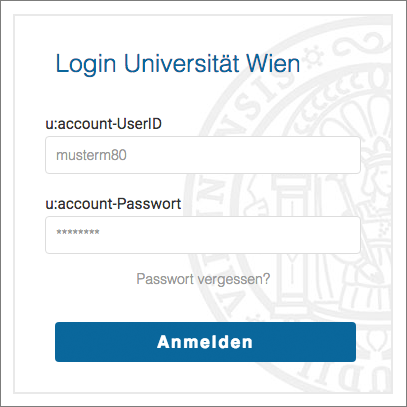
You will be redirected to the Weblogin. Enter your u:account UserID and your password. The login is only possible for persons with an active employee account of the University of Vienna.
Selecting a series für streaming
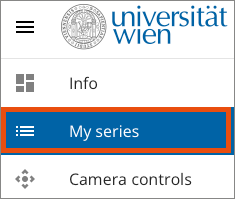
Navigate to your series by clicking on My Series in the side menu.
Here you will find all series registered with u:stream for which you are authorised. They are divided into custom series and courses. Your series may already have been registered with u:stream by other authorised persons.
Please make sure that the correct semester is selected in the Semester (1) section. custom series may also have been created without a semester. If a course or custom series does not yet appear in the list, you must first register it with u:stream.
To start a recording or live stream from the lecture hall:
- Select the appropriate series from the list.
- Click on Start session (2).
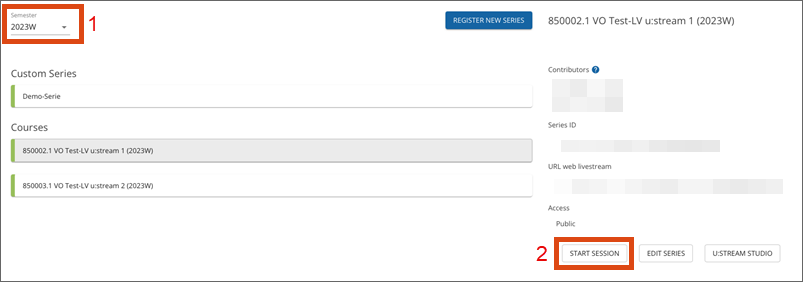
For custom series, you must add the following information:
- Title: Enter the title of the recording.
- Contributors: Enter the name(s) of the presenter(s).
Click Start session again.

Controlling streaming
The streaming interface is divided into the following areas:
- Preview
- Streaming layouts
- Camera profiles
- Streaming control
- Timer (Auto-Stop)
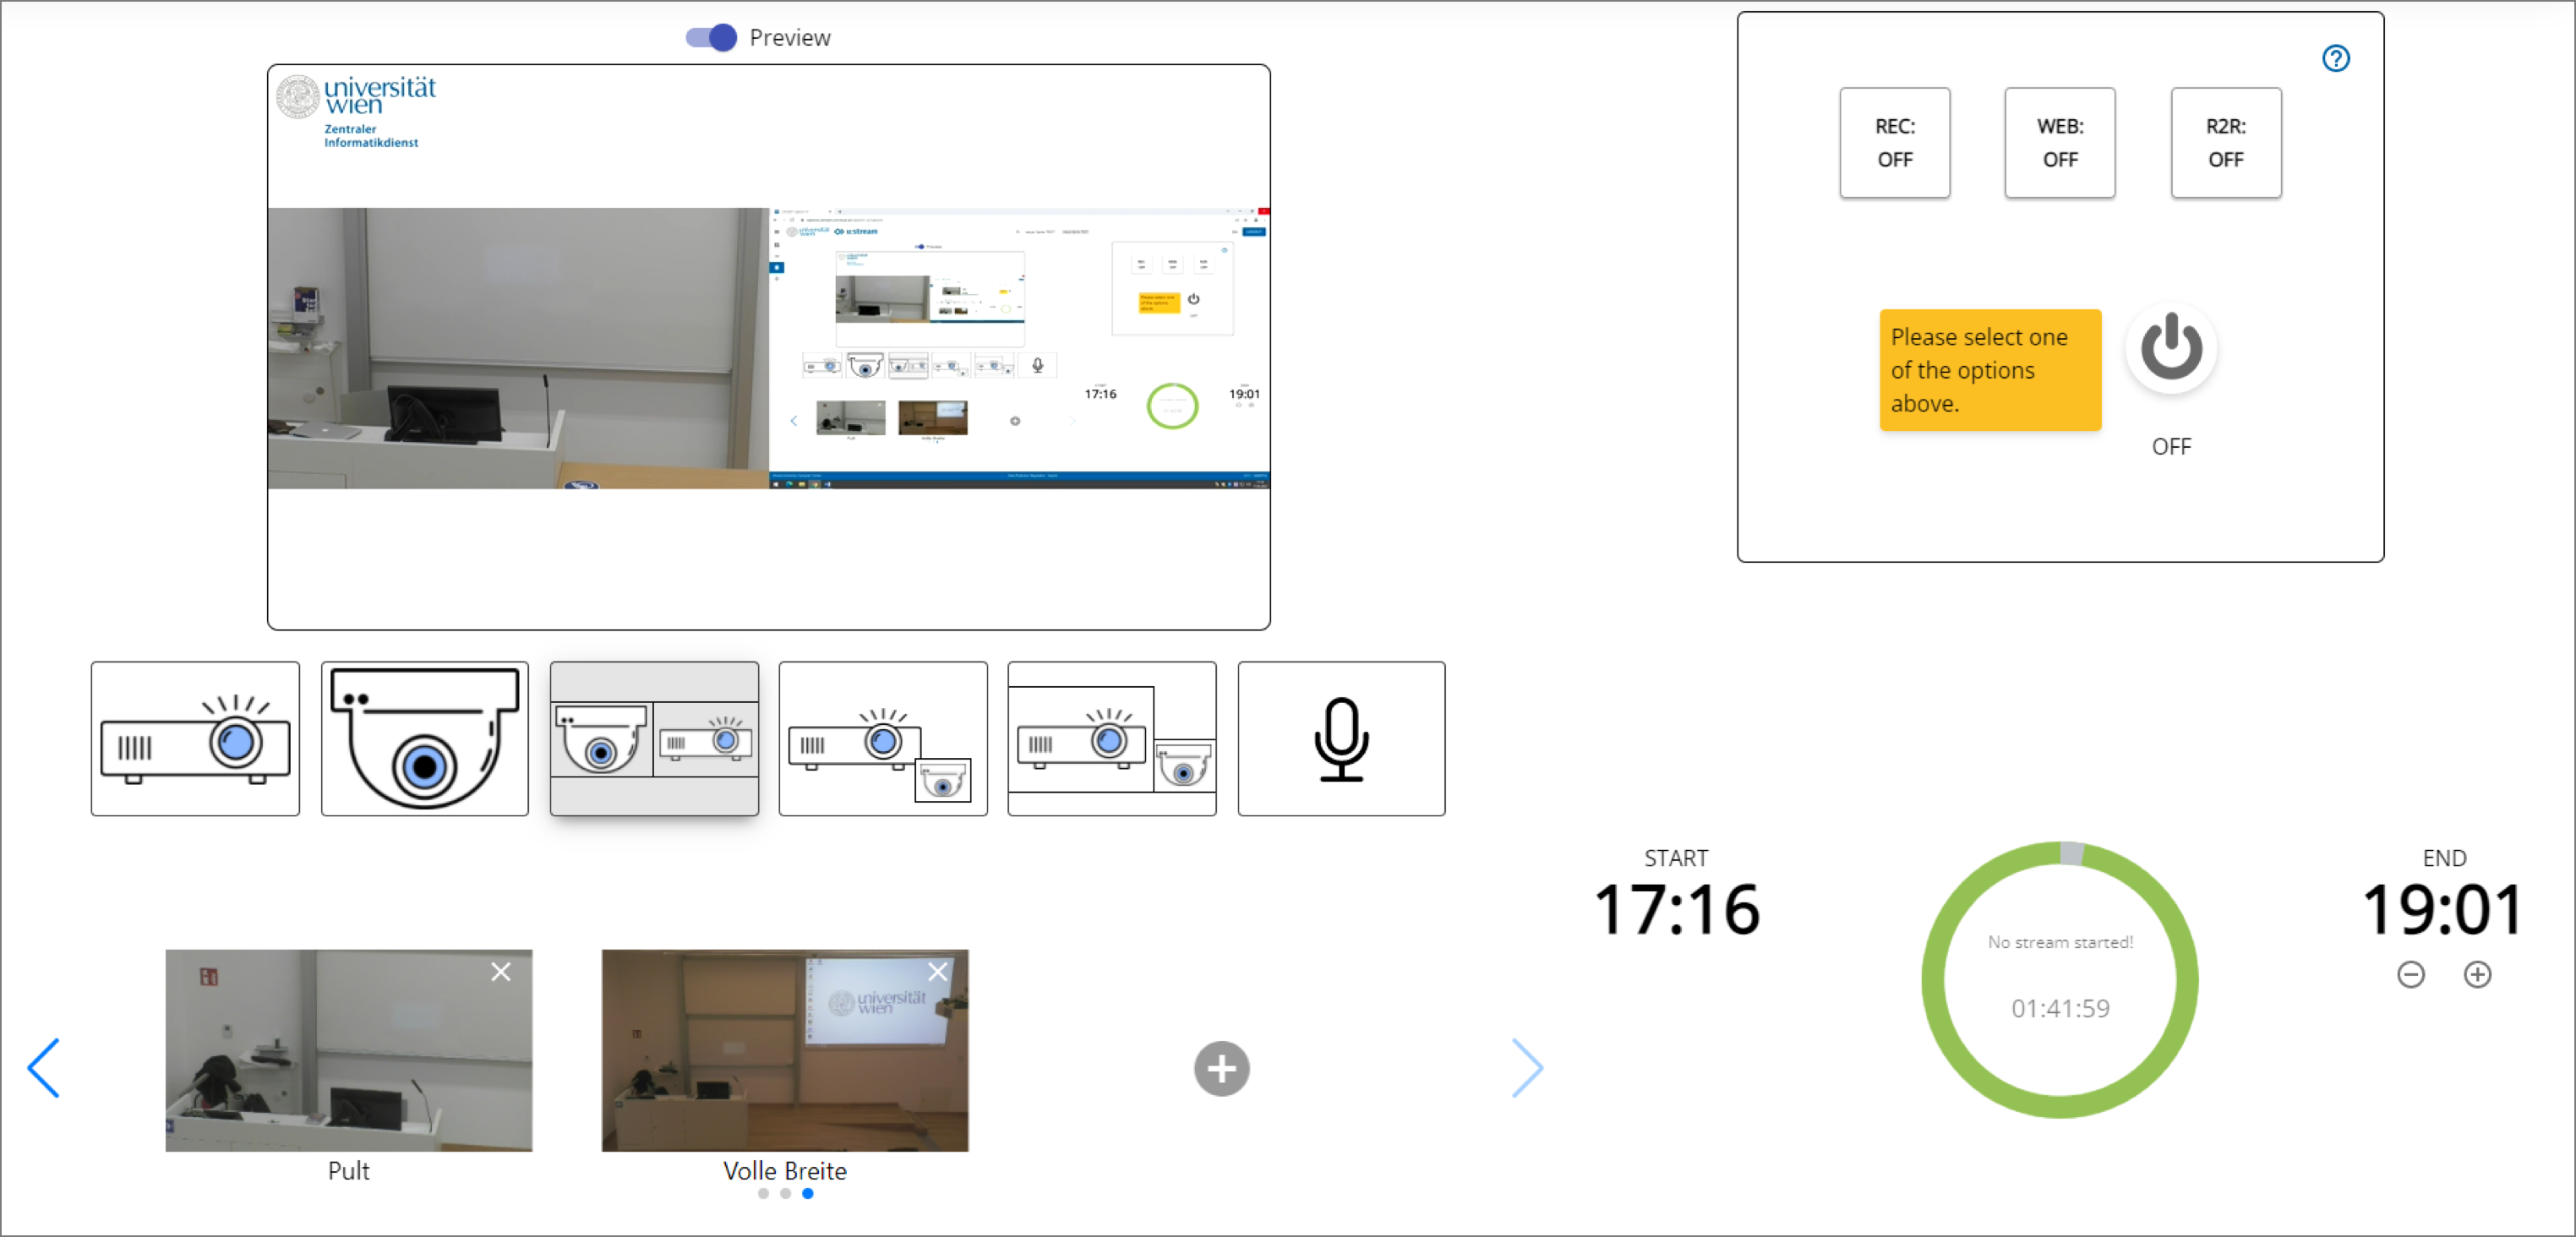
Choosing a streaming layout
With u:stream, the image from the camera in the lecture hall and/or the image you send to the projector in the lecture hall are available as sources. In addition, there is the sound from the lecture hall system (microphones, feed players). You can choose between 6 different layouts (from left to right):
- Full screen projector
- Full screen camera
- Camera and projector
- Picture in Picture (projector large and camera superimposed small)
- Picture by Picture (projector large and camera next to it small)
- Audio only
Clicking on the respective button changes the layout. The preview shows the selection accordingly.
Selecting camera profile
You can choose between different predefined camera profiles. The profiles differ by different shot sizes and camera positions and are adapted to the respective lecture hall. It is possible to change the profiles at any time, even during a running stream.
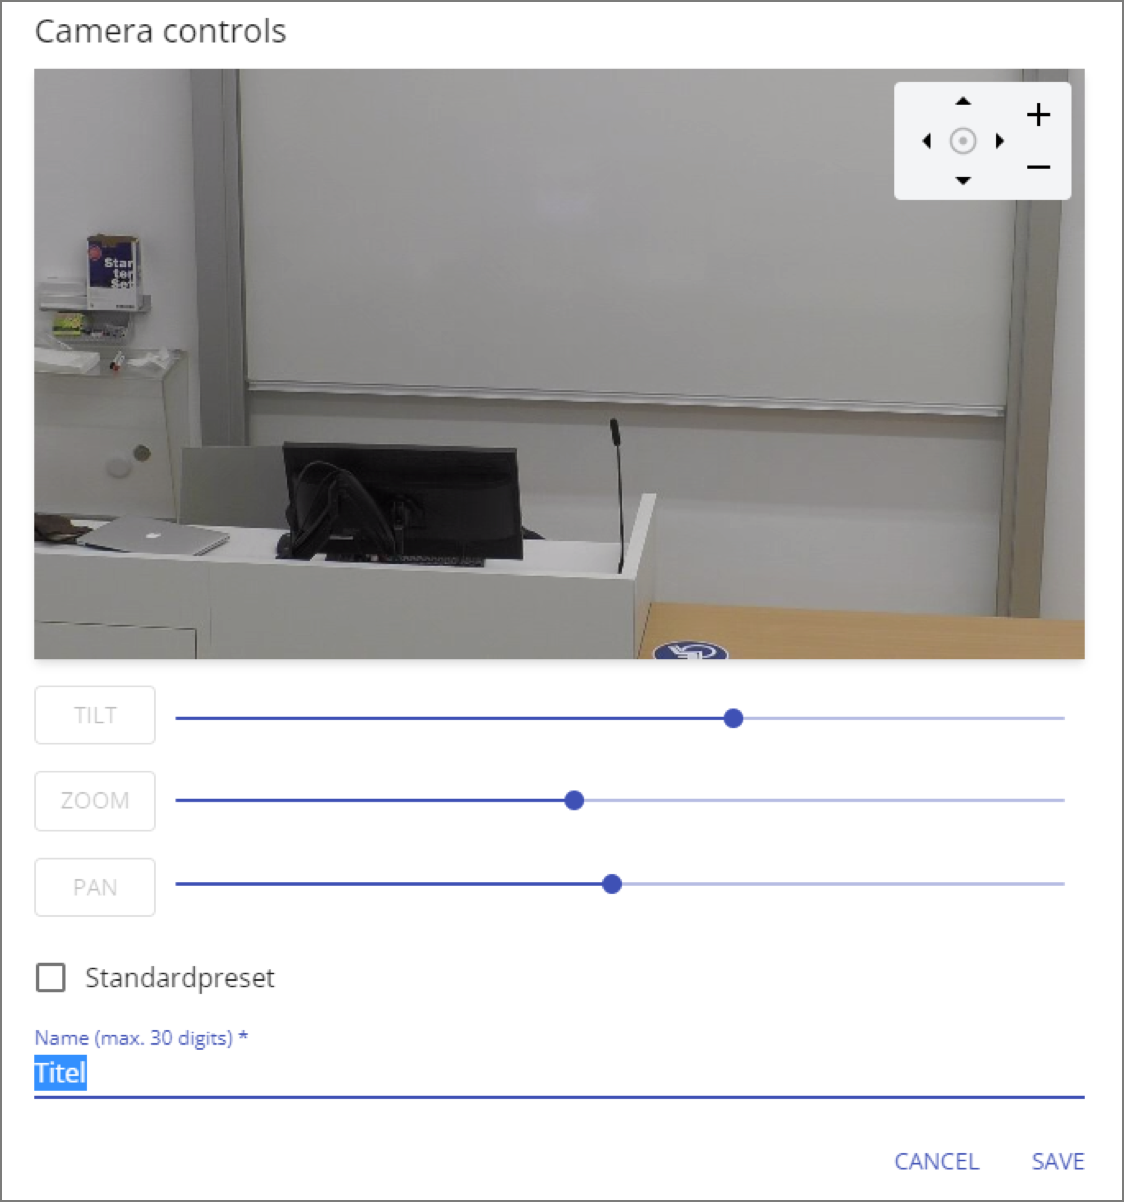
By clicking on the plus symbol to the right of the predefined camera profiles, you can set up an individual camera profile for the lecture hall.

Note
Use the individual camera profiles to select a better image section if necessary. For data protection reasons, we have to set the camera profiles so that the students' seats are not in the picture. This means that we are subject to certain restrictions with the predefined camera profiles. As a lecturer, you can react more flexibly to the situation on site and, e.g., include seats close to the lecturer's desk in the picture if no one is sitting there anyway.
- Use the Tilt, Zoom and Pan controls to change the view greatly.
- Use the arrow keys and plus-minus keys to fine-tune the image.
- Enter a descriptive name for the camera profile.
- Click on Save.
Now you can select your profile from the presets at any time.
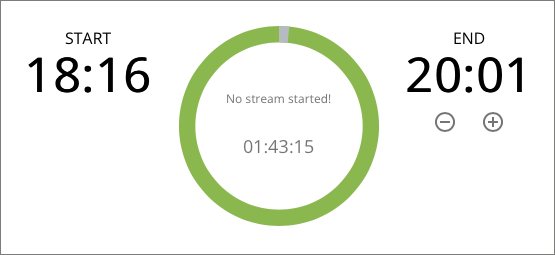
Timer (Auto-Stop)
The timer saves you from unintentionally streaming for a long time. It ends the stream automatically.
The preset time when the stream will end is 105 minutes after the start of access to the controller. Make sure that the specified time is sufficient for your lecture and adjust it if necessary.
- By clicking on the plus-minus symbols, you can shorten or lengthen the Auto-Stop time by 15 minutes at a time (even several times).
- It is possible to adjust the auto-stop time during an ongoing streaming.
- The timer inside the circle shows how much time you have left until the session is automatically ended.
Streaming controls
Here you select which streaming variants are to be carried out (recording and/or live stream) and control them. The control includes:
- Switching the individual streaming variants on and off.
- Common start, pause and stop button
The 3 buttons stand for the 3 streaming variants offered. With these buttons, you can switch individual streaming variants on and off, if necessary also during an ongoing streaming session:
- REC: Recording
- WEB: Web live stream, e.g. via a Moodle course
- R2R: Room2Room live stream, when using more than one lecture hall
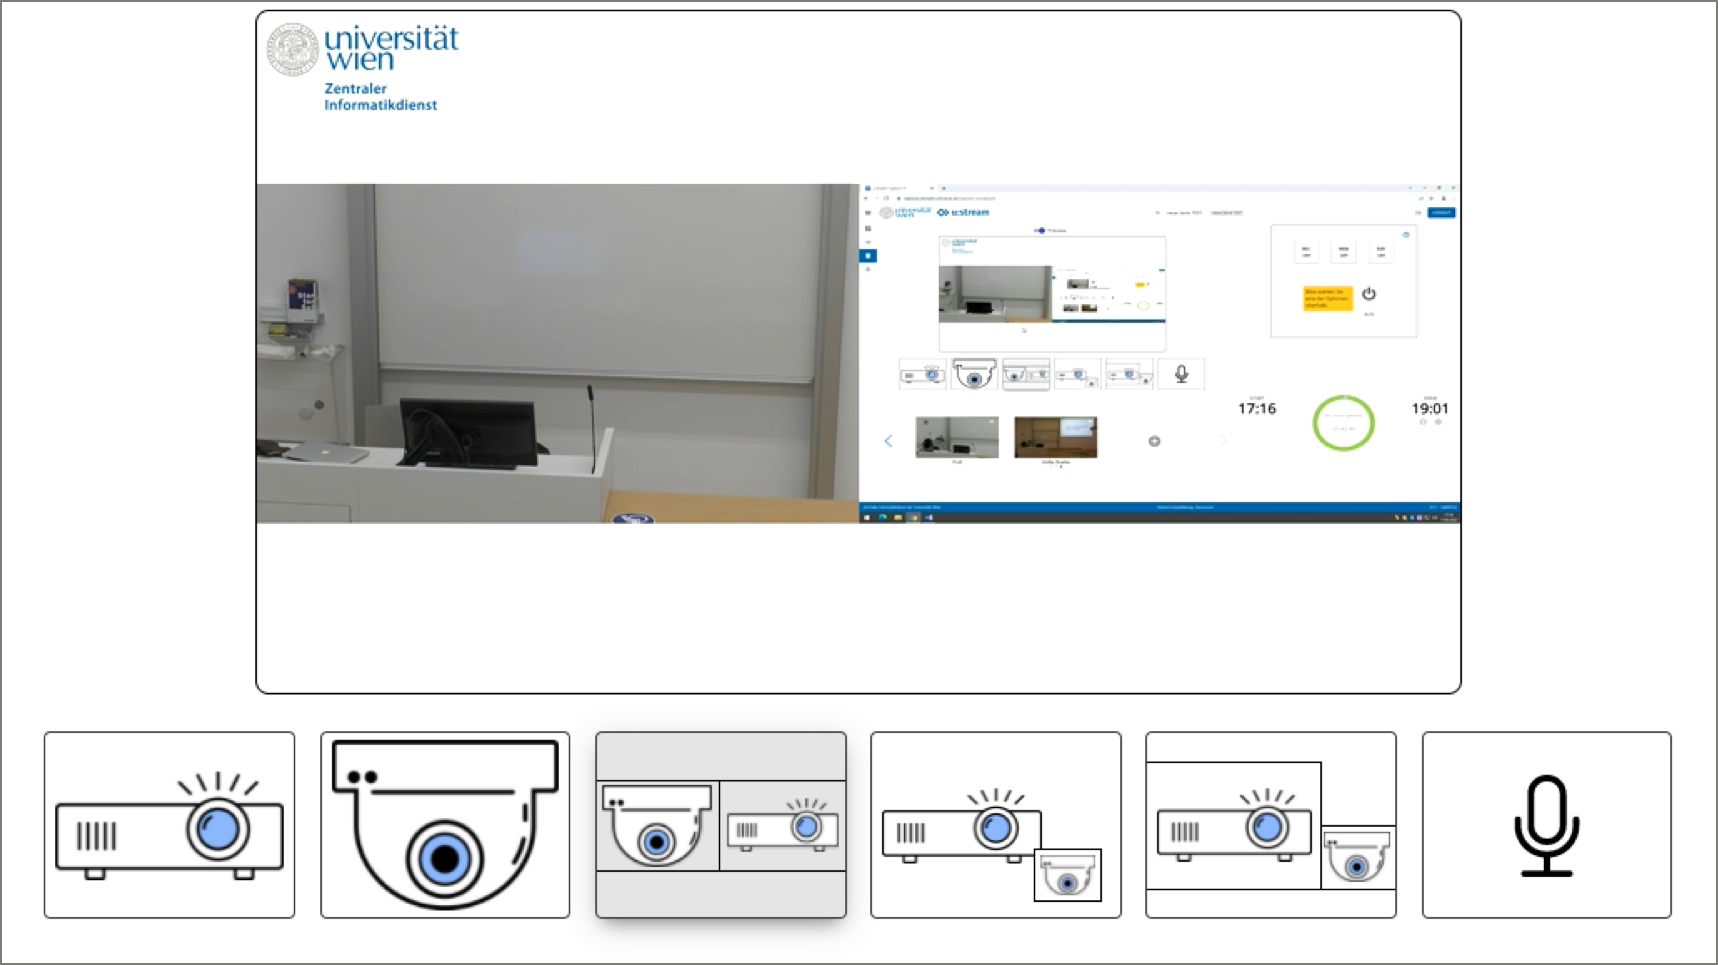
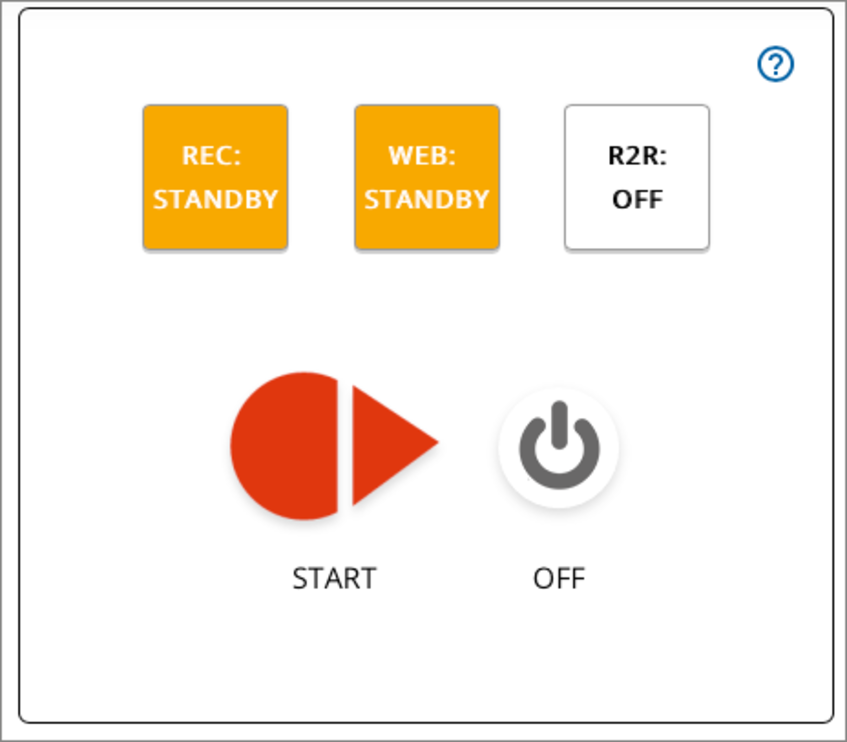
The following illustrations show the state of the control system on the left side when streaming a course for the first time: No streaming variant has been activated yet, so the start button is not yet displayed.
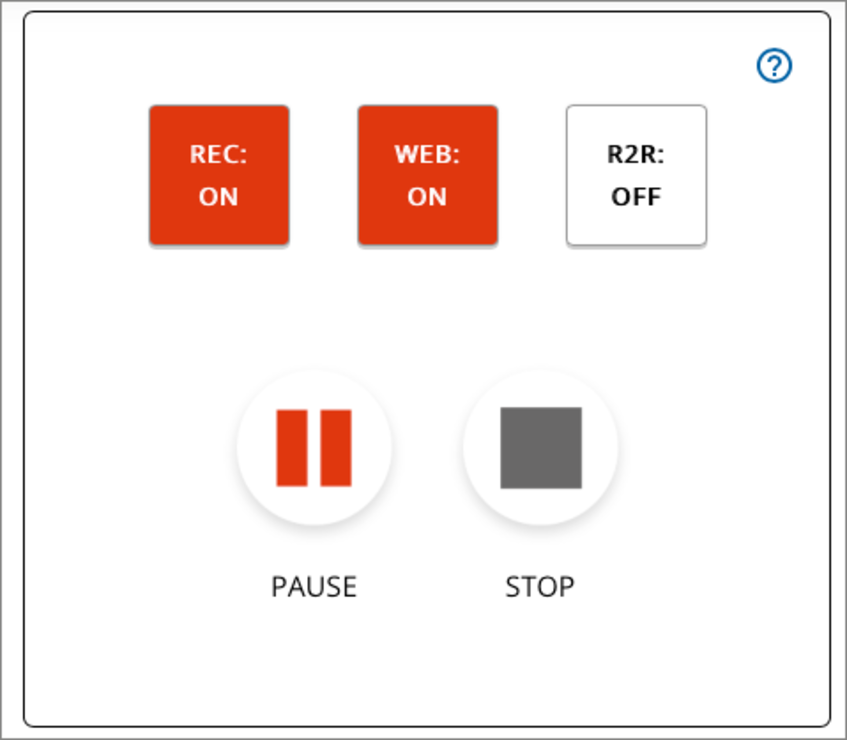
The coloured background of the buttons in the picture on the right shows which status is currently selected for the respective streaming variant:
- Yellow – STANDBY: active, but paused at the moment
- Red – ON: active and streaming
- White – OFF: inactive


Starting and pausing streaming
First select one or more streaming variants that you would like to use. As soon as a streaming variant has been switched to standby, it is highlighted in yellow and the start button is displayed.
Click the start button to start streaming. All streaming variants that were in standby status (yellow background) change to On status (red background): It is being recorded or live streamed.
If a recording or live stream is running, the Pause button is available. This pauses all streaming variants that are in the On status. Do not forget to reactivate the paused streams at the end of the pause by clicking on the start button again.
Stopping streaming and closing the browser
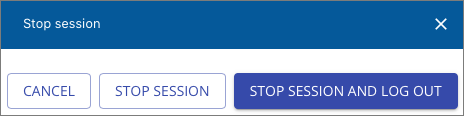
Please remember to stop the streams promptly at the end of your presentation. To do this, click on Stop.
To prevent unintentional termination, a confirmation dialogue is interposed. You can choose:
- Cancel: The streaming session continues unchanged.
- Stop Session: The session and all associated streams are terminated. However, you reamin logged in to u:stream and are redirected to My Series.
- Stop session and log out: The session and all associated streams are ended and you are logged out of the current u:stream session.
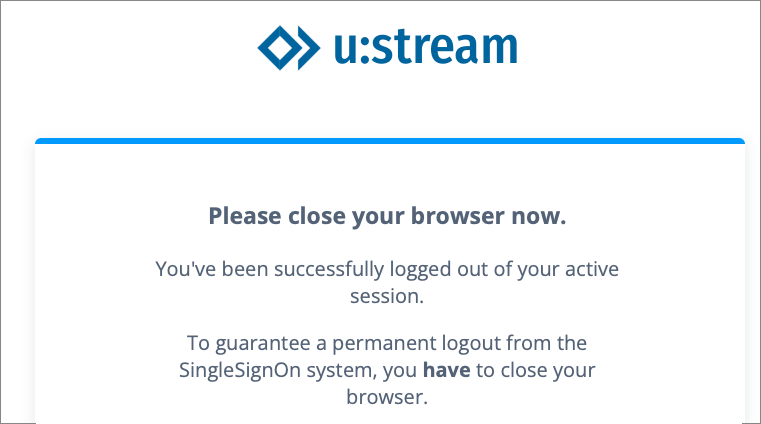
Be sure to close the browser at the end of your course. This is the only way to ensure that you are permanently logged out of the system.
Note
You will find a link to a quick user guide in the lecture halls with the most important steps to start streaming.