Using u:stream administration
In the u:stream administration, employees, especially teachers, get an overview of all their series and videos and can edit them. Furthermore, they can upload audio and video files to u:stream and create new recordings in u:stream studio.
Login
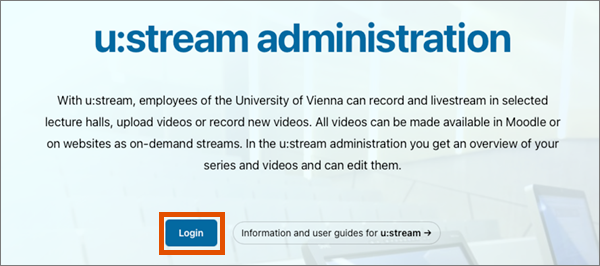
Open u:stream administration and log in with u:account UserID and password.
The login is only possible for persons with an active employee account of the University of Vienna. Students do not have access. u:accounts for guests have to be activated first to be able to access. Please contact the u:stream support for this.
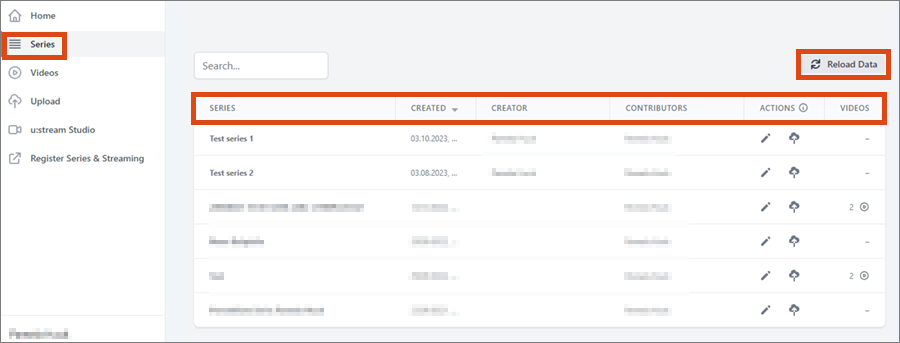
Series
The Series menu item lists all series for which you have editing rights. You can see series that you have registered for u:stream yourself, as well as series to which you have been co-authorised.
The table contains the following entries:
- Series: series title
- Created: date when the series was registered for u:stream
- Creator: person who registered the series to u:stream for the first time
- Contributors: persons contributing to the content; for courses taken from the campus management system
- Actions: editing options available for the series
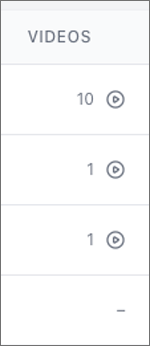
- Videos: number of videos in the series; clicking on them will take you to the videos in that series
Note
Changes you make always affect the entire series. Note this especially if several people are authorised to edit a series.
Editing the series metadata
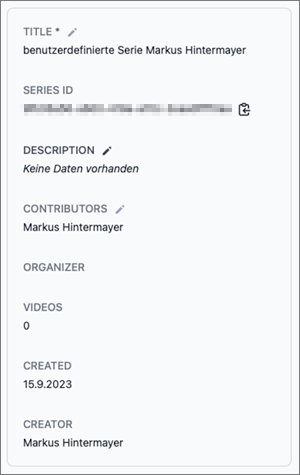
Click the pencil icon to edit the series metadata. Modify the fields as needed, and then click Save.
You can edit the following metadata:
- Series title
- Description: information about the series, visible only in u:stream administration
- Contributors: people who are contributing to the content
Series ID: Here you can find the unchangeable series ID and copy it. You need the series ID both when publishing a series in Moodle and when linking u:stream series in Moodle.
Uploading audio and video files to the series
By clicking on the upload icon you can upload existing audio and video files to the respective series. More information in the Upload menu item section.
Showing videos of a series
In the Videos column you can see if and how many videos are available in a series. Clicking on the entry will take you to the videos in that series only. For more information on the functions there, see the section on the Videos menu item.
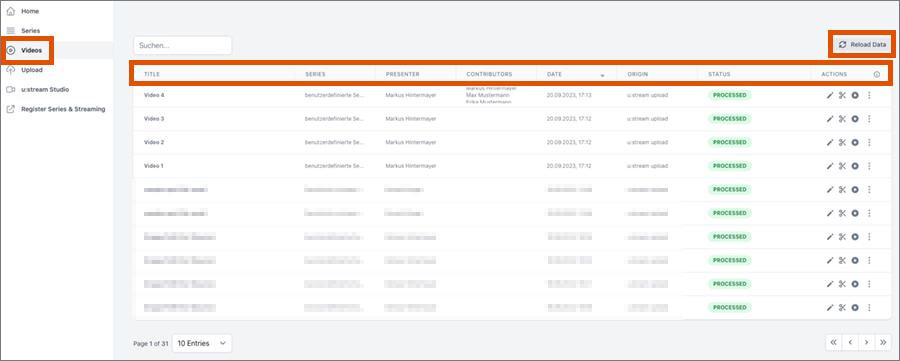
Videos
The Videos menu item lists all audio and video files for which you have editing rights. These rights are derived from your permissions at the level of the series to which the video is assigned.
The table contains the following entries:
- Title: title of the video
- Series: series to which the video is assigned
- Presenter: person who made the recording or uploaded the video
- Contributors: persons who contributed to the content (for courses taken from the campus management system)
- Date: date on which the recording was made or the video was uploaded
- Origin: source of the video (lecture hall, u:stream upload, Moodle upload, u:stream studio)
- Status: the processing status of the video
- Actions: editing options available for the video
Note
Changes you make to a video take effect for all publications of the video. Note this especially if multiple people are authorized to edit or the video is published in multiple locations.
Checking processing status of a video
When a video is uploaded to u:stream, it must first be prepared for on-demand streaming. This process can take several hours, depending on the length of the video and the number of videos to be processed by u:stream at that moment. The ZID guarantees a maximum processing time of 24 hours, in most cases it is much faster. In the Status column you can see the progress:
- Processing: The video is currently being processed, the on-demand stream is not yet available.
- Processed: The video is finished being prepared, the on-demand stream is available.
- Processing Error: Processing failed, for assistance please contact u:stream support.
To make sure that you are shown the current status for each video, please click Reload Data above the table on the right.
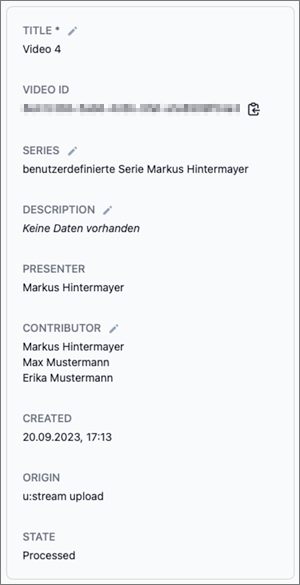
Editing video metadata
Click the pencil icon to edit the metadata of a video. Change the fields as needed, and then click Save.
You can edit the following metadata:
- Title of the video
- Series to which the video is assigned
- Description: information about the video, visible only in u:stream administration
- Contributor: people who contributed to the content of the video
Video ID: Here you can find the unchangeable video ID and copy it. You will need the video ID when publishing a single video in Moodle.
Cutting video in the editor
Click the scissors icon to open the editor and then cut the video. You can cut away the beginning, the end or a part in the middle of the recording.
Use the play button below the video to play the video and pause it at the appropriate point. Where you are in the video is indicated by the vertical marker in the audio track of the video. You can also move the marker directly to the appropriate place.
- If you want to remove the beginning or end, place the marker at the desired point in the video before or after which to cut. Click Cut at the desired cut point. Then place the marker on the section you want to delete and click Delete.
- If you want to cut within the video, you need 2 cut points that delimit the section to be cut out. You also set these two cut points with Cut. Then select the section and click Delete.
You can then view the video with preview mode on and decide if you want to save the change. If necessary, you can undo any cuts or deletions you have made by clicking Merge Left or Merge Right, or Restore.
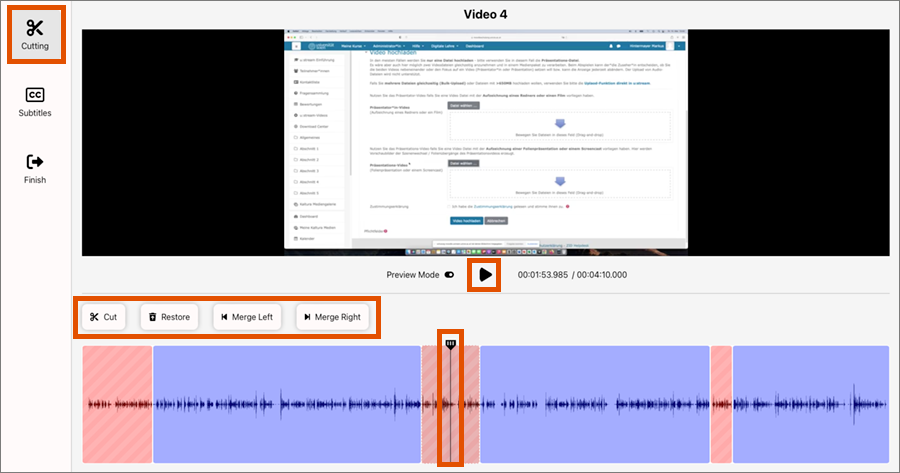
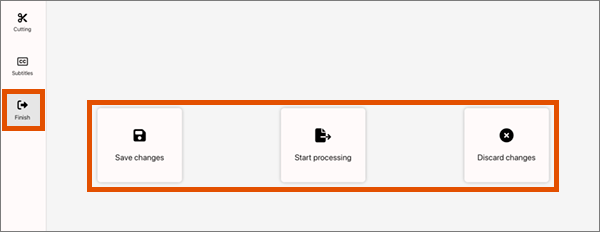
You can now make further changes or click Finish in the left menu of the editor. There you can:
- Save changes: The edits you make are saved, but the video is not reprocessed. This function is recommended, for example, to save the intermediate status of an edit that should not yet be visible to the users of the video.
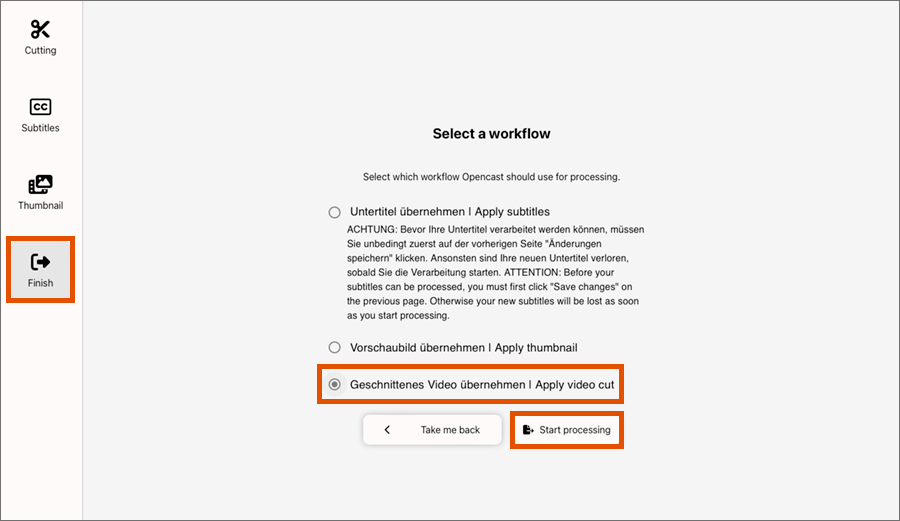
- Start processing: The processing of the video is triggered, with which the cuts are applied to the published video. To do this, select the workflow Geschnittenes Video übernehmen | Apply video cut and click on Start processing.
- Discard changes: All edits are discarded, and the video is not reprocessed.
Creating subtitles
Click the scissors icon to open the editor and then use it to create subtitles.
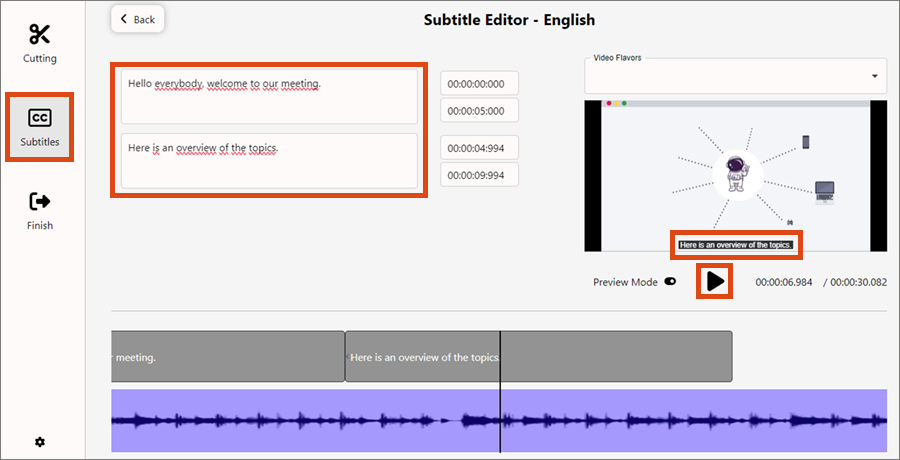
To manually create subtitles for a video, click Subtitles and then select the language in which you will write the subtitles.
The first content segment is created automatically. You can add as many additional segments as you want. You change the length of the segments using the start and end timecodes next to each segment. In each segment, enter the subtitles that you want to appear at that point in the video.
To remove a segment, click Delete Segment.
To check the typed subtitles, preview the video including the newly created subtitles.
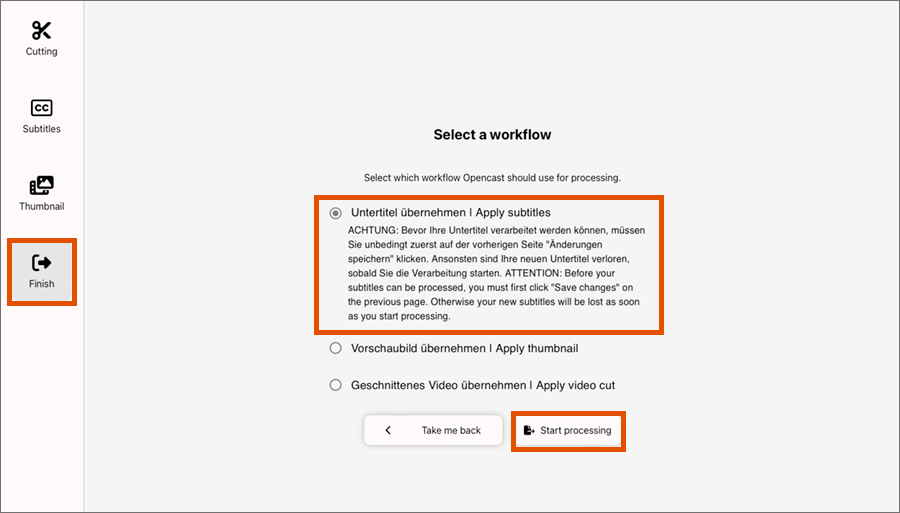
To permanently add the subtitles to your recording, click Finish in the left side menu, and then click Save changes. Then open the Finish menu item again and click Start processing. Select the workflow Untertitel übernehmen | Apply subtitles. Be sure to keep to this order, otherwise the new subtitles will be irretrievably lost.
Customising thumbnail
By default, a still image from the start of the video is used as the thumbnail. You can customise this thumbnail. To do this, click on the scissors symbol to open the editor and select the menu item Thumbnail.
There you can navigate through the video, pause at a suitable point and select the still image as the thumbnail by clicking on Generate from presentation.

If you have a recording with 2 separate video tracks for presenter (1) and presentation (2) (e.g. from u:stream Studio), you can generate the thumbnail from either of the 2 tracks. In this case, you can use the Generate from presenter (1) and Generate from presentation (2) buttons.
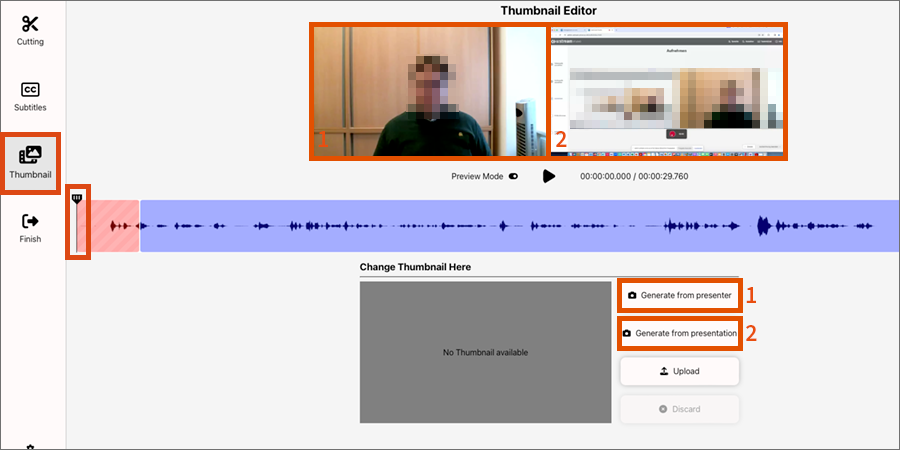
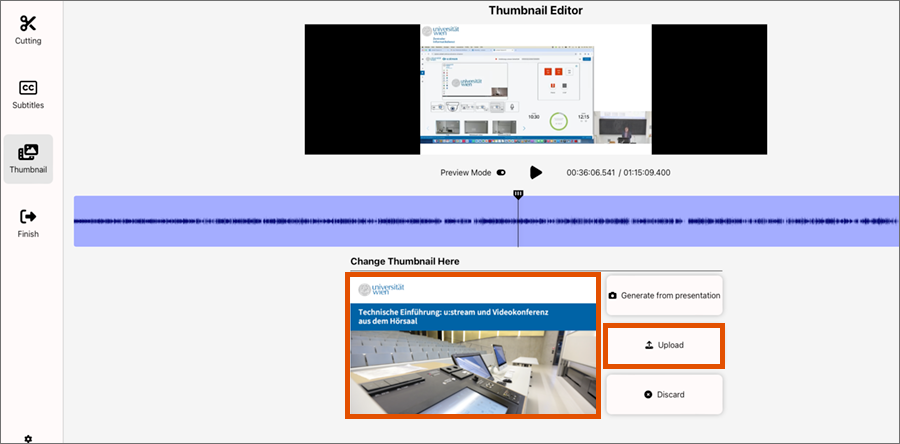
Alternatively, you can click on Upload to upload an image file as a thumbnail (such as a customised title slide).
Click on Discard to remove the selection you have made. If no thumbnail is available in the editor, the default thumbnail is used.
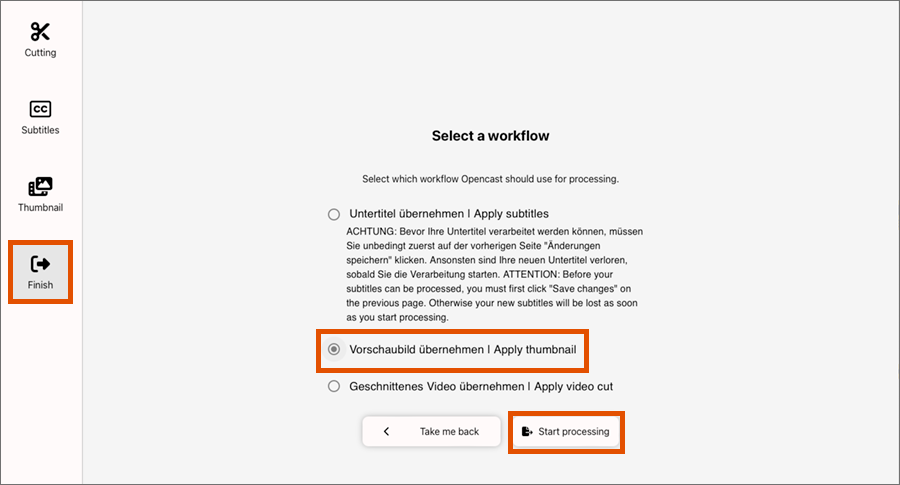
To save a newly selected thumbnail permanently, go to the Finish menu item and then click Start processing. Select Vorschaubild übernehmen | Apply thumbnail and start processing.
Playing video
Click the play icon to play the video. A player with the video opens in a new tab.
Downloading video
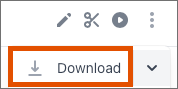
Downloading video
In the advanced actions for the video you will find the Download. By clicking the arrow to the right of Download, you will be offered variants of the video in different sizes. Select the desired variant for the download.
If you want to edit or archive the video outside u:stream, you should select the largest available variant. If you have uploaded screen and camera recordings of a video separately (e.g. recordings from u:stream Studio), they will also be offered separately for download.
Deleting video
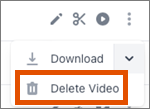
Deleting video
In the extended actions for the video, you have the option of deleting the video. This will permanently and irrevocably delete the video from u:stream. All publications of the video will be invalidated by the deletion.
Note
Only use this function if the video is actually to be deleted and the creator of the video – if it is not you – wants this to happen. This is particularly important for courses with several lecturers and teaching assistants. Bear in mind that a video can also be published in several places (e.g. in Moodle courses in different semesters).
Upload
The Upload menu item allows you to upload existing audio and video files to u:stream to make them available as an on-demand stream. All common audio and video file formats are supported.
Notes
- Only upload audio or video files to u:stream that you want to make available to other people as an on-demand stream. Do not use the service as a file repository.
- All videos are assigned to a series in u:stream. A series is a collection of videos. If you have not yet registered a series suitable for upload to u:stream, you must do so before uploading. For this purpose, use the user guide Registration and administration.
- Click on the upload area to select the desired file with the file browser or drag and drop the file into it.
- The file to be uploaded is displayed in a list. If necessary, you can change the file name. To do this, click on the pencil icon next to the title of the file.
- Now select the series you want to upload the file to. You can choose from all series for which you have editing rights.
- Then click on Upload. The file will now be uploaded. Depending on the file size and internet connection, this may take different amounts of time. If necessary, you can put the browser in the background while the upload is in progress.
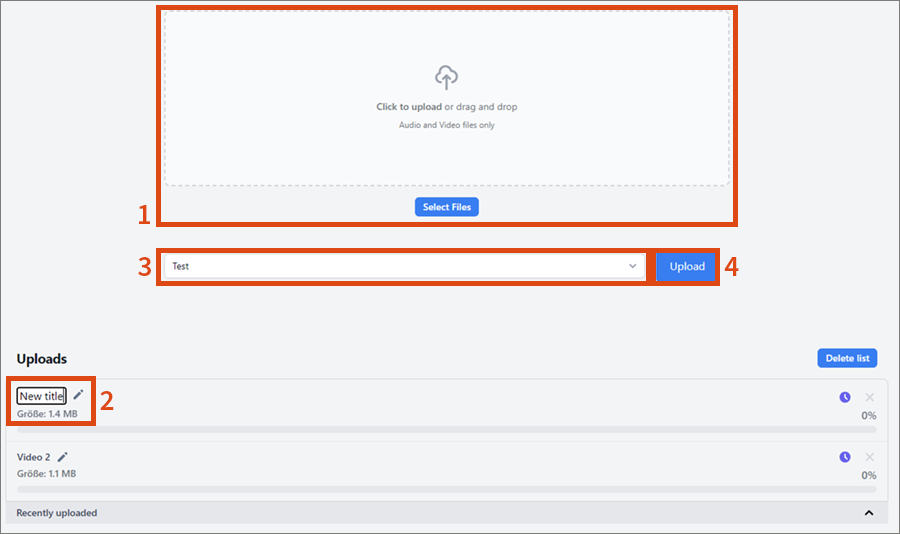
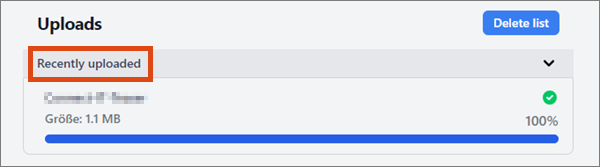
After the upload is complete, you can upload more files or switch to another menu item. The files that have already been uploaded are displayed under Recently uploaded.
u:stream Studio
With u:stream Studio, you can create new videos on your device via the web browser and then upload them to u:stream. The source is (depending on the selection) the screen, the camera and/or the microphone of the device or connected hardware, such as an external webcam.
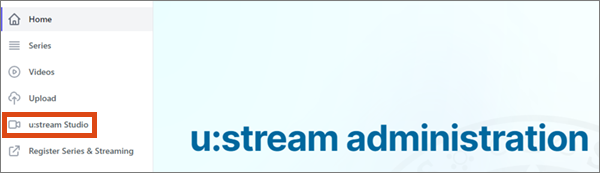
To create a new recording, click on the u:stream Studio menu item. Then, if necessary, use the user guide Using u:stream Studio.
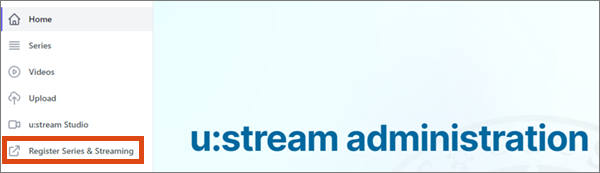
Registering Series and Streaming
Both the registration of new series to u:stream and the streaming from the lecture halls equipped for u:stream can be found in the current expansion step on the previous u:stream web interface. The menu item takes you there in a short way.