Using u:stream studio
With u:stream studio, employees and students can create new videos on their end device via web browser. The source is (depending on the selection) the screen, the camera and the microphone of the device or connected hardware, such as an external webcam.
Students and employees can download the videos and save them on their own device.
Employees can also upload the videos to u:stream and assign them to a u:stream series. The prerequisite is that a u:stream series has already been set up before the recording begins. To create a series, use the user guide for registration and administration.
Note
u:stream studio does not support all web browsers equally well. In particular, there can be limitations with Safari. The ZID therefore recommends using Firefox or Chrome.
Understanding the basics
u:stream studio can be accessed in 3 different ways:
- As an independent service (for all users)
- Via u:stream administration (only for employees)
- Via Moodle (only for employees)
Creating and editing a video is the same in all 3 ways. The only differences are the options for using the finished video (downloading it to your own device, uploading it to a u:stream series).
Opening u:stream studio
Independent service (for all users)
All users – students and employees – can use u:stream studio as an independent service and download a video created in this way and save it locally.
Employees can also upload the videos to u:stream and assign them to an existing u:stream series.
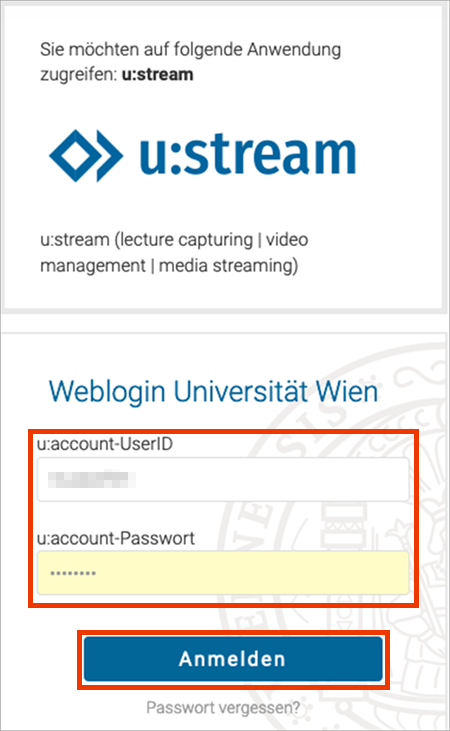
Open u:stream studio with the link studio.ustream.univie.ac.at and log in using your u:account userID and password.
u:stream administration (only for employees)
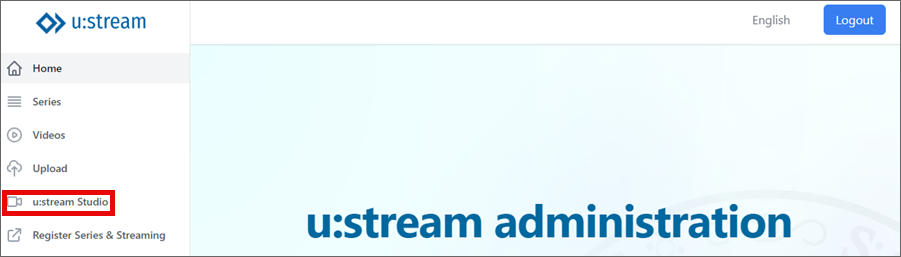
Employees can access u:stream studio via the u:stream administration. A video created in this way can be assigned to any existing u:stream series for which the user has editing rights. It is also possible to download the video and save it locally.
Access u:stream administration via the link ustream.univie.ac.at and log in with your u:account userID and password. Then select u:stream studio.
Moodle (only for employees)
Employees can access u:stream studio via Moodle. A video created in this way is automatically assigned to the u:stream series that is linked to the Moodle course and selected for u:stream studio. It is also possible to download the video and save it locally.
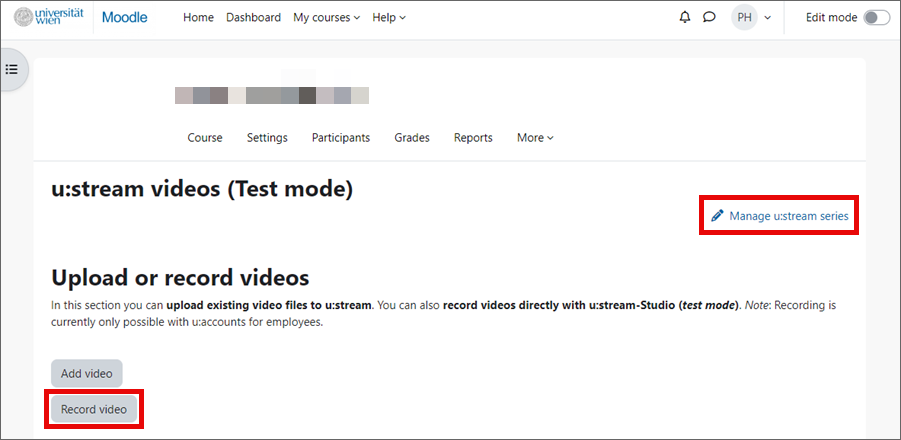
Log in to Moodle with your u:account userID and password and open the desired Moodle course. On the More tab, you will find the menu item u:stream videos. Click on it to go to the overview page of u:stream videos.

Before you record a video, make sure that you have selected the correct series under Manage u:stream series in the column Default. The video is automatically assigned to this series.
Click on Record video to switch to u:stream studio.
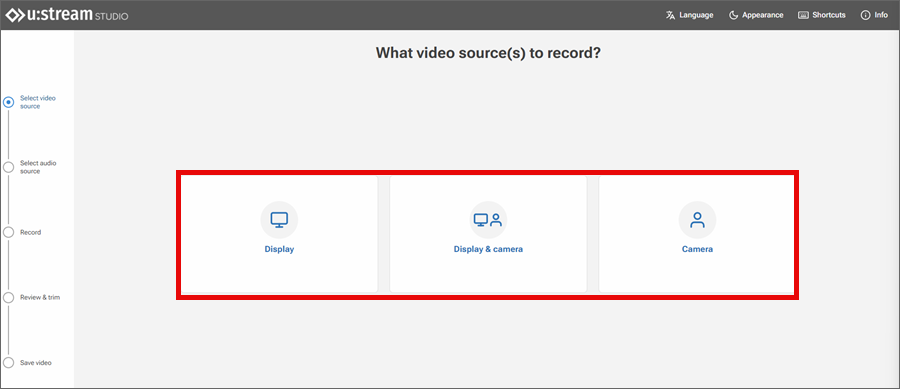
Selecting video source
Select the source for the recording. The options Display as well as Display & camera and Camera are available. If you select Display & camera, both video tracks are recorded separately (dual recording). In this case, viewers can decide at any time how they want to view the two videos (side by side, focus on screen or camera image) when playing the processed videos.
Note
If required, you can customize the appearance of u:stream studio in the top right menu (light and dark view) and get an overview of the available keyboard shortcuts.
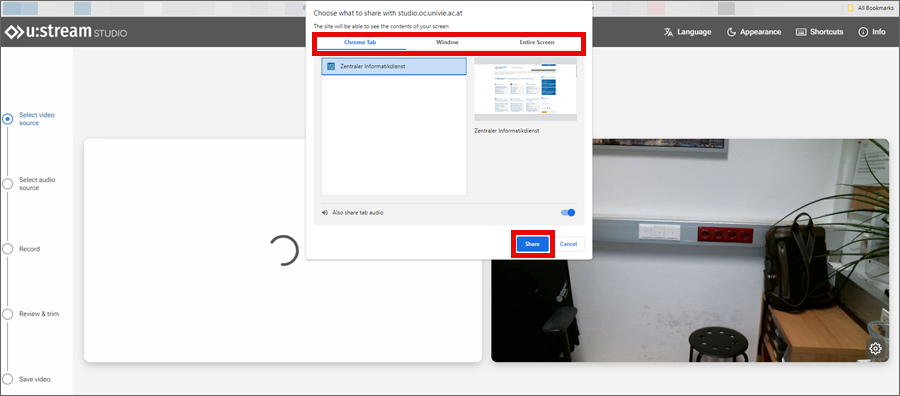
Note that you must assign the necessary rights to your browser or allow access. Depending on the source, these are the release of the camera, the screen and/or the microphone. Depending on the system settings and the browser used, either a pop-up opens for the necessary releases or you have to assign the rights directly in the settings of the PC.
For display recordings, you can also decide which display window is to be released.
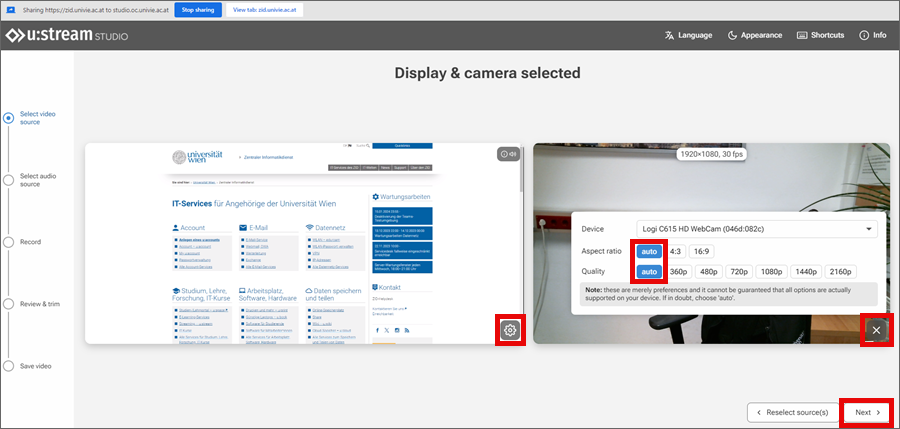
After you have decided on a source and given the approvals, you will see a preview with the display and/or the camera image. In the example shown here, Display & camera was selected and a browser tab was selected as the shared display window.
You can use the gear symbols to change the resolution and, in the case of the camera, also the aspect ratio. The ZID recommends using the auto setting.
Selecting audio settings
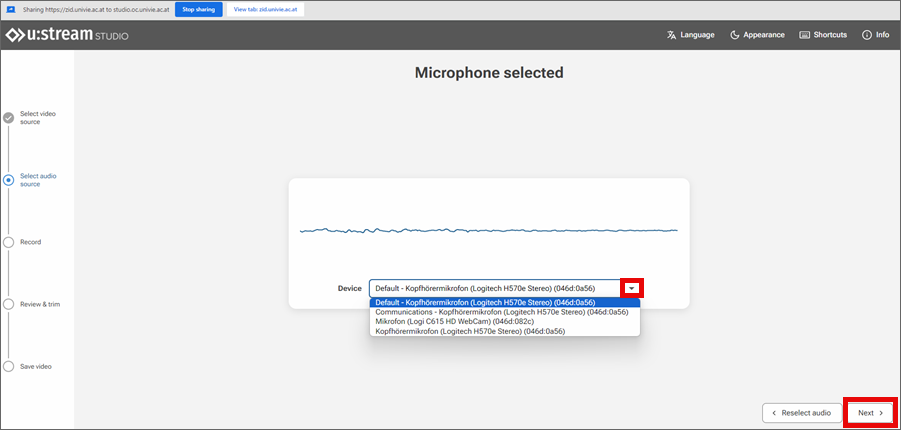
The Next button takes you to the audio options. You can decide here whether the recording should take place with microphone or without audio.

If you decide to record with sound, you must allow the microphone to be used.
You can then select the device via which the audio signal is to be recorded. In the preview, you will also see a level indicator.
Once you have selected all the settings, click on Next to start recording.
Recording video
Clicking on the red recording button starts the recording.
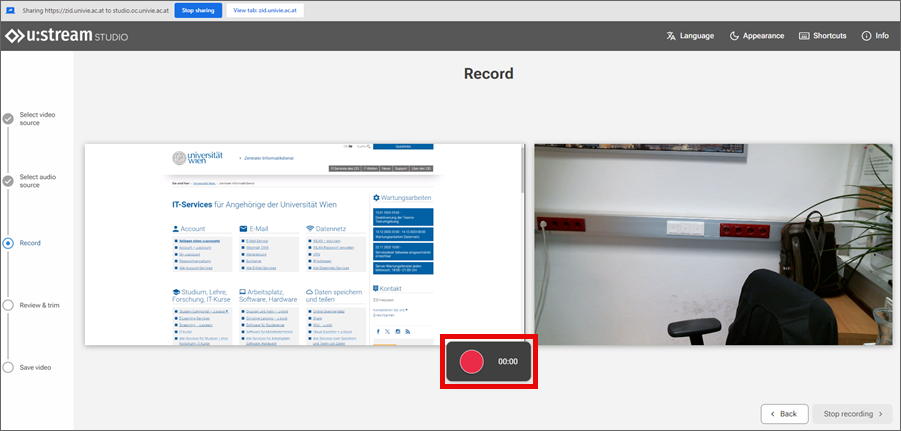
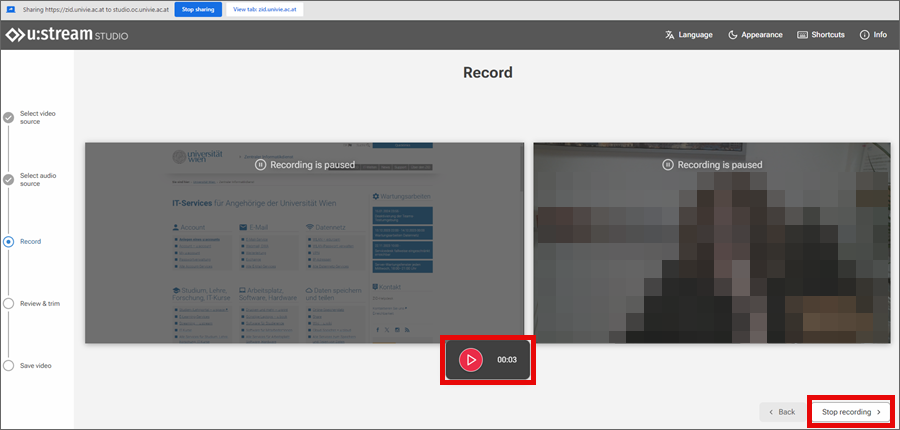
You can pause and resume the recording as often as you like. To stop the recording, first click on the Pause button. You can then select Stop recording.
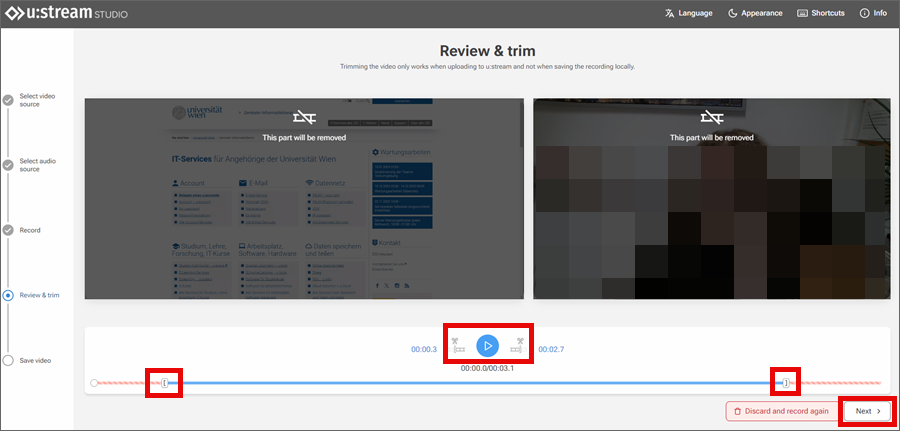
Checking and trimming video
After you have finished the recording, you can watch it. Use the play button to do this. If you are not satisfied with the recording, you can delete it by clicking on Discard and record again and start a new recording.
If necessary, you can also trim the recording, i.e. reset the beginning and/or the end. To do this, click on the desired time in the timeline or pause the playback of the video at the point where you want to trim. If the selected point in time is to be the new beginning of the recording, select the trimming tool to the left of the play button. For a new end point, select the tool to the right of the play button. You can correct the trim points as often as you like or remove them completely using the recycle bin symbol. Cuts in the course of the video are not possible.
When you are satisfied with the video, click Next.
Note
Trimming does not affect the files that are offered for download. The full-length, uncut recording is always downloaded.
Saving and uploading video
Once the recording is complete, you have different options for continuing to use the video – depending on how you started u:stream.
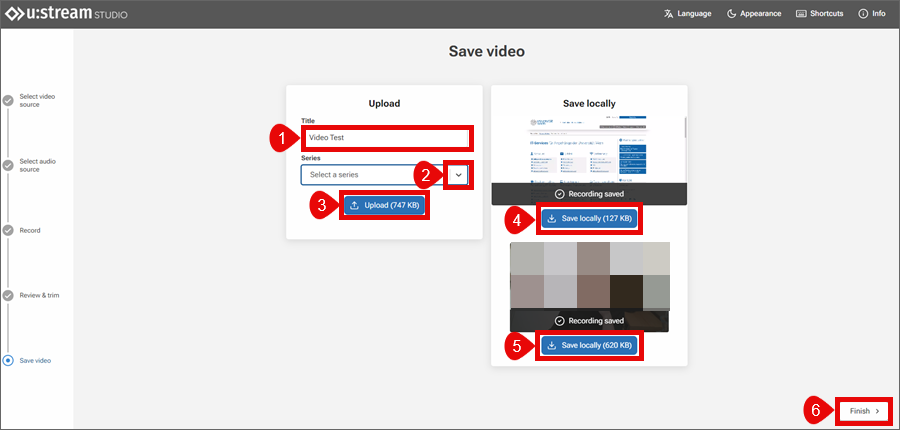
All users can download a video created with u:stream studio and save it locally. Display recording (4) and camera recording (5) are made available separately.
Employees can also upload the recording to u:stream or Moodle. To do this, give the recording a title (1) and select the u:stream series (2) to which the video should be assigned. All u:stream series for which you have editing rights are available. If you have accessed u:stream studio via Moodle, you can only upload the recording to the u:stream series that is linked to the Moodle course.
Then click on Upload (3). If uploading is not possible, make sure that you are logged in with your u:account for employees.
When you are finished, click on Finish (6).