Creating OpenAI resource
This user guide will help you to create an OpenAI resource, configure it and restrict access to it to the data network of the University of Vienna.
Requirement
You have already created a resource group within your subscription.
Creating resource
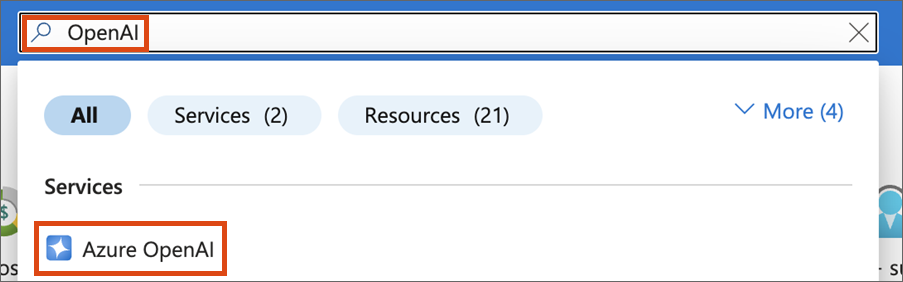
- Open the Azure portal.
- Enter the term OpenAI in the search bar at the top.
- Select the Azure OpenAI service under Services in the search results.
Click + Create to the right of the search field.

Configuring resource
- Select the subscription and the resource group in which the resource is to be created.
- Select the region, i.e. the Azure data centre in which the resource is to be created.
Due to data protection and data security measures, only some European Azure regions are available within the Azure environment of the University of Vienna. Depending on the selected region, the available models in Azure OpenAI vary. If you use the latest models such as ChatGPT4, the ZID currently recommends the Sweden Central region. Available models per Azure region - Select a name and a pricing tier. Only the Standard S0 option is currently available in the Pricing tier drop-down menu. Current pricing – as an employee of the University of Vienna, you receive a 15 per cent discount on these prices.

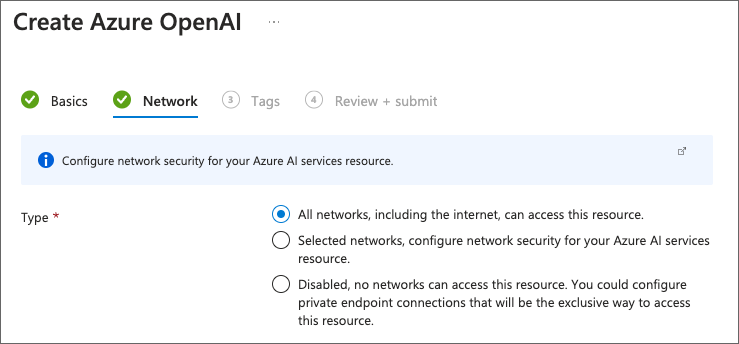
Then click on Next. This takes you to the network settings of the OpenAI resource. These include 3 options:
- accessible via the public internet
- accessible via the public internet, but only for restricted IP address ranges
- not accessible via the public internet; connection is only possible via a Private Endpoint that must be created within the Azure network
The ZID recommends restricting access from the public internet for your resource. Select the first option for the time being. Once you have created the resource, continue with the Restricting access section.
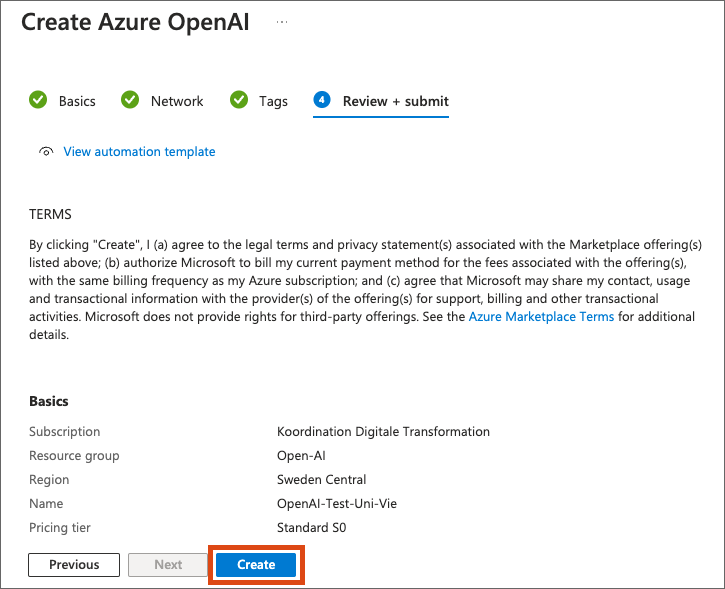
You can skip the Tags section in the configuration.
You will then receive a summary of the selected configuration. Click on Create to finalise the creation of the resource.
After a few seconds, a notification appears that the resource has been created correctly.
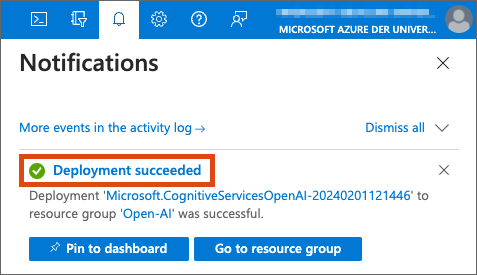
As a next step you can:
- restrict access to the OpenAI resource to the data network of the University of Vienna (recommended), see the following section
- deploy the desired OpenAI model in the resource
Restricting access
You can restrict access to your OpenAI resource to the IP address ranges of the University of Vienna’s data network. You then have to be connected via
- cable,
- eduroam Wi-Fi (only at the locations of the University of Vienna) or
- VPN (only in full-tunnel mode)
to the data network in order to access OpenAI in Azure.
The ZID recommends setting this up to protect your resource from unauthorised access.
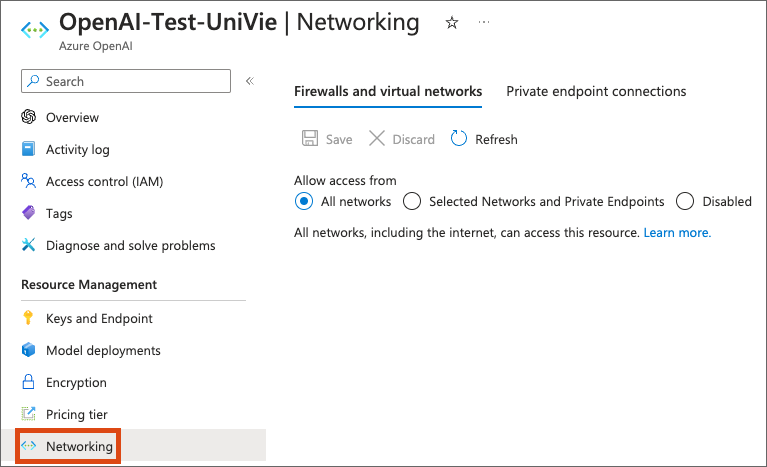
- Open the Azure portal and select your OpenAI resource under Resources.
- Click on Networking in the menu on the left.
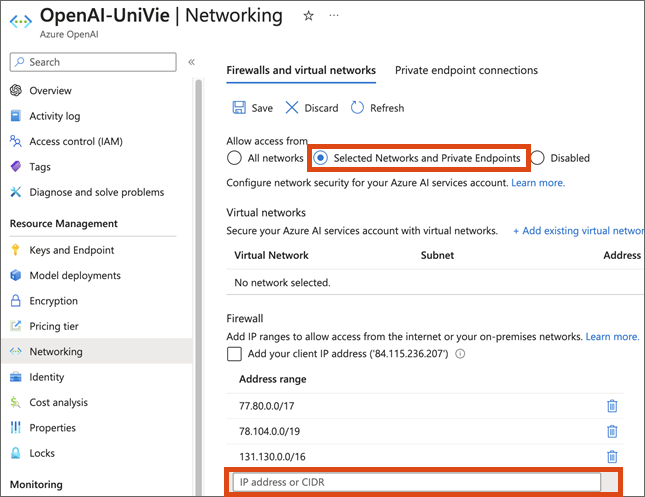
- Under Allow access from, select the option Selected Networks and Private Endpoints.
- You can now add the IP address ranges of the University of Vienna’s data network in the Firewall section. These are as follows:
77.80.0.0/17
78.104.0.0/19
131.130.0.0/16 - Click Save when you have added all ranges.
You can now only access the OpenAI resource via the selected IP address ranges.
Note
For VPN users: To ensure smooth access, use the VPN of the University of Vienna in full tunnel mode. To do this, select the option vpn.univie.ac.at (Full tunnel) under Change server in the VPN software.
The next step is to deploy the desired OpenAI model in the resource.