Creating internal area
This user guide will help you to set up an internal area that is only accessible to employees of a single organisational unit.
Note
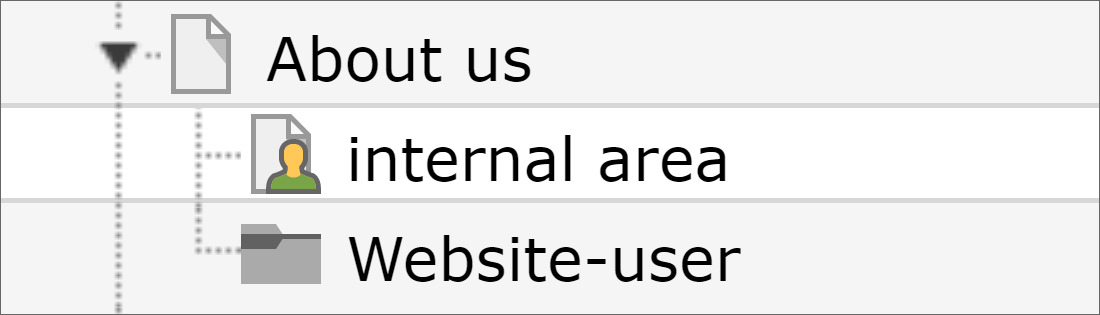
You can recognize protected pages in the page tree by the symbol with the green person:
Creating a page structure
For the internal area you need:
- a start page with the name internal area
- the protected subpages with the contents
- a page hidden in the menu with the login
Your page tree should look something like this:
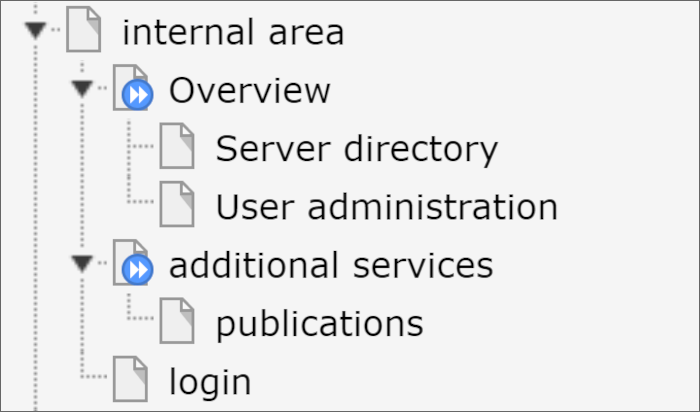
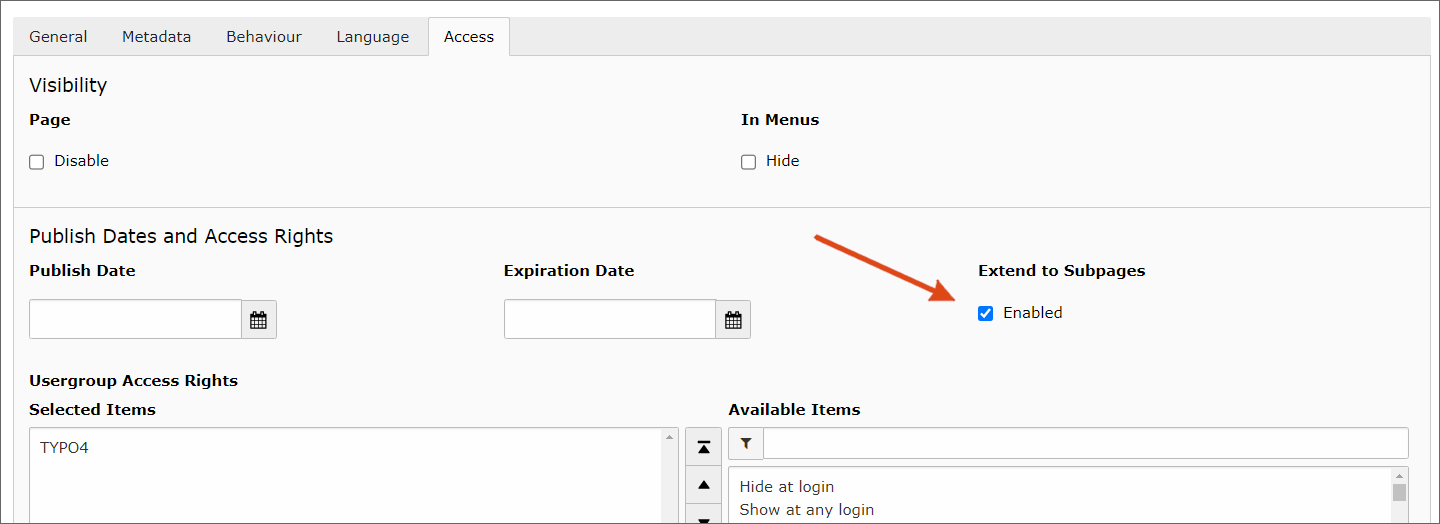
If you want to protect an extensive page tree, you do not need to protect each page individually. It is enough to restrict the topmost page and check the Extend to Subpages checkbox. The icon with the blue circle and the white arrows indicates that the access protection is extended to the subpages.
Note
Access protection does not inherit automatically. Subpages of protected pages can still be linked and accessed without login. To be on the safe side, you should always select the Extend to Subpages checkbox for protected pages.
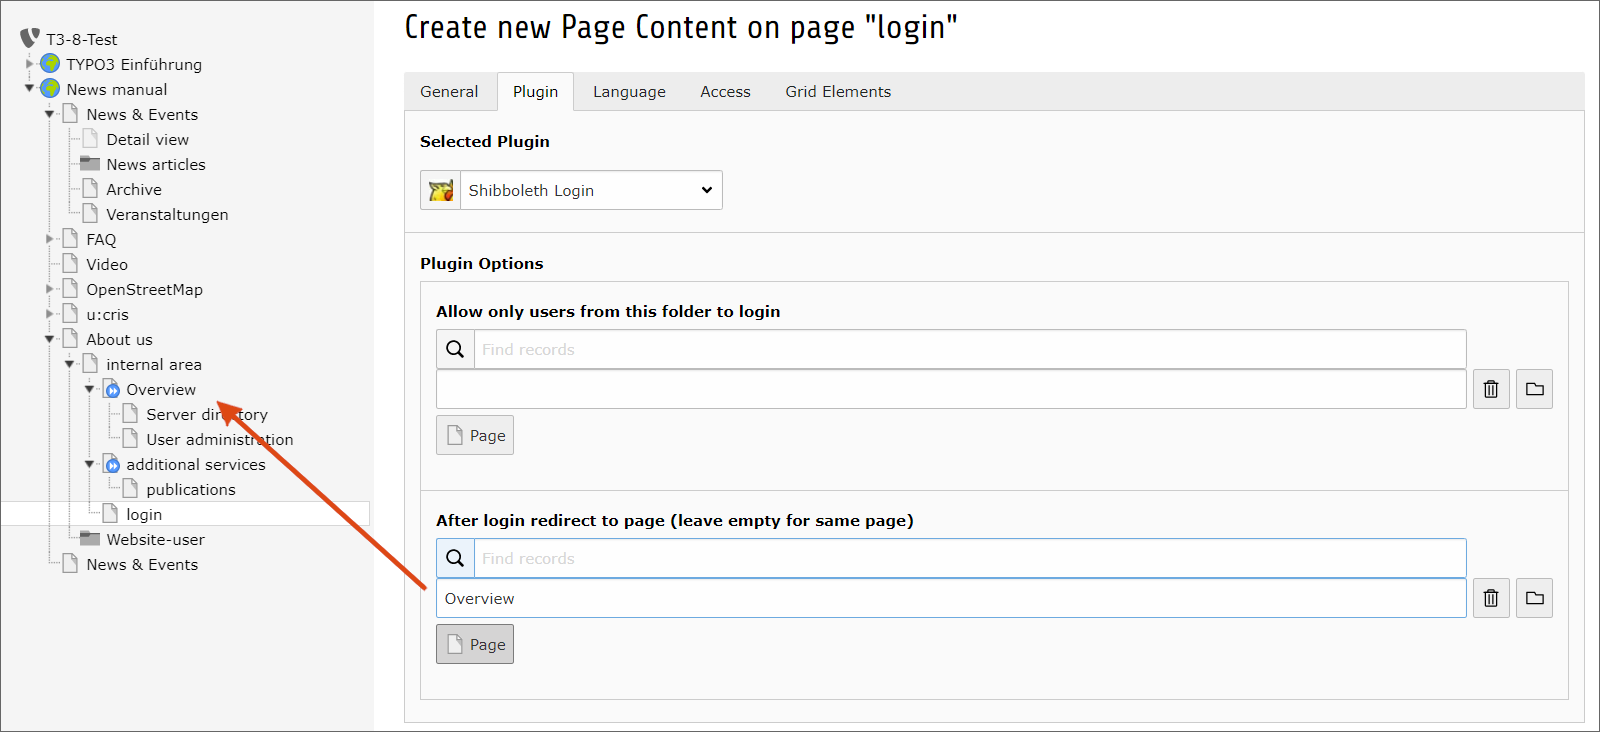
Setting up login page
On the login page, you need only one content element with the weblogin plug-in. As the destination for redirection after login, select the top protected page of your internal area.
The login page itself is hidden in the menu, but otherwise has no access restrictions.
Note
The login page must always be freely accessible. You can unlock a door only if you have access to the lock. You should also avoid the Hide at login setting, otherwise the redirection will not work and there will be no logout option.
Setting up start page
On the start page of the internal area, create content elements that are shown before one is logged in and those that are seen only after login. To do this, use the Hide at login and Show at any login options in the Access tab.
Do not select your organisational unit, as this content will also be directed to other users who log in to your site.
Note
The login is always done via the Weblogin of the University of Vienna. Therefore, you cannot prevent students or employees of other organisational units from logging in this way. You can only prevent them from seeing the protected content.
- Create a content element of the type Text and Images.
- For example, the text could read: This area is only available to employees of our institute. Click on the following link to log in via the Weblogin of the University of Vienna: To Weblogin.
- Link the text To Weblogin to the login page you have already created.
- Under Access for this content item, select Hide at login.
Before the login, the page should look something like this:

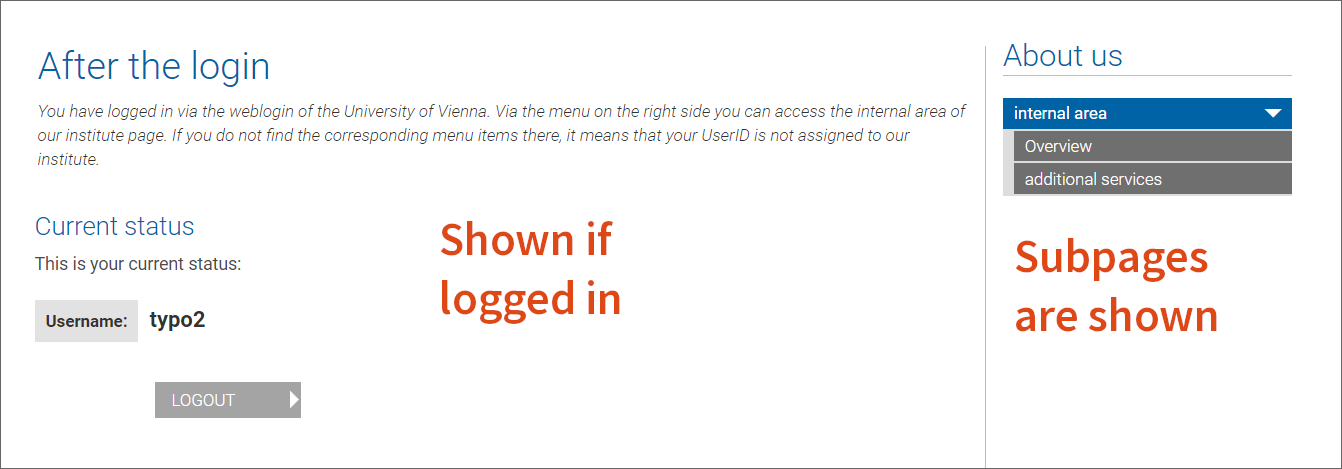
- Create another text with for example the following content: You have logged in via the Weblogin of the University of Vienna. Via the menu on the right side you can access the internal area of our institute page. If you do not find the corresponding menu items there, it means that your UserID is not assigned to our institute.
- Set this text to Show at any login.
- Create another weblogin on the start page, also set it to Show at any login. It will show the connection status and provide a logout option.
After login the page would look like this:
Your internal area now works as follows:
- The user is not yet logged in. After clicking on internal area in the menu, the text with the link to the Weblogin is displayed.
- If you click on this, the login page is opened. Since the user is not yet logged in, they will be redirected to the Weblogin of the University of Vienna.
- After logging in, the first protected subpage opens. The start page itself displays information for people from other organisational units and a logout option.
You can vary this scheme and, for example, leave the login page in the menu and rename it Login/Logout. This way you only need one content element of the Shibboleth Login type. You can also place this login/logout function on the start page itself, in which case clicking on the internal area in the menu will immediately redirect you to the weblogin.
Protecting files
Files that you link on your protected pages do not automatically take over the access protection of the page. You must place the files of your internal area in a separate folder, which you also share only with your group(s):
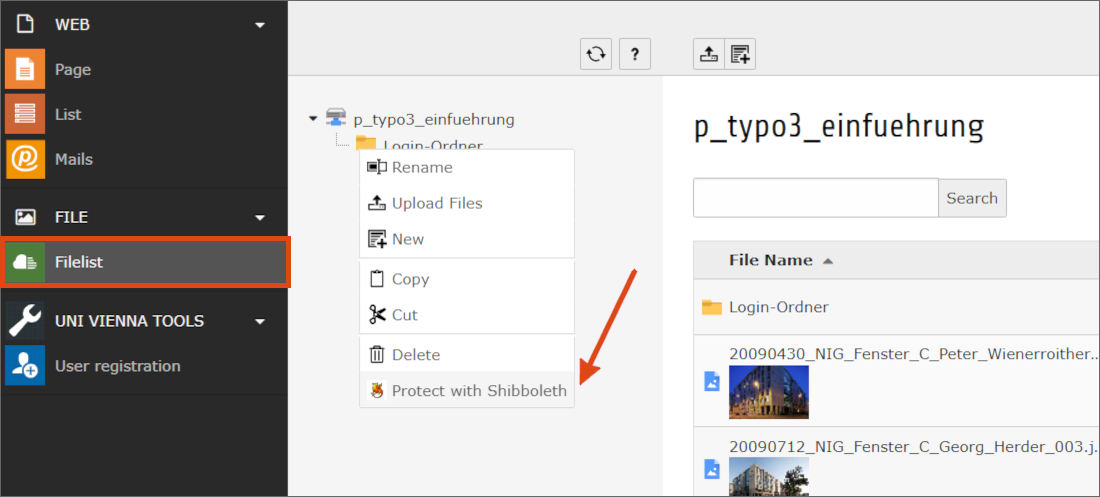
- Switch to the module Filelist.
- Click on the icon in front of the folder.
- A context menu opens. Select the Protect with Shibboleth entry.
- You will get to the familiar group selection where you can choose your organisational unit.
- After that, all files contained in the folder are only available after login, even if someone knows the direct link to a file.