Continuing to use video stored on the u:stream server
This user guide will help you to download a video stored on the u:stream server, upload it to u:stream and republish it. This is necessary because the u:stream server is decommissioned on 1 July 2024.
Prerequisite: Your device is connected to the data network via cable, eduroam WLAN (only at University of Vienna locations) or VPN.
Connecting to the u:stream server
To access the u:stream server, you must connect a share called Streamin as a network drive.
The following quick user guide applies to Windows 10. A detailed version and user guides for other operating systems can be found here.
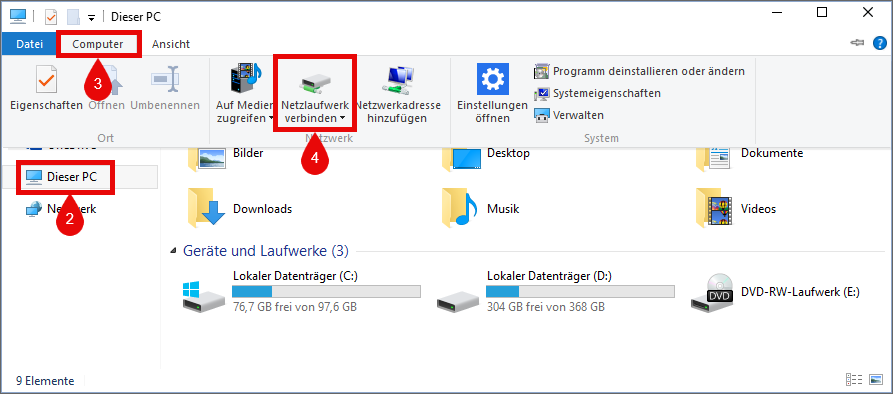
- Open Windows Explorer (Win+E)
- Left column: This PC
- Computer tab
- Connect network drive option.
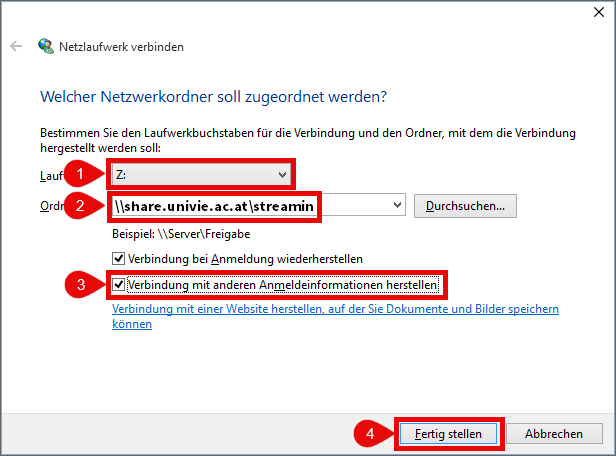
Selecting network folder:
- Leave or change the suggested letter for the drive.
- Enter in the Folder field: \\share.univie.ac.at\streamin
- Activate Establish connection with other credentials.
- Finish the process.
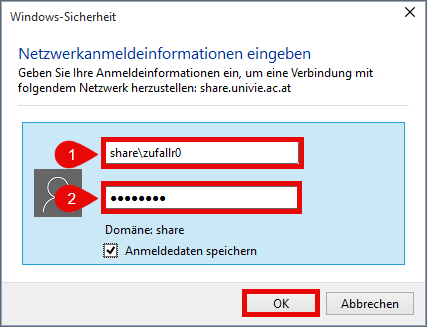
Entering login information:
- share\u:account UserID (example: share\zufallr0)
- u:account password
You will now be connected to the u:stream server.
Note
If Windows already suggests a UserID, first click on More options and then on Use another account.
Downloading video
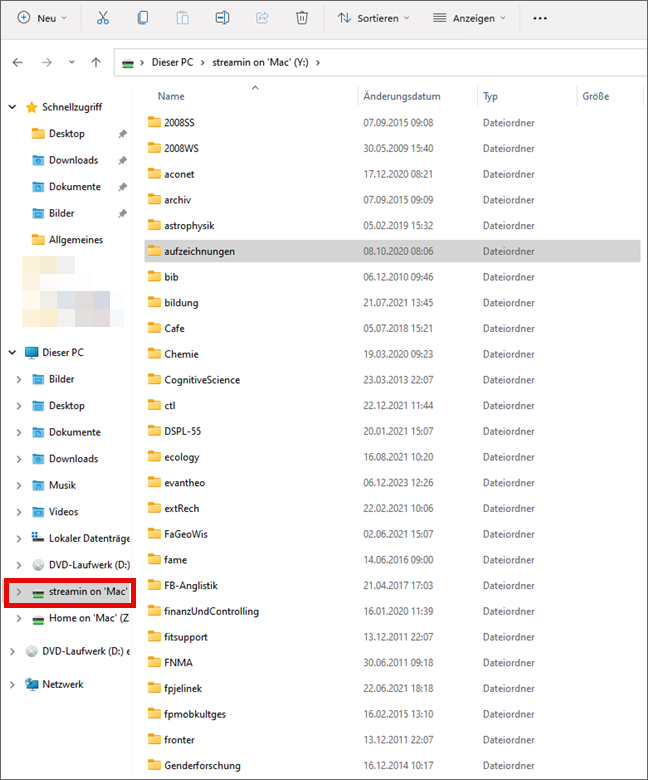
The Streamin network drive now appears under This PC. Open the network drive by double-clicking on it. You will see all the folders in Streamin, but you can only open folders for which you have authorisation.
- Open a folder that is available for you.
- Check which videos you still need and save them locally on your device.
- If you only want to save a backup copy, you are now finished. If you want to continue publishing the downloaded files, you must upload them to u:stream in the next step.
Uploading video to u:stream
Note
Each u:stream video must be assigned to a series. If the videos downloaded from the u:stream server do not fit into your existing series or you do not yet have a u:stream series, you can set up a new custom series before uploading.
You can find a detailed user guide for uploading videos to u:stream here.
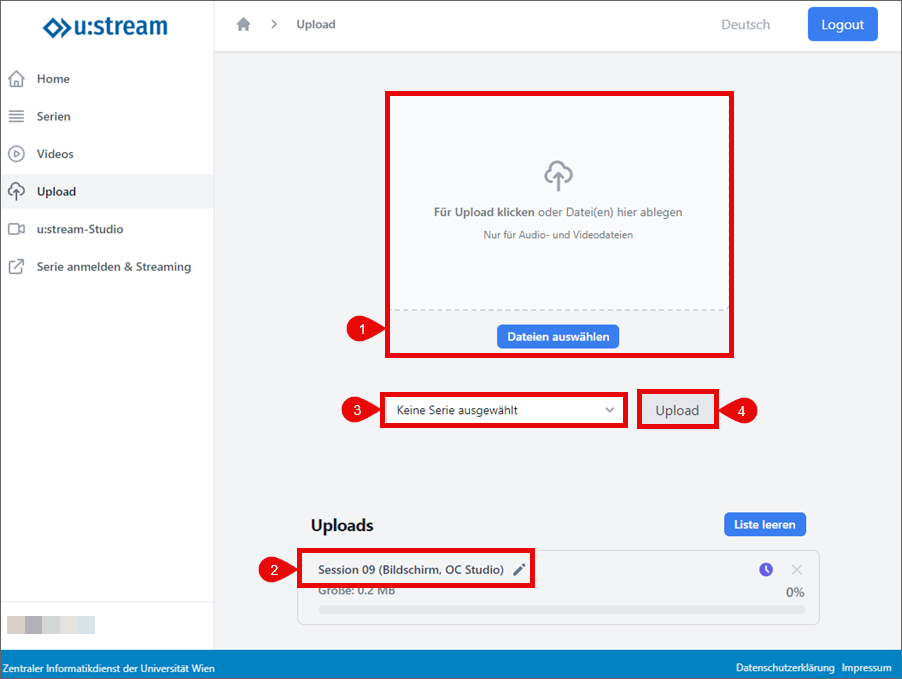
Open u:stream administration, log in with your u:account UserID and password and click on Upload in the left-hand column.
- Click on Select files in the central upload area or drag and drop them.
- Selected files are displayed under Uploads. If necessary, click on the pencil icon to change the file name.
- Select the series to which all files displayed under Uploads are to be assigned.
- Click Upload.
As soon as the files have been processed, you will receive a notification to your e-mail address at the University of Vienna. With the information contained there, you can publish the uploaded videos as on-demand streams.
Publishing video
You can find a detailed user guide to publishing u:stream videos here.
Publishing series in Moodle
Open the Moodle course and switch on Edit mode.
Add an activity or resource in the desired topic block.
Click on the activity u:stream.
In the next window:
- Enter the title and, if required, a description of the series
- Streaming Mode: u:stream-Serie (series)
- ID: enter the series-ID (series= ...) from the e-mail notification including series=
- Display: Default
Click to save.
Publishing single video in Moodle
Open the Moodle course and switch on Edit mode.
Add an activity or resource in the desired topic block.
Click on the activity u:stream.
In the next window:
- Enter the title and, if required, a description of the series
- Streaming Mode: u:stream-Einzelvideo (single video)
- ID: enter the video-ID (id= ...) from the e-mail notification including id=
- Display: Default
Click to save.
Publishing video on websites
- Link: In the e-mail notification you will find a link under Player that you can insert into your website.
- Embed Code: In the e-mail notification you will find an HTML code for embedding a player with the recording. If necessary, adjust the width and height of the player (retain aspect ratio).
- TYPO3 plug-in: This plug-in embeds a player with the recording in your TYPO3 page of the University of Vienna. Information on this can be found on the TYPO3 Support pages.
