Using u:stream studio
With u:stream studio, users can create videos on their end device via browser. Possible sources are:
screen, camera, microphone of the device
connected hardware, e.g. external webcam
All users can download the videos and save them on their own device.
Employees can also upload the videos to u:stream and assign them to a u:stream series. Prerequisite: the u:stream series has already been set up before the recording begins, see user guide Registration and administration.
Opening u:stream studio
u:stream studio can be accessed in 3 different ways. Depending on the variant selected and the user group, the options for creating, saving and uploading videos differ:
| Access via | Creating, editing, saving video | Uploading to u:stream, assigning to existing u:stream series |
|---|---|---|
| Independent service studio.ustream.univie.ac.at | yes | employees only |
| u:stream administration ustream.univie.ac.at | employees only | employees only |
| Moodle moodle.univie.ac.at | employees only | employees only |
Independent service (all users)
- Open u:stream studio via studio.ustream.univie.ac.at.
- You will be automatically redirected to the Weblogin of the University of Vienna. Log in with the UserID of your u:account (example: doejamie99) and the corresponding password.
u:stream administration (employees only)
- Access the u:stream administration via ustream.univie.ac.at.
- Click Login.
- You will be automatically redirected to the Weblogin of the University of Vienna. Log in with the UserID of your u:account (example: doejamie99) and the corresponding password.
- In the menu on the left choose Studio.
Note
A video created in this way is automatically assigned to the u:stream series that is linked to the Moodle course and selected for u:stream studio.
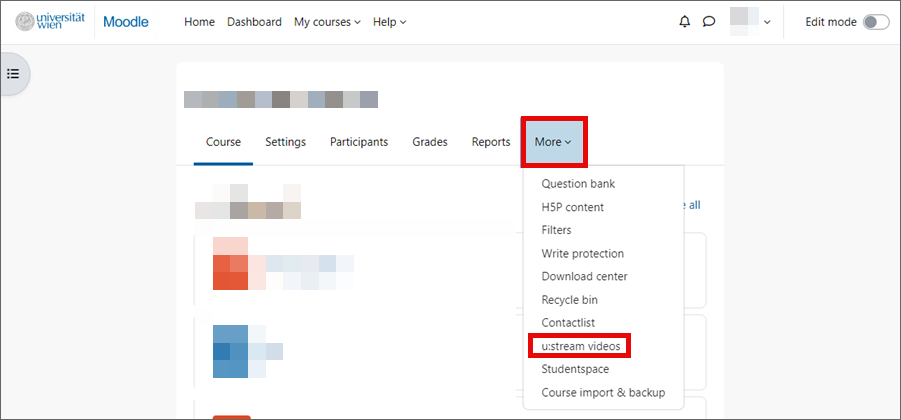
- Open Moodle and then the desired Moodle course.
- On the More tab, click the menu item u:stream videos.
2. Allowing access
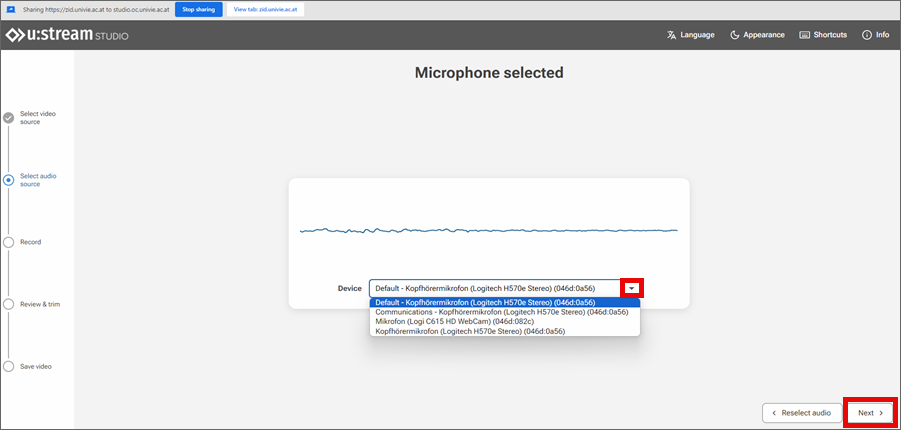
You must assign the necessary permissions to your browser or allow access. Depending on the source, this may involve sharing your camera, screen and/or microphone.
Depending on your system and browser, either a pop-up will open or you will need to grant the permissions directly in the system settings.
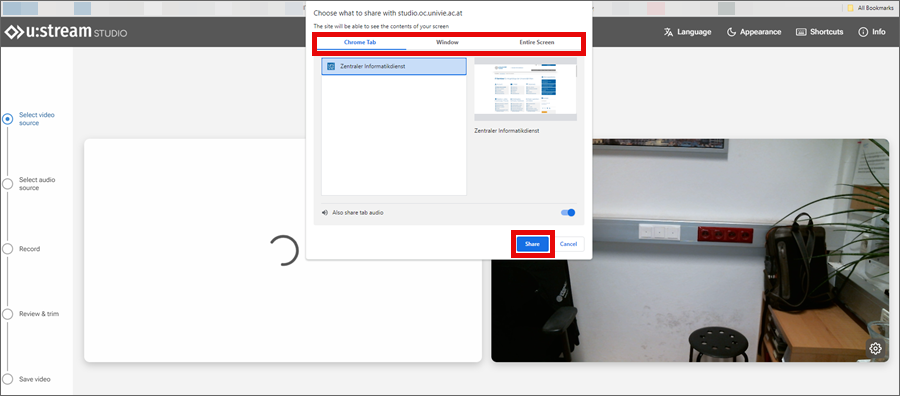
For screen recordings, you can decide which screen window should be shared.
3. Configuring settings
- You will see a preview with the screen and/or camera image. In the example shown here, Display & camera was selected and a browser tab was shared as the screen window.
- By clicking the gear icons ⚙, you can change the resolution and, for the camera, the aspect ratio. The ZID recommends using the auto setting.
- Click Next.

Checking and shortening video
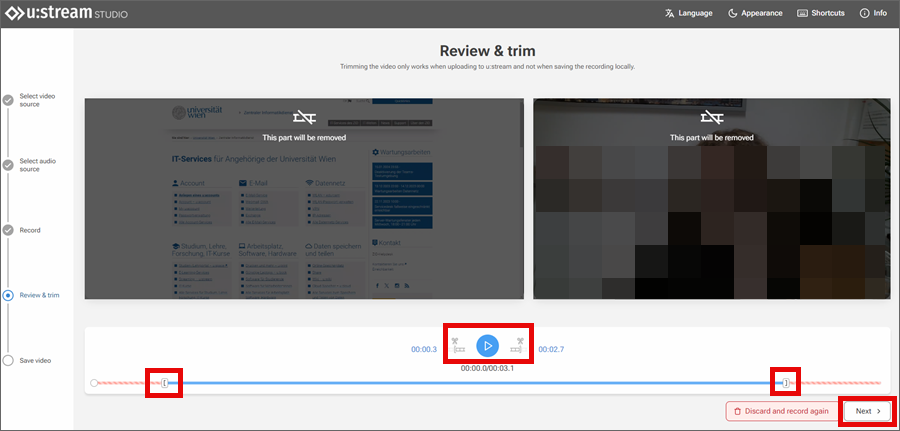
Check the video by clicking on the play button. If you are not satisfied with the recording, you can delete it by clicking Discard and record again and start a new recording.
If necessary, you can also shorten the recording, i.e. reset the start and/or end points:
- Click the desired time in the timeline or pause the playback of the video at the point where you want to shorten the recording.
- If the selected point in time is to be the new start of the recording, select the scissors icon to the left of the play button.
- For a new end point, select the scissors icon to the right of the play button.
- You can correct the cut points as often as you like or remove them completely using the recycle bin icon. Cuts in the course of the video are not possible.
- When you are satisfied with the video, click Next.
Saving and uploading video
Once the recording is complete, you have different options for continuing to use the video – depending on how you started u:stream.
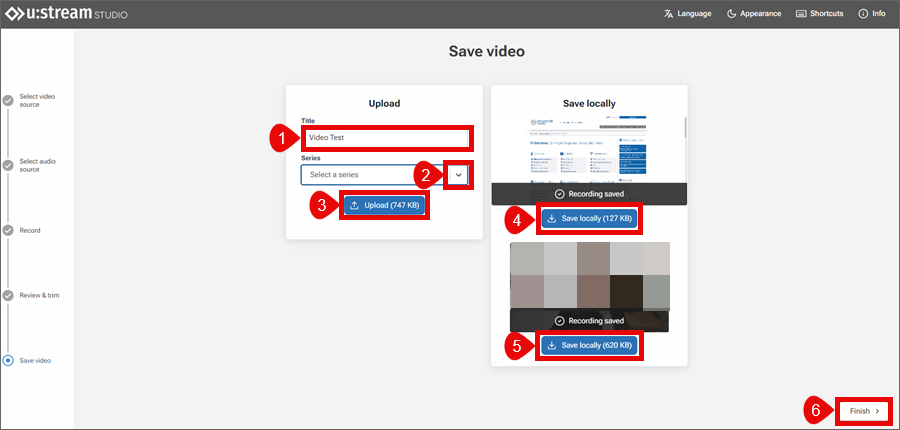
All users can download a video created with u:stream studio and save it locally. Display recording (4) and camera recording (5) are made available separately.
Employees can also upload the recording to u:stream or Moodle:
- Give the recording a title.
- Select the u:stream series to which the video should be assigned. All u:stream series for which you have editing rights are available. If you have accessed u:stream studio via Moodle, you can only upload the recording to the u:stream series that is set in Moodle for uploading to u:stream studio.
- Click Upload.

